There are several kinds of software photographers can use to post-process their photos. For the past several weeks, I’ve been exploring the latest photography post-processing software from Skylum Software, Luminar 4, to see if it can handle everything an outdoor photographer needs.
Organization is Key
When I get back from a photography trip, I’m always shocked at how many photos I actually took. If you’re anything like me, you grow tired of scrolling through countless images wondering how you will remember to come back to the best shot to edit it. One of the features in Luminar 4 that I really enjoyed was how simple it was for me to organize my photographs.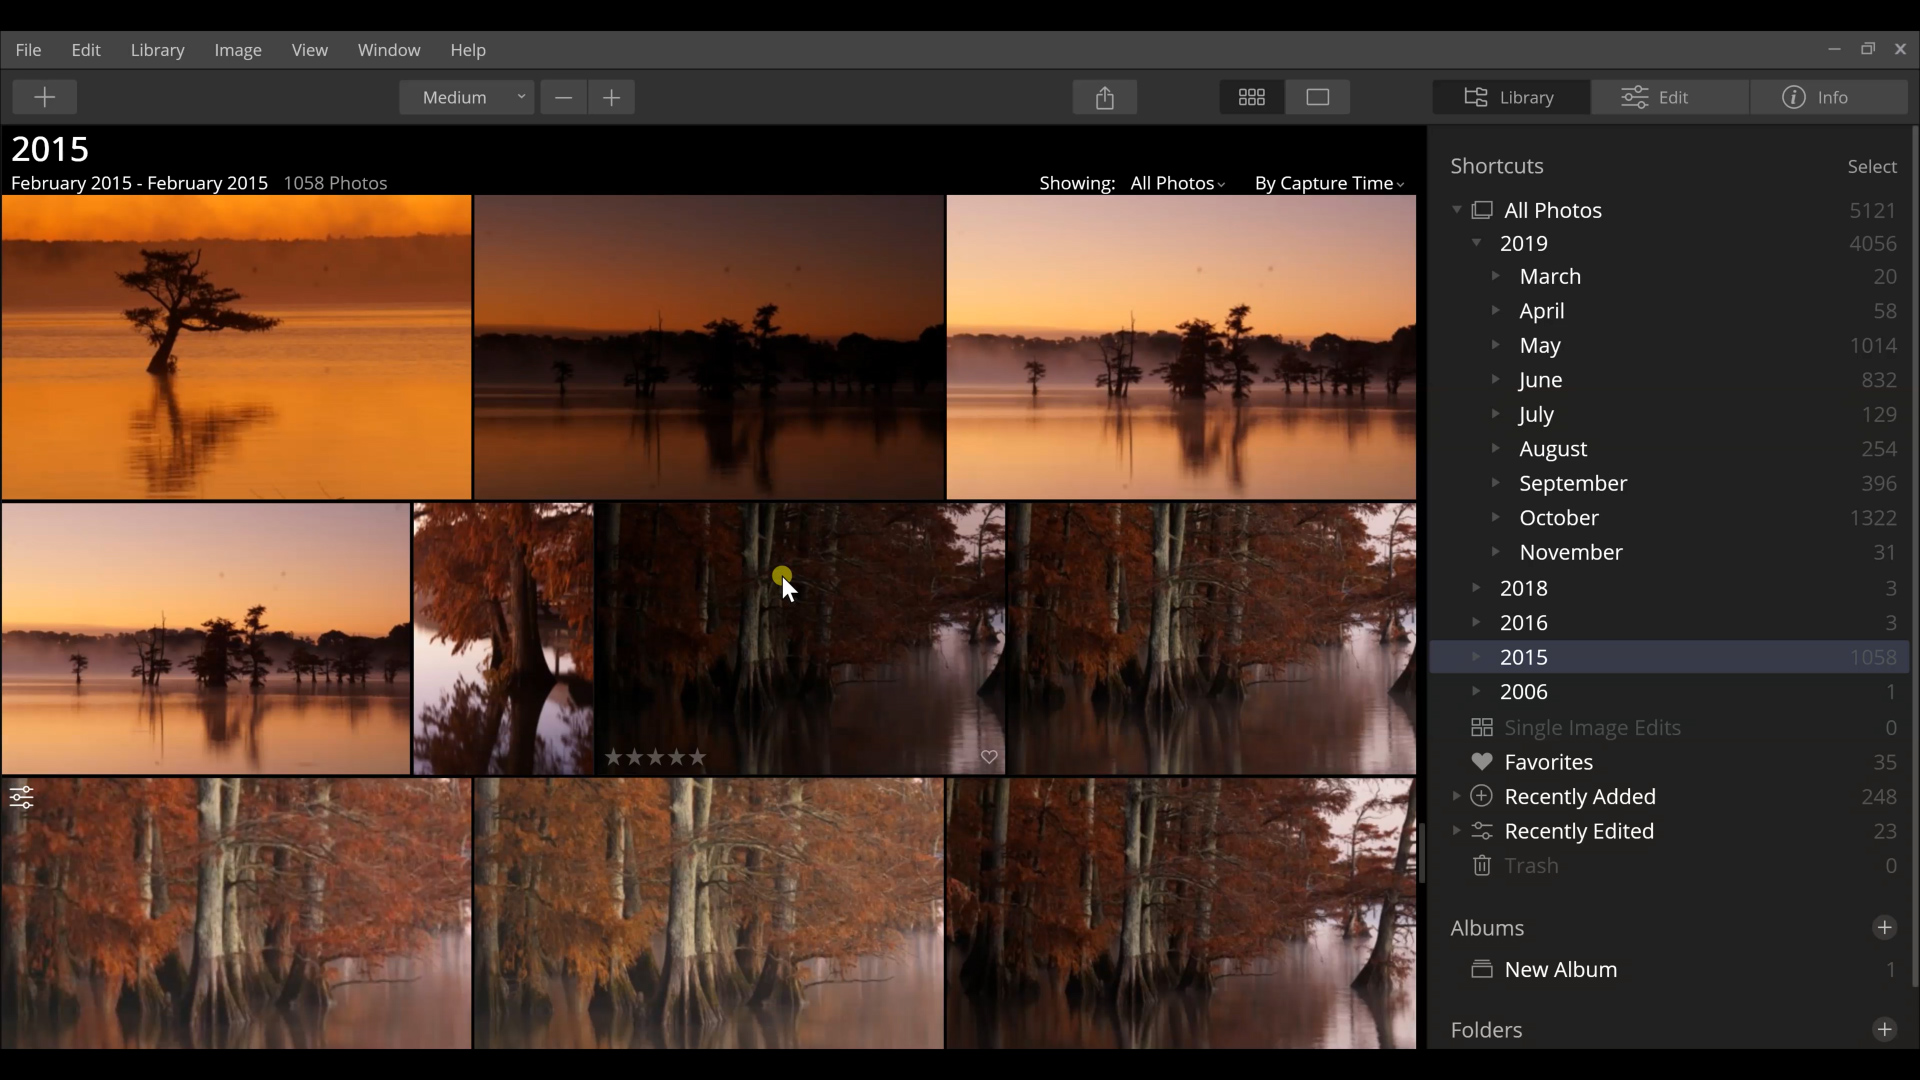 When I started using Luminar 4 and navigated to my photos folder, I was faced with organizing nearly 6,000 images. That may seem traumatic, but the organizational features in Luminar 4 let me easily see all of my photos based on the year and month they were shot. Not only that, but I was also able to subdivide my favorite images into a rating system and favorites. I discovered the best way to know which images I liked most was to give the interesting photos star ratings and then favorite the best out of that selection. This made it easy for me to quickly know which images I thought were worthy of going through the editing process.
Artificial Intelligence is Here
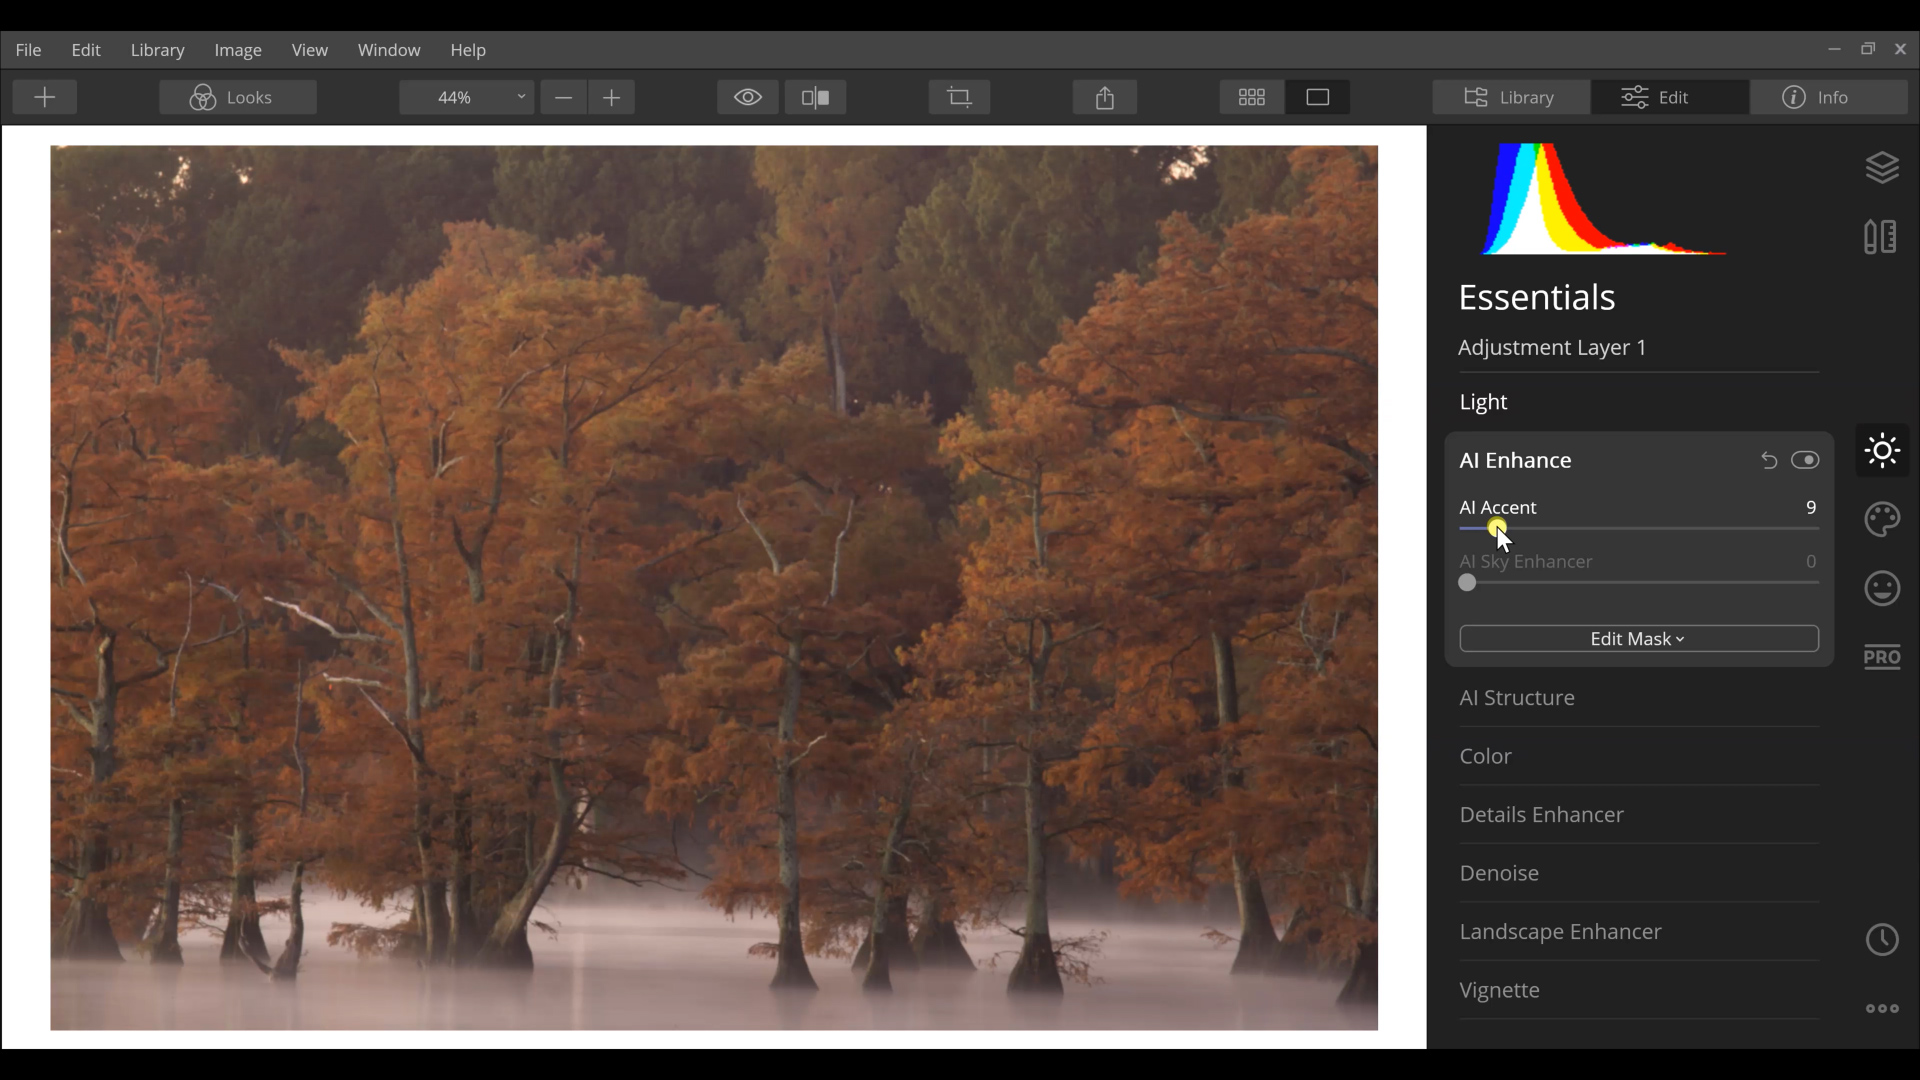
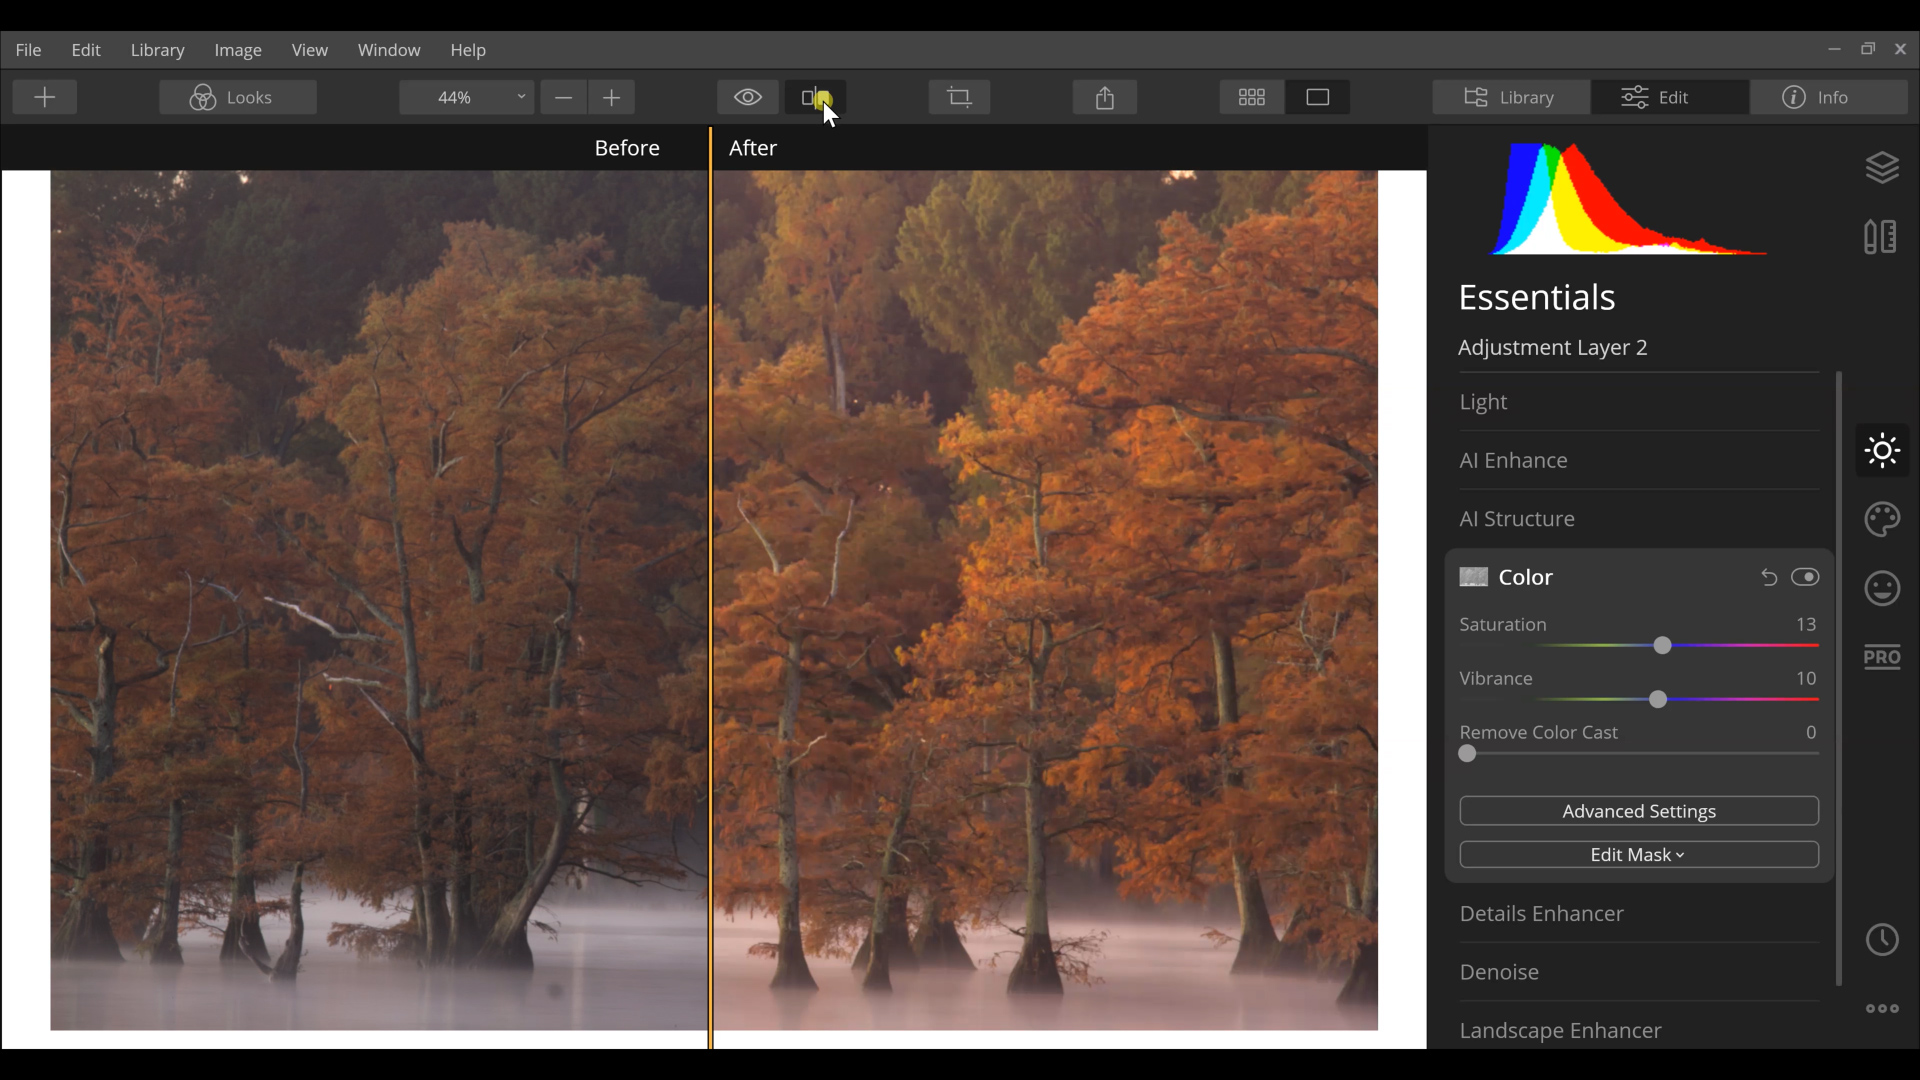
I will admit that I’m skeptical about new tools in outdoor photography post-processing. It seems like a new feature will emerge, people will use it way too much, and then it will disappear forever. Take, for example, the over-processed HDR fad of years past. When I first heard of Luminar 4’s Artificial Intelligence (AI) features, I thought they would be the same old story. That is, until I actually started playing with them in my post-processing workflow.The AI editing tools in Luminar 4 are now my favorite tools to use. Using the AI Accent tool, AI Structure, and the Landscape Enhancer tool allows you to quickly adjust your photos with multiple edits at once. For example, the AI Accent tool may seem like a basic slider, however, when you actually apply it to your photo, you’ll see that it improves light, color, contrast, and clarity at the same time. The best part is that the results are realistic, not over-processed.
 One tool that is being released with Luminar 4 is their AI Sky Replacement tool. This allows photographers to replace skies in their images seamlessly. This can be a big help for those situations when you are shooting multiple exposures for a sky and foreground. What used to take several hours of blending and masking can now quickly be done with one tool. Technology is truly something to behold.
Basic to Advanced Edits
It doesn’t matter what skill level you are at with post-processing. Luminar 4 is a fit for everyone. There are editing tools for the most basic adjustments like exposure, shadows, highlights, and saturations. This will make the learning curve much easier for new users and first-time editors alike.The basic tools shouldn’t deter advanced editors, either. Luminar 4 has advanced editing tools as well. More advanced photographers can stack multiple layers in Luminar 4 to create majestic landscapes, crisp wildlife photos, and amazing travel images.
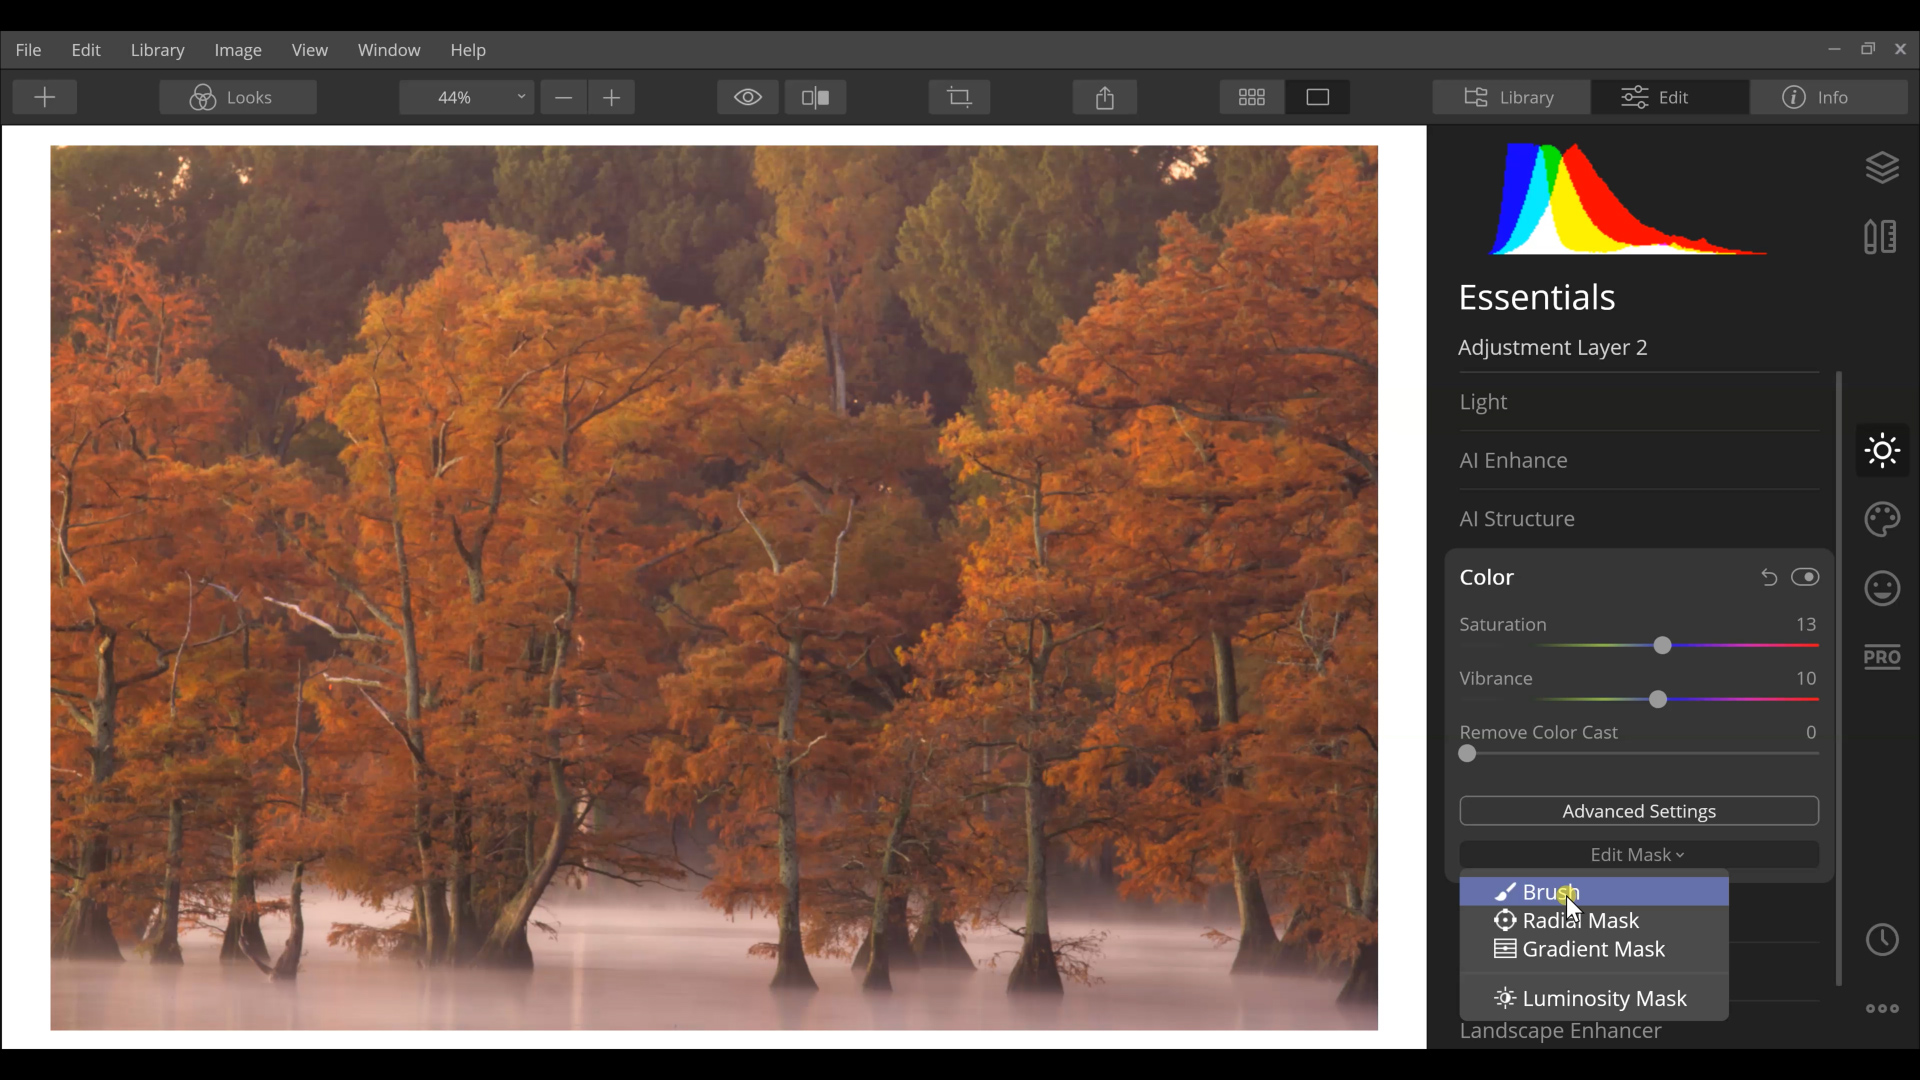
 The most shocking tool that I found in Luminar 4 was the ability to use masks with each effect. Masking can be an extremely complex and tedious task in other software. However, it’s literally one click of the button with Luminar 4 and you have control over that mask. The available masking effects can be done with a brush, gradient, radial filter, and even luminosity masks.
 When I think about using a post-processing software for my outdoor photography, I know I want something that is going to make editing easier, smarter, more organized, and faster. With all of the tools that are packed into Luminar 4 from Skylum Software, I am confident that I can create amazing outdoor photographs. Luminar 4 helps me create professional results in a shorter amount of time, which helps me get back out into the field to shoot more photos.

You've covered it all David. Having started my DSLR and now mirrorless camera journey late in life, I needed an editing program that was easy to learn, Luminar Neo fit that bill perfectly for me. Not paying a hefty annual fee for an editing programme was also a big incentive. I would highly recommend Luminar Neo. I do get annoyed that most if not all editing tutorials on OPG, are for Photoshop or Lightroom users.