I’ve been in quite the quandary the past few months because I fear there is a division among some people who consider themselves to be outdoor photographers. On one side there is the old guard of outdoor photographers who desire to keep the shooting pure. It’s not outdoor photography unless it’s a photograph of only nature.
Sure, I can be on board with that!
However, you also have the young guns coming up and changing the meaning of “outdoor photography” to include “adventure photography” as well, meaning there is some sort of adventure going on in the composition that may include people, sports, or gear. The rise of social media has given adventure photography a huge platform to flourish because it easily connects these adventure shooters with a large audience instantly. The photographs often inspire as well as make people jealous they aren’t living your life however lavish it may be.
I can be on board with that too!
So, why is there a divide? To get down to what I truly believe about the argument, I looked up the definition of outdoor photography and this is what it read:
“Outdoor photography is simply defined as photography that is performed outside. To take great outdoor photographs, a photographer must have: Mental fitness. Good physical condition. Good logistics.”
After reading that definition, I continue to stand in the middle and accept all outdoor shooters no matter what you enjoy framing. And with that spirit in mind, I wanted to give you five ways you can immediately improve your adventure photography.
Related eBook: The Art of Adventure
1. Keep Your Camera On… All the Time
One day while I was minding my own business, I received an email from someone who follows me. He wanted some feedback on photos he shot while adventuring in another country. I was humbled and happy to oblige him. I gave him a few pointers when suddenly one photo of a ram’s rear end caught my eye. I gave him the tip to try to avoid the butt shot when shooting wildlife. His response changed the way I saw adventure photography.
“I definitely agree to avoid those shots,” he said. “But, I have found that the difference between landscape, wildlife, and adventure photography is that you wait on conditions in landscape and wildlife shooting, whereas you shoot what’s available in adventure and do your best with it.”
I was blown away because he was right. That’s why I want to drive home the idea that you should always have your camera out and ready when you’re on an adventure. If you’re constantly on the move, there is no time to wait on that stellar sunset. You also don’t want to miss the best shot by not having your camera out!
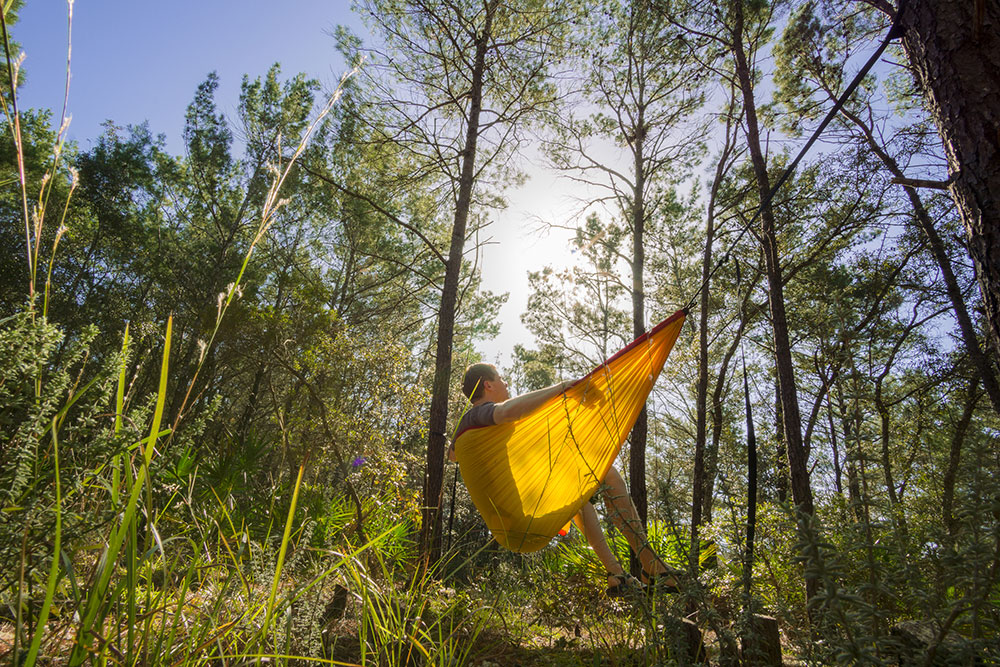
2. Put Yourself in the Frame
Listen, no one wants to get up at 4:30am to hike to the peak of a mountain to shoot the sunrise. Well, except photographers of course. So, don’t be surprised if you often find people turning down the opportunity to lose sleep to go shoot with you.
With that in mind you’re going to find yourself alone many times when a great adventure photograph could be shot. In that case don’t be afraid to put yourself in the frame. It can be a little awkward at first and it may take some trial and error, but I’ve found it to be a fun and different exercise.
It’s pretty simple if you just use your camera’s timer, have a wireless remote shutter with a long reach, or if you have the wifi capabilities to connect your camera with your phone like many mirrorless options have.
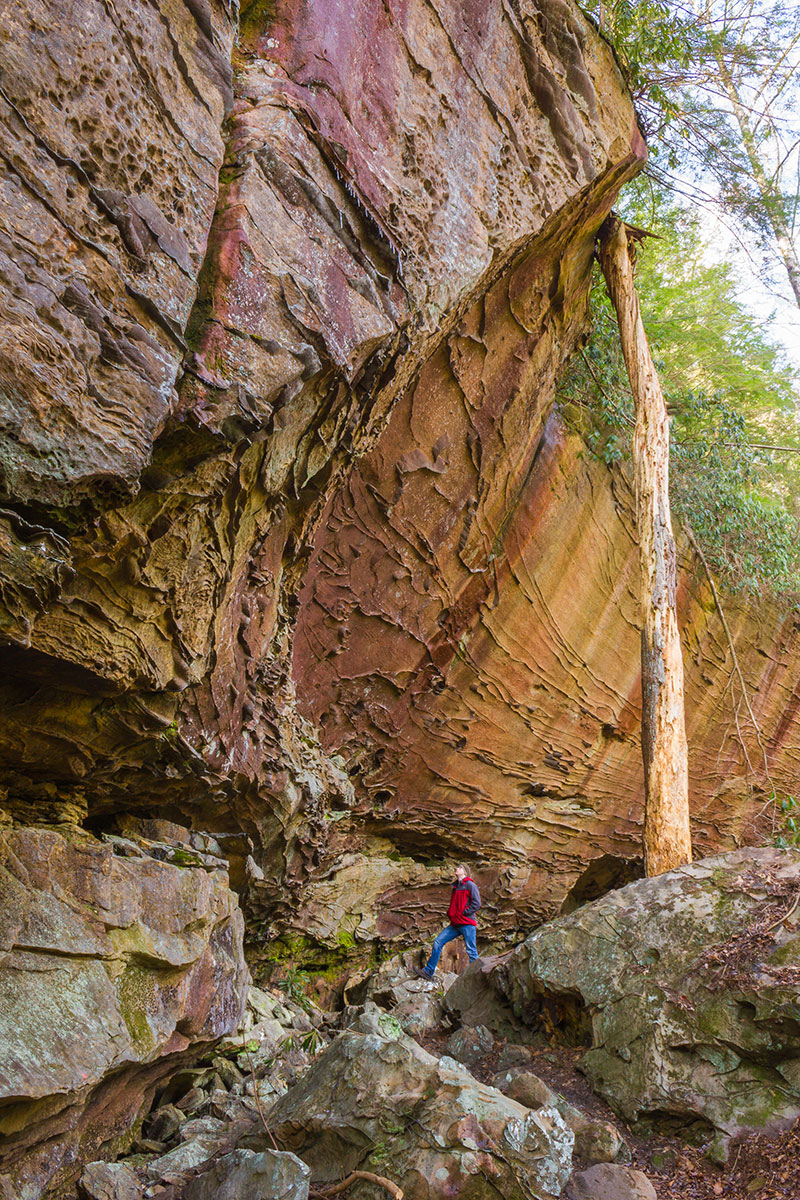
3. Maximize Your Use of Scale
I love to use scale in adventure photography because it gives people an idea of the conditions you were surrounded by.
Think about it this way: if you snap a photo of a cliff face with a tree next to it, it’s going to be difficult to determine how large the cliff actually is. You can try to use the tree for scale, but that all depends on the type of tree, the age of the tree, the area you’re in, and the conditions the tree has grown in. With all of that dependent information it would be nearly impossible to tell the approximate size of the tree or the cliff.
However, if the known average height of a human male is 5 feet 6 inches, it’s much easier to determine the actual size of the objects around that person. You know average heights of people. I mean, we are constantly surrounded by them! So why not put them into the scene?
4. Create Wild Perspectives
Perspectives are important in all genres of photography, but we can find it easy to be stuck in a creative rut when we are framing an outdoor scene. What are the three you typically go to? I’d be willing to guess they are eye level, high, and low.
While I have no issue with any of the three options, to create incredible shots, you need to think about pairing your perspectives with objects in the surrounding landscape.
So, if you’re shooting a high perspective, maybe you should climb a tree and shoot your subject through a natural window of leaves.
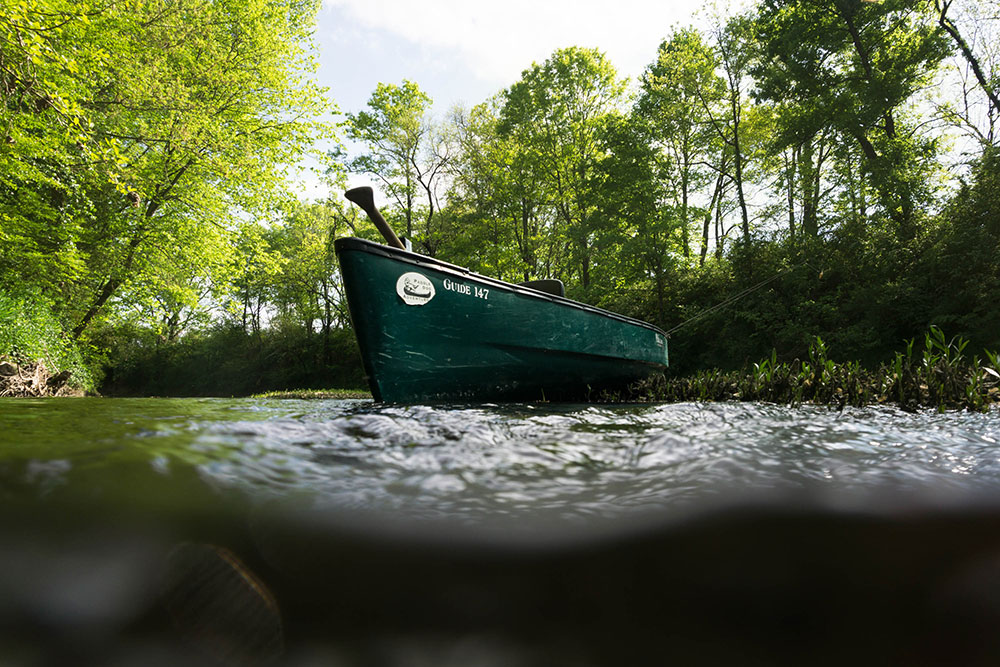
If you’re shooting a low perspective near a body of water, maybe you should submerge the perspective to get a little bit of the underwater world into your frame. Next time you use perspectives in nature, think about what could make them even better!
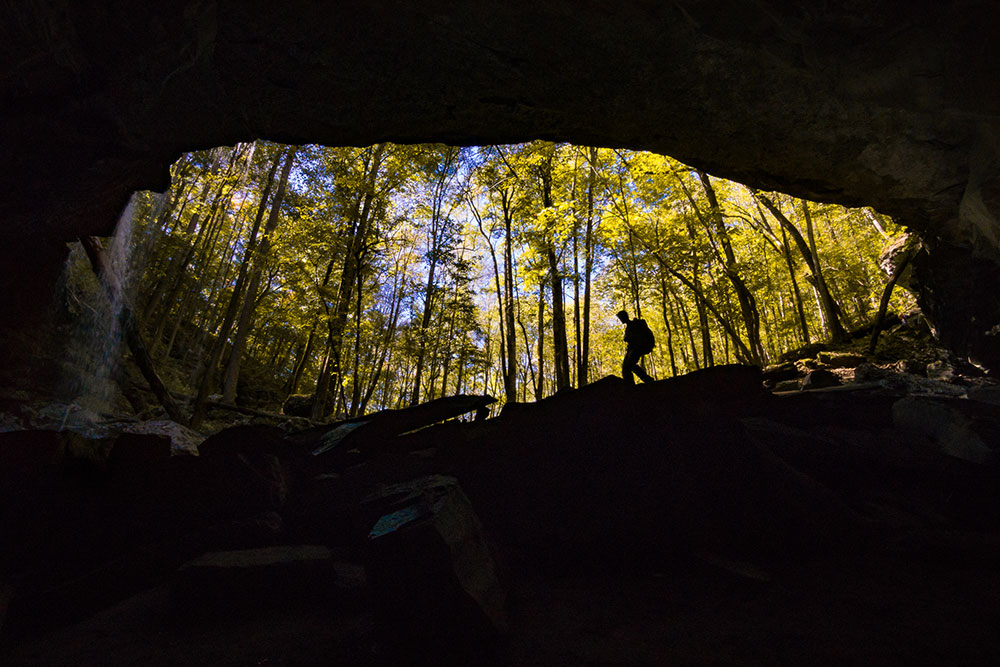
5. It’s All About the Placement
I’ve saved my best tip for last, so those of you who read the entire article will be rewarded with this one. This is the one thing that will take your adventure photography to the next level.
When I was starting to figure out the adventure scene, I would frequently look at my images and be disappointed with them. Now, I’m a big fan of Chris Burkard’s work and I went through his portfolio to try to figure out what was separating his work from mine. Then I found a constant in his photographs.
When he was framing his subject in the scene, whether that was a person or gear, he always had them placed completely in negative spaces of tones or colors.
That one placement trick made me realize that to enhance the subject the best, I had to show them the best. If there were in a distracting area with a lot of textures or horizon lines, they are harder to notice. Once I started working harder to place my subjects correctly, my adventure photography improved.
Look, I know it’s a bold statement to claim that your photographs will instantly improve if you do these five things, but I’ve studied and tested these composition techniques in adventure photography.
They work.
If you truly want to improve your adventure shooting, put these into practice.
About the author:When David Johnston isn’t leading photography workshops and tutorials or hosting his popular photography podcast, Photography Roundtable, he can be found traveling the world taking photos to awe and inspire his viewers. David has a passion for sharing his knowledge of photography and has many educational offerings designed to help photographers improve their work. Visit his website at www.photographyroundtable.com.

Always appreciate your insights & the way you make suggestions really straight forward. Gonna try & work on the suggestions of perspective & placement but I'm too old to think about climbing too many trees.
great article. My fav is he last tip, subject above the negative space. Heading out next week!
Help me understand the concept of negative space. The image you show associated with negative space depicts a hiker against a background of trees. Nice shot and i love the framing but don't understand how the hiker is in negative space.
after battling MS for years I now will dust off my cameras, These 5 tips have awaken me to the building blocks of a good photo Thank You.
I thought of another situation to have a camera ready. While traveling in southern Utah with my son I was photographing landscapes and barns out the window and through the window at a fast shutter speed. I got a beautiful shot of a barn in a field but it had some giant sprinkler in the foreground. I was able to crop it out. Coming head on was an old vintage car I was able to capture it through the windshield. So if a person has their camera with them they will probably get some pictures that won't wait. A well known photographer, Jay Meisel once said he keeps a camera by his bed as well.
Thanks for the tips. Im not a professional photographer I do like to frame a good picture, but its never interesting. I just started following your tips. Thank-you!