There are many options for camera perspectives no matter what location you visit for outdoor photography. One of the challenges is to work your way around a location and the subject of your location to shoot various perspectives to get the best photograph possible. In this post, we will be analyzing multiple perspectives and compositions of one location to find the best option so you can easily follow the same steps in the field.
The problem I see with a lot of people who come in the field with me to learn how to work a location is that the majority of beginner and intermediate photographers (and some experts) struggle with ending their shoot after one good photograph. They take one image they really like and pack up their gear to leave.
Yes, they have one shot in the bag, but there could be a better shot out there. Photographers need to learn to continue working around the landscape to get the best shot.
I visited Ozone Falls to prove my point.
First, I wanted to get a high perspective of the waterfall because I’d never seen one before. Now, I’m not talking your standard high perspective. I mean a really high shot. This was a job for my drone.
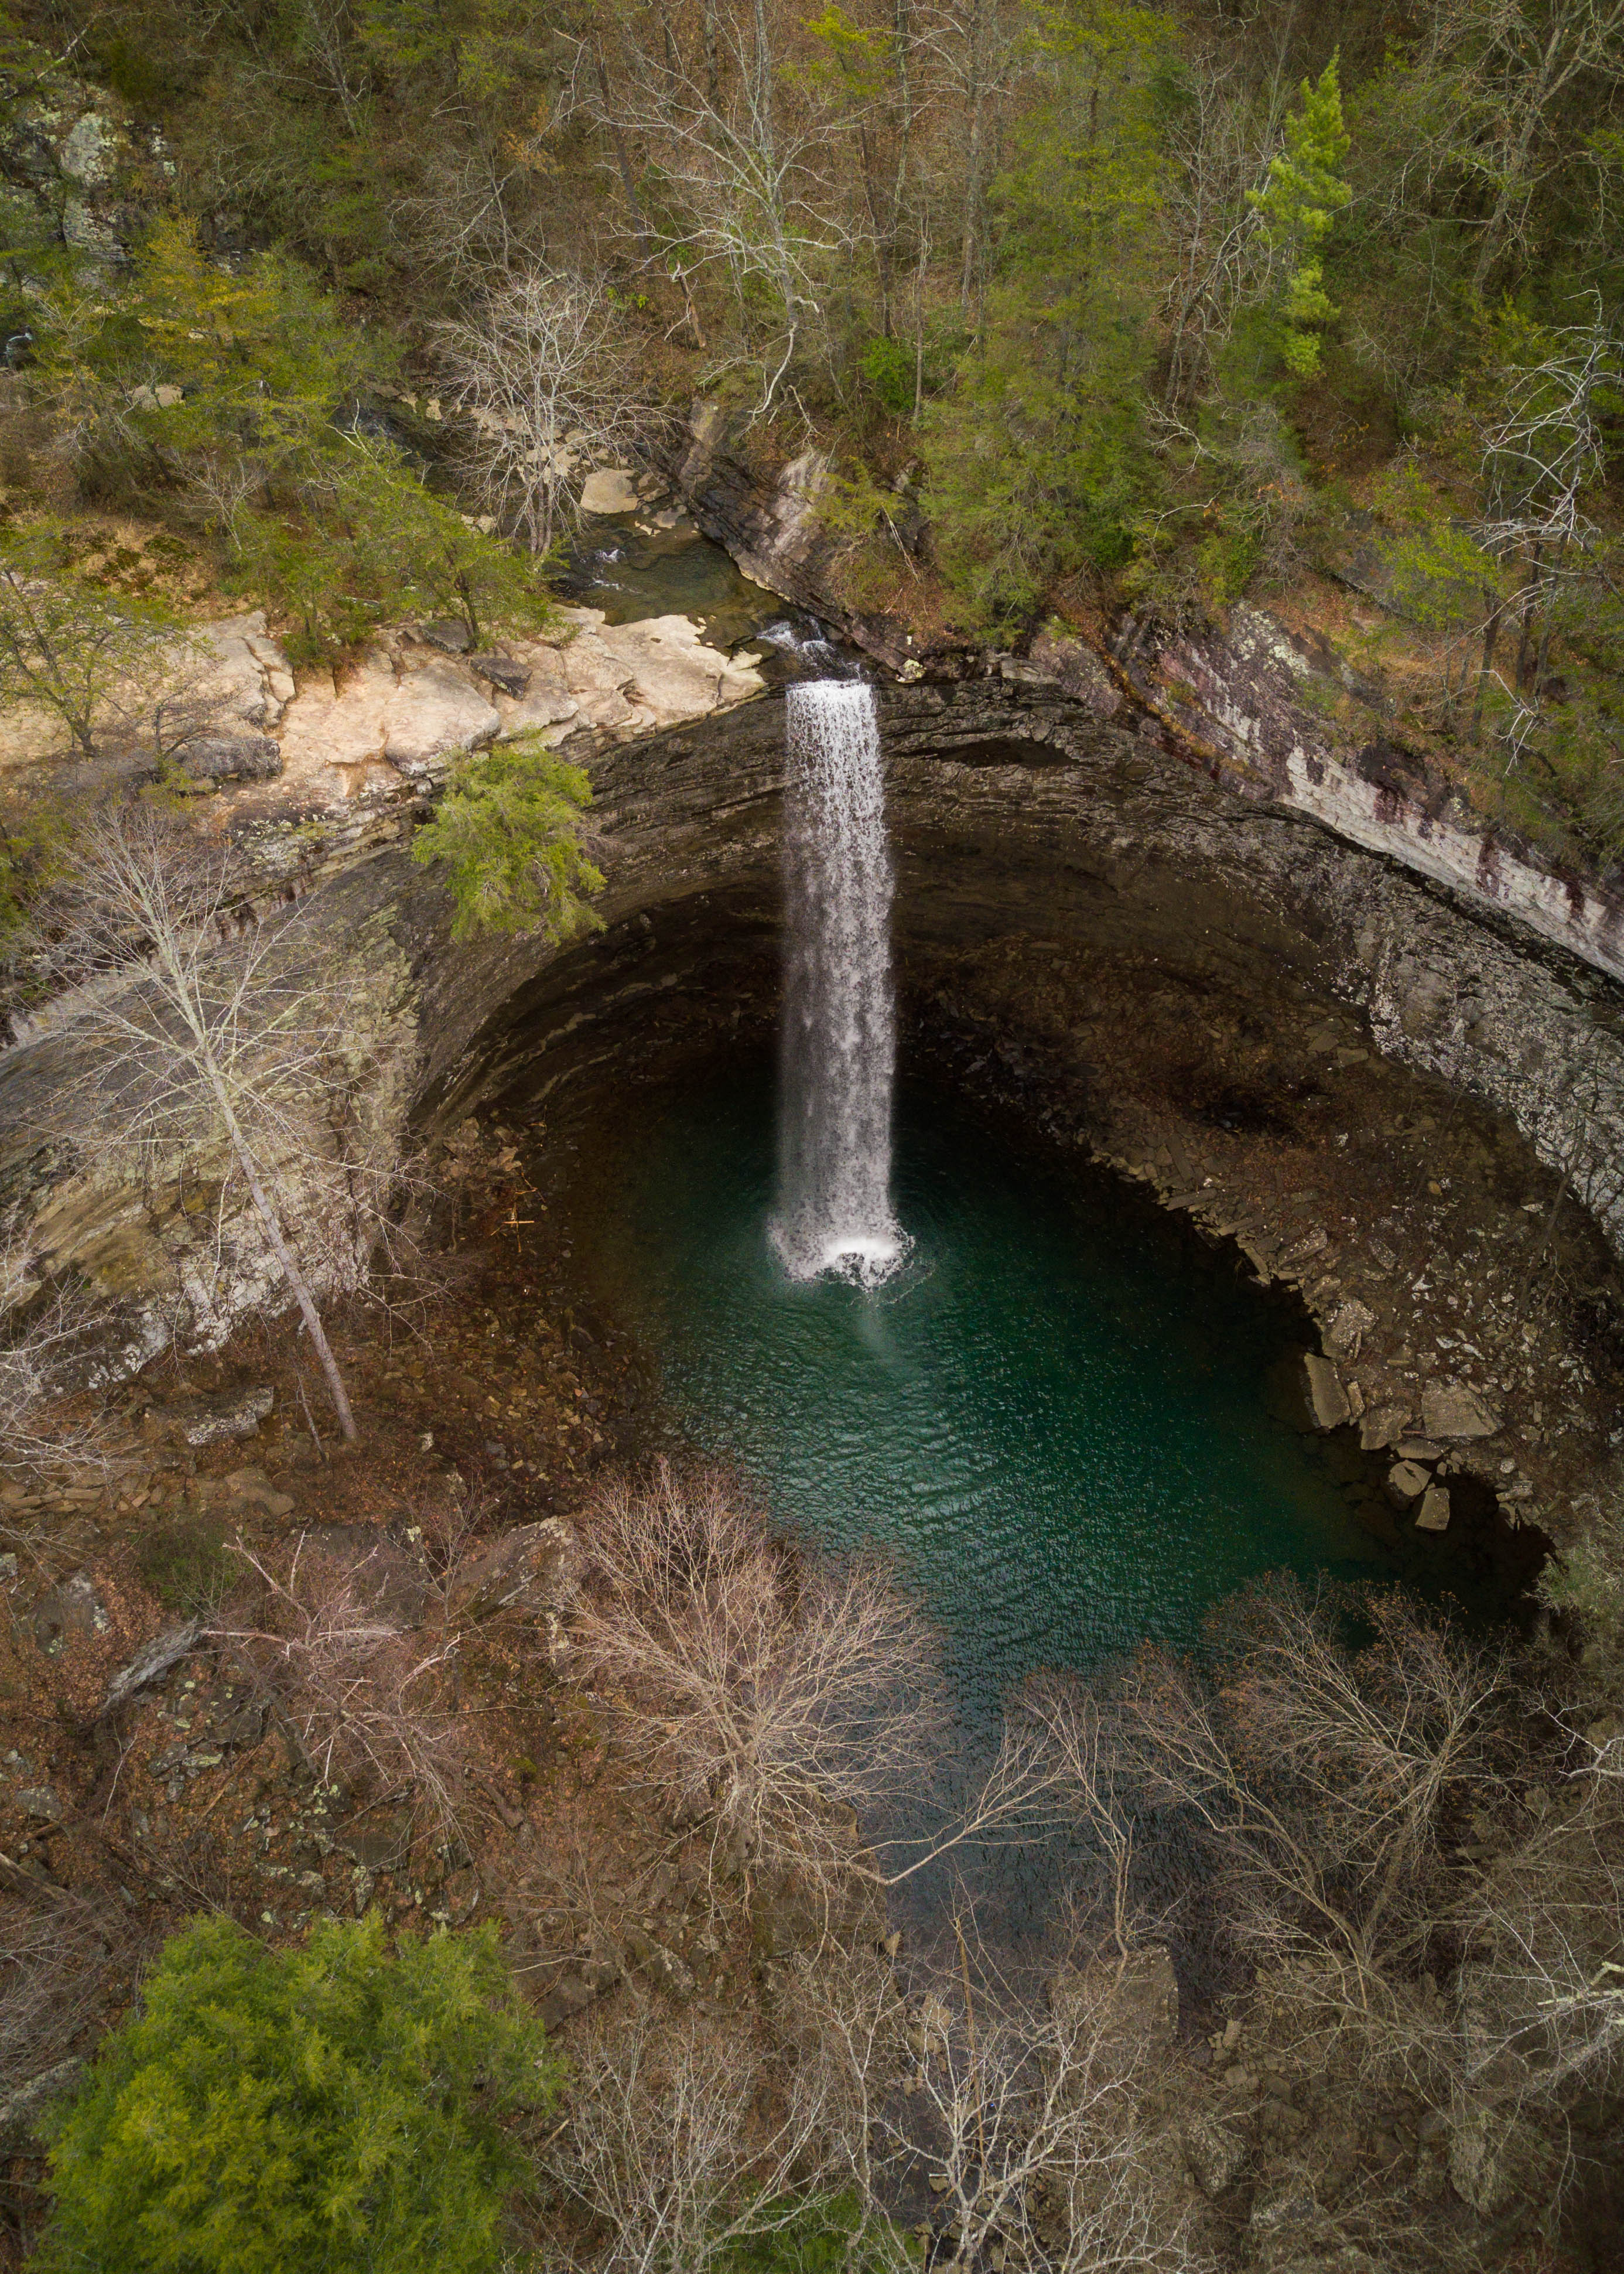
A high perspective looks pretty good here due to the path of water you can follow that leads up to the waterfall itself. The opening in the trees over the pool of water that the waterfall flows into is a nice effect too. It’s like a natural window from above looking through the tree canopy.
Good shot! Let’s pack up, right?!
Nope.
Next, I wanted a shot from far off down in the trees to show a relationship between the waterfall and its surroundings. It’s a good composition option to give someone a better idea of what conditions they could face while visiting the same location.
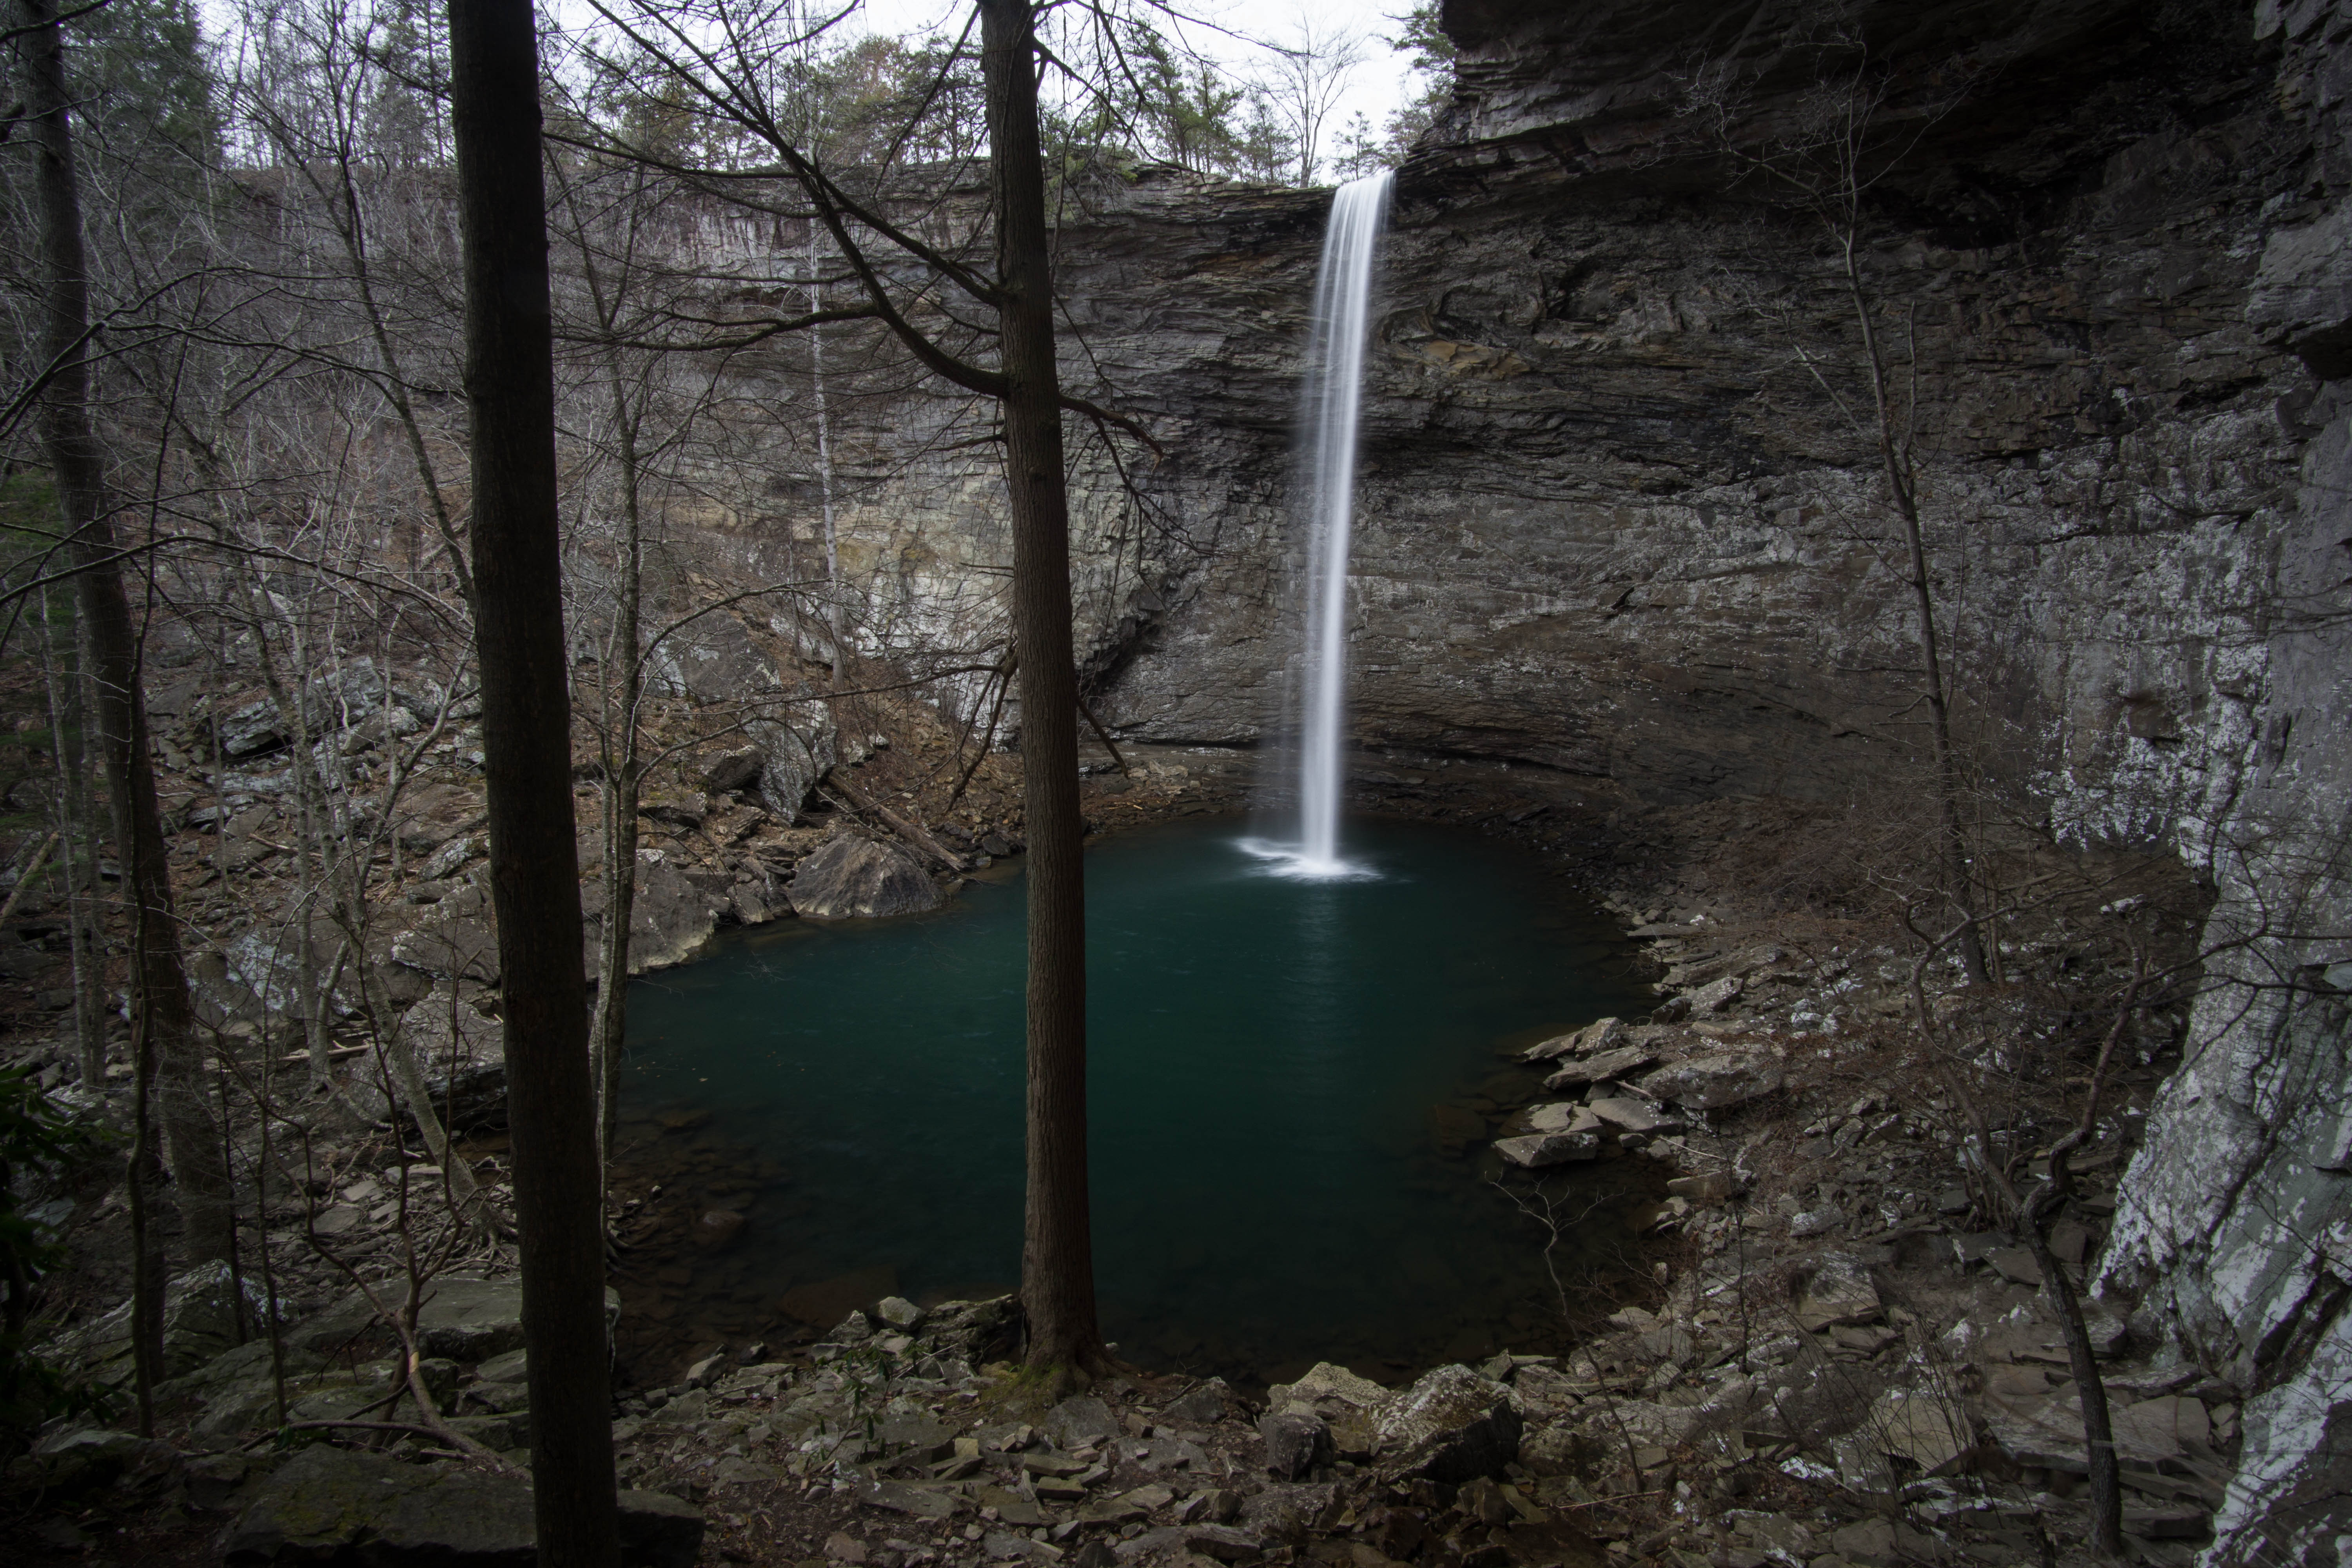
This is another interesting shot of the same waterfall that looks completely different than the first shot from my drone. Because I’m under the tree canopy, I’m dealing with more shadows so the temperature and tint of the photograph changes. Also, I have the ability to set up my tripod and use a circular polarizer with this perspective which is an effect I really enjoy with waterfalls.
Another good shot in the bag! Time to look for more!
One of the shots that has eluded me in this location is a photograph from underneath the waterfall. The water is usually too high to get that perspective, but not this day. I made my way behind the falling water and I was treated to another completely different looking photograph of the same subject.
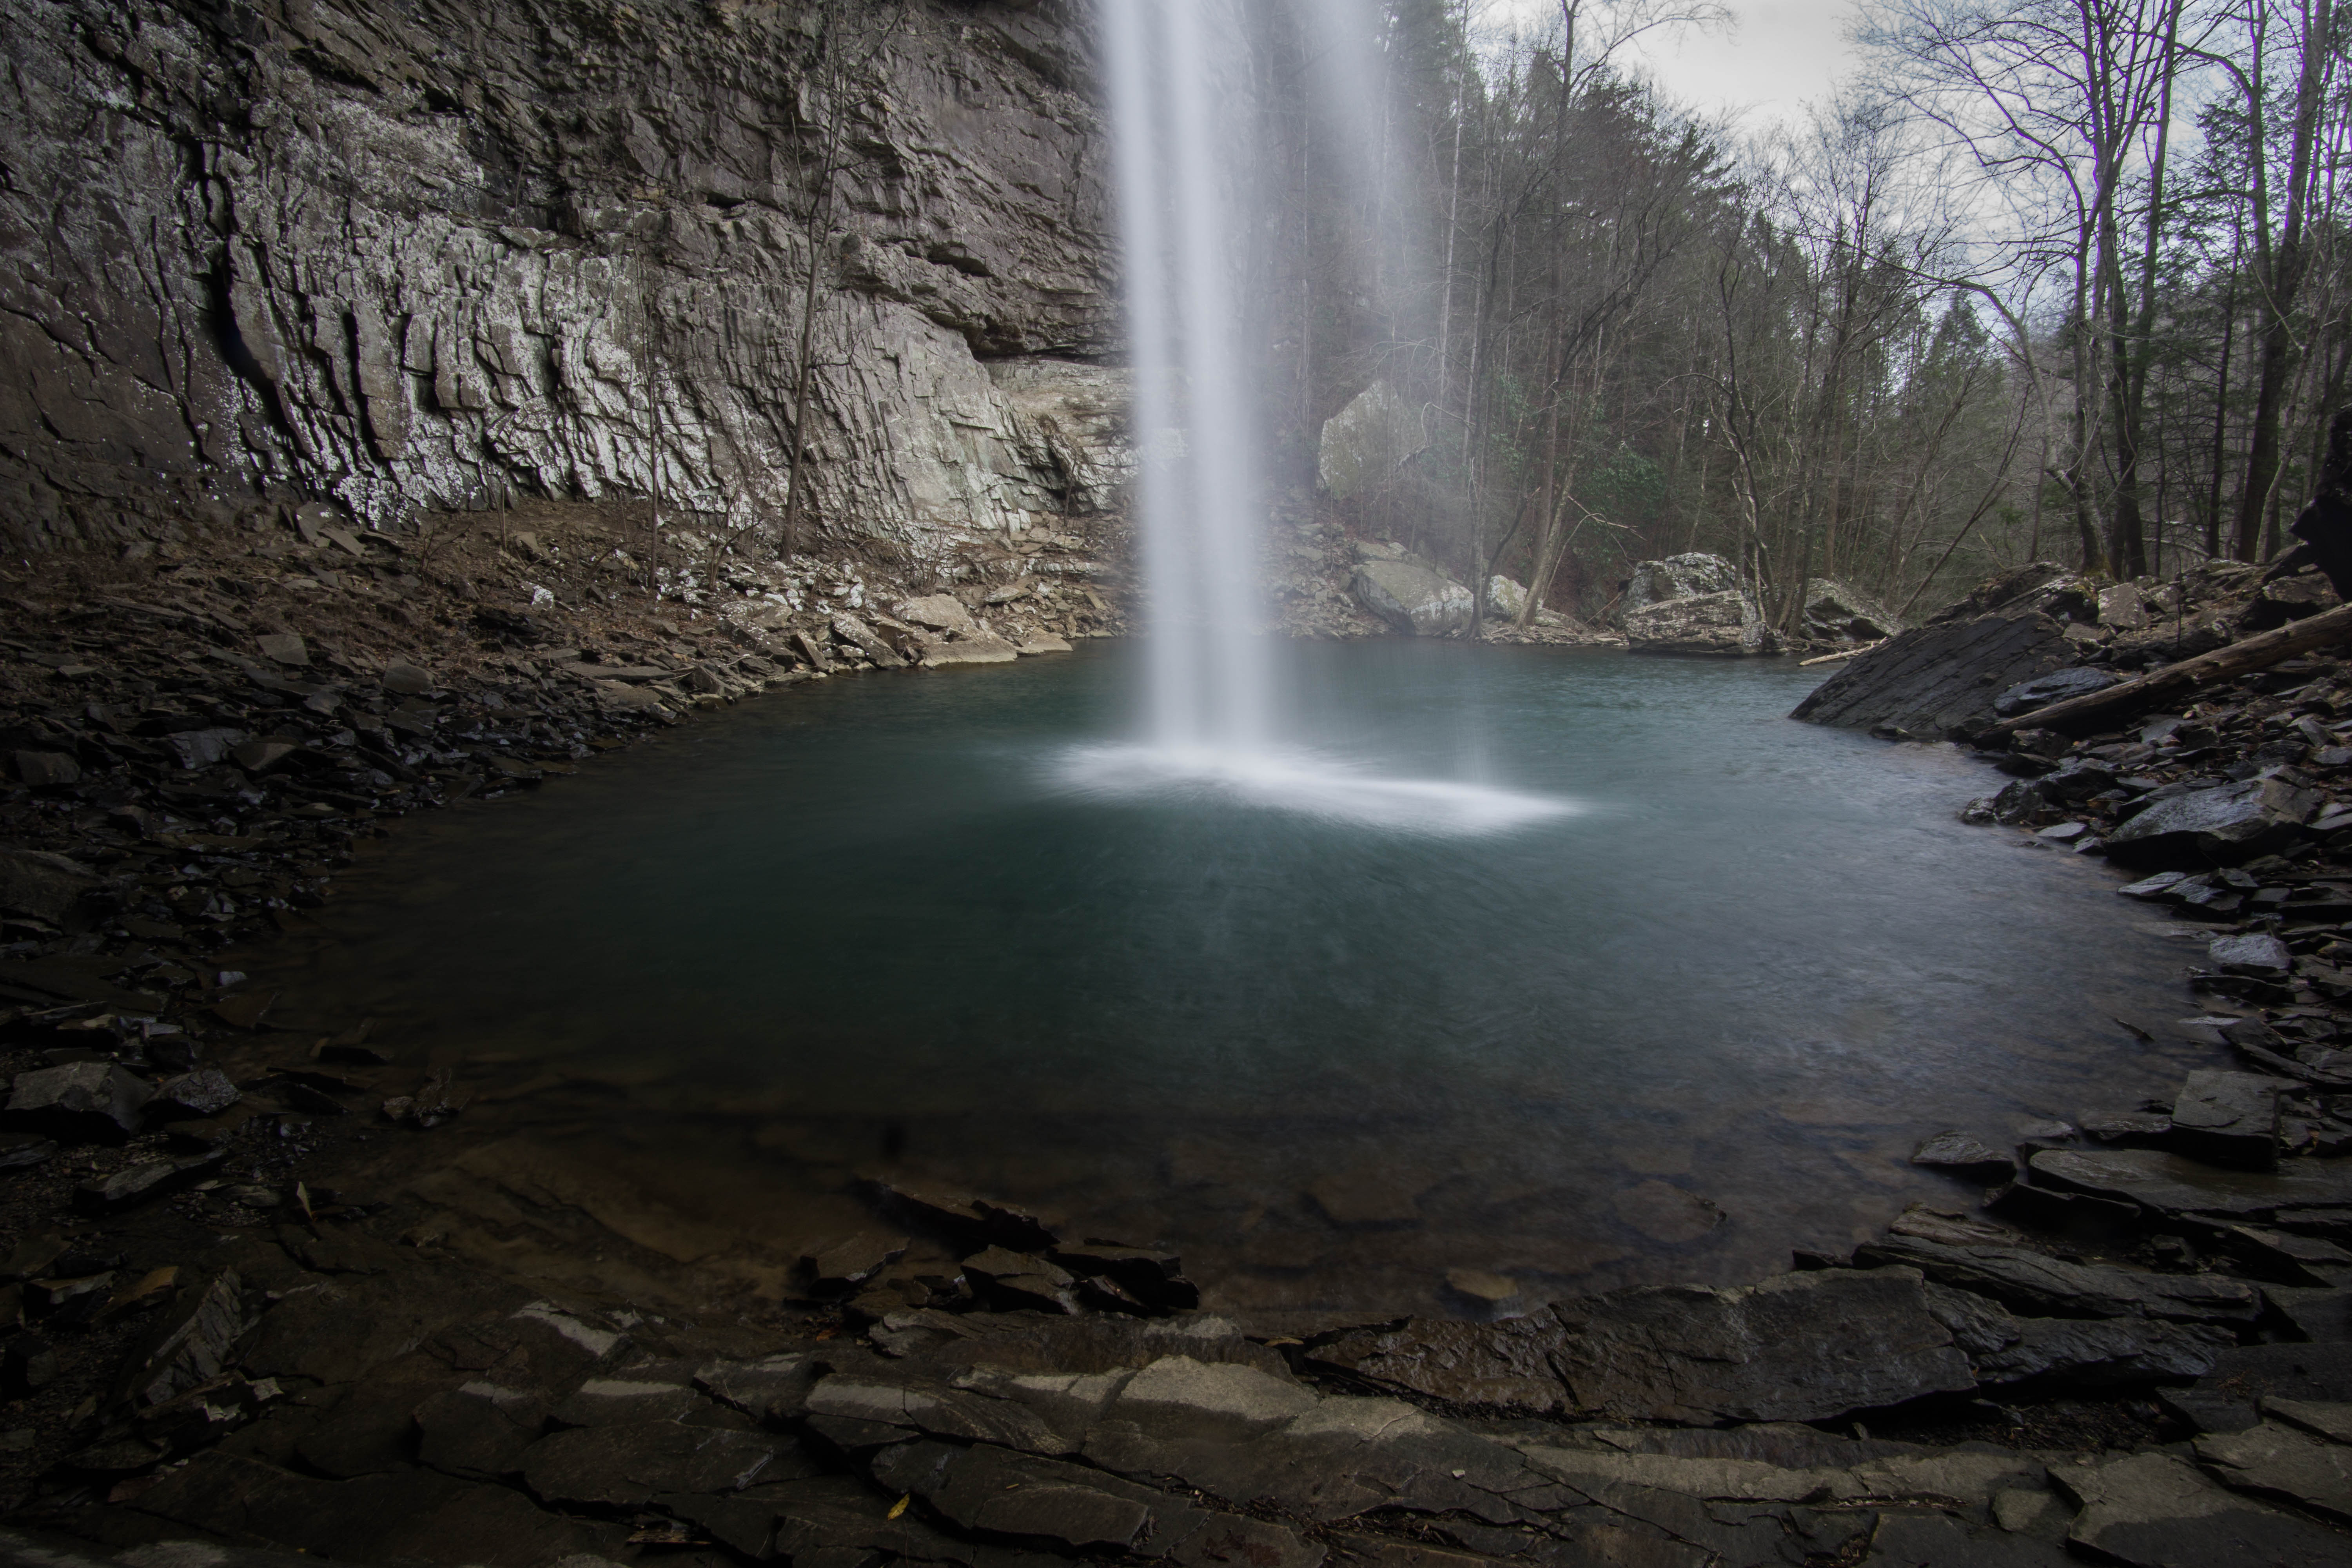
The important thing I needed to remember was to get the entire circular pattern of rocks that surrounded the pool of water. I also needed to blow off any water that was hitting my lens from the mist coming off of the fast falling water.
My favorite shot of the day is the photograph from underneath the waterfall. But, I now have three different views from one day.
If you’re quitting before shooting at least three perspectives of the same location, this is a technique you should incorporate into your workflow. It may seem unnecessary at first, but you’ll start to see some of your favorite photos are the ones that were the second, third, even fourth photos you took.
Related Videos:
Best Weather for Waterfall Photography
A Guide to Waterfall Photography Composition
 About the author: When David Johnston isn’t leading photography workshops and tutorials or hosting his popular photography podcast, Photography Roundtable, he can be found traveling the world taking photos to awe and inspire his viewers. David has a passion for sharing his knowledge of photography and has many educational offerings designed to help photographers improve their work. Visit his website at https://www.davidjohnstonart.com/.

These are all very beautiful photos. It pays to take your time and look at things from different perspectives. I need to start doing that. I tend to rush through my photography and get as many varieties of shots as I can rather than taking the time to focus on one subject and showing it from multiple perspectives. Thank you for sharing your photos and your story
I was amazed at your onsite! Sometimes I get so mad at myself for taking so many different pictures of the same subject. One thing I can say is I am so often surprised at what my camera captured that I didn’t see and certainly would have missed if I hadn’t taken so many pictures! Thank you so much for your perspective now I can honestly feel good about taking so many...
Seriously, this is absolutely excellent advice. Get down low, get up high, go as far around a subject as you can, there are Always surprises to be found! Thanks, David, for putting this one out here.
I really enjoyed reading this article as it provides some practical ideas and incentives to get out and photograph. Thanks for sharing your ideas. I love David Johnston's practical ideas and techniques and have followed him before joining Outdoor Photography Guide.
What were the setting for these waterfall pictures?