With towering sandstone pinnacles, deciduous trees that turn vibrant colors in the fall, and an extensive network of canyons, Utah’s Zion National Park holds an endless range of opportunities for landscape photography. Since I took up photography in 2009, I have visited the Zion area on many occasions over different seasons and have been fortunate enough to explore some of the more remote parts of the park. Still, one of my favorite places in Zion is the quite accessible Temple of Sinawava.
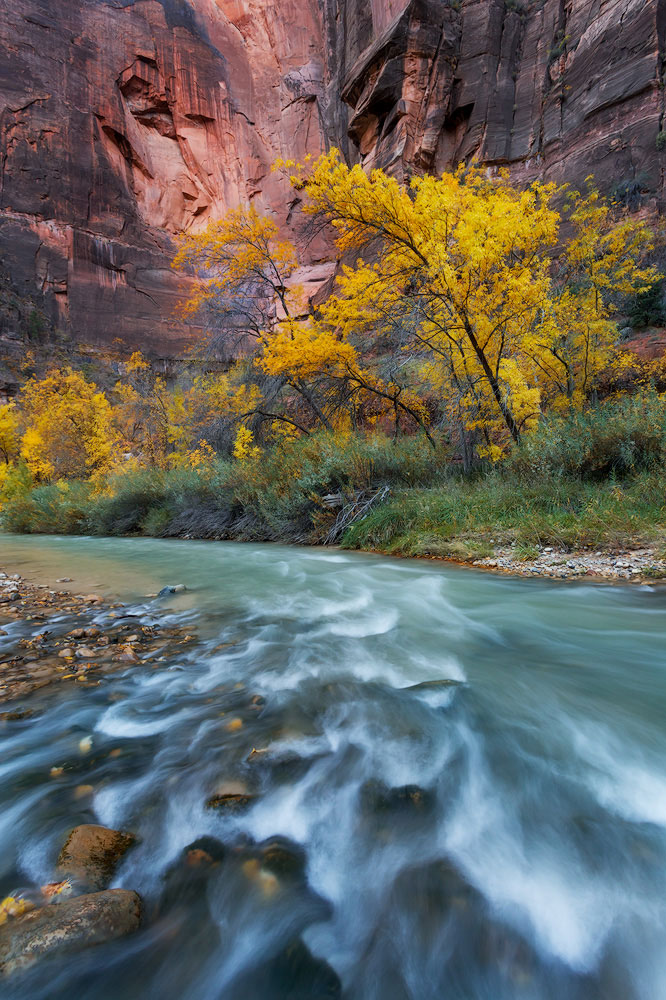
The Temple of Sinawava is at the end of the driving route into Zion Canyon and is the starting point for the classic Zion Narrows hike. At this point, the Virgin River spills out of an extensive section of narrow cliffs into a more open amphitheater of red sandstone towering hundreds of feet above the canyon floor. While the Virgin River is muddy with runoff during other parts of the year, it is often a crystal clear turquoise blue in the fall. With most people focused on hiking up the River Walk to the Zion Narrows or photographing the iconic Pulpit Rock formation a little further down the road, this short but impressive section of river is often ignored but offers many excellent opportunities for photography.
Preparation
For this photo, getting into the river was essential. Although Zion is located in the American southwest, which is known for its heat, autumn in this area can be quite chilly. While some photographers will enter a river with bare feet or water shoes, I find that the pain from cold water is distracting and keeps me from doing my best work. Thus, I always bring along a pair of fishing waders and wader boots for situations like this. By wearing waders, I can get into the water and comfortably stay there as long as needed without worrying about being uncomfortable.
Related course: Water Photography: The Ultimate Inspiration
My Goals for Capturing this Scene
When I arrive at a photography location, I always spend some time thinking about the place and observing my surroundings before I take out my camera. In viewing this scene, I wanted to capture the feeling of being surrounded by the sheer red cliffs, the vibrant fall colors, and the cascades in the river. I was specifically drawn to the arching tree in the background and wanted to integrate it in my final photograph. When out in the field, I always seek out elements that communicate the elegance and grace of nature, with this tree helping meet that aesthetic goal for this scene.
Refining My Composition
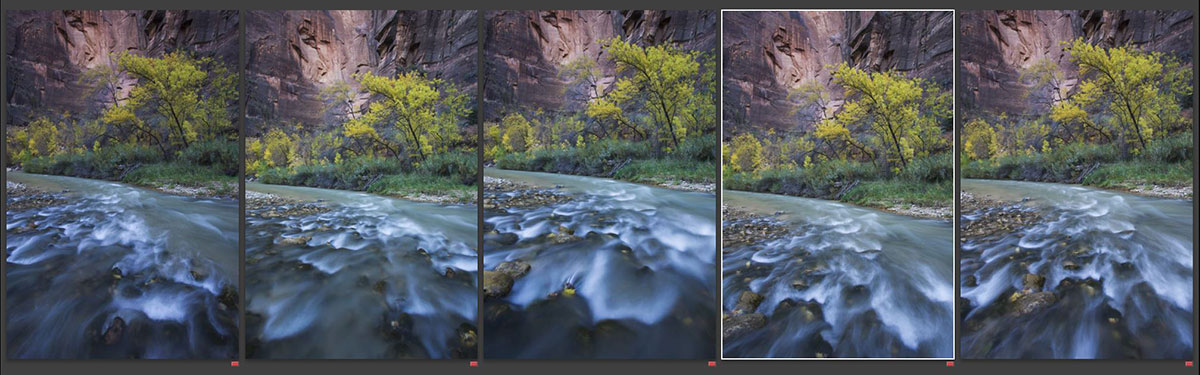
As I started photographing this scene, I knew that I wanted to visually connect the cascades with the arching tree in the background. While I did end up with a composition I like, it took quite a bit of refinement to get the cascades to point to the trees in the background in a way that I found pleasing. I also tried a variety of tripod heights, deciding on this view in which the tripod is at a higher level, thus allowing more of the mid-ground cascades to show up in the final composition (with a lower tripod position, the foreground cascade became too dominant for a balanced composition).
Technical Notes
This photograph is simple from a technical perspective. The only major technical decision involved choosing the best shutter speed for the water because I wanted a silky effect while maintaining some detail and texture in the cascades (I boosted my ISO setting to get a faster shutter speed). I used a circular polarizer, as reducing glare on the water and the trees helped bring out their vibrant colors. While the current of the Virgin River is swift during the fall, most places are not terribly deep. This makes exploring for compositions in the river fairly easy but can complicate actually taking photographs. Because the river current causes vibrations in a tripod, it is important to take time to set up the tripod in a way that minimizes these vibrations and to check the resulting files for sharpness.
Related course: Photographing Waterfalls & Other Items in Nature
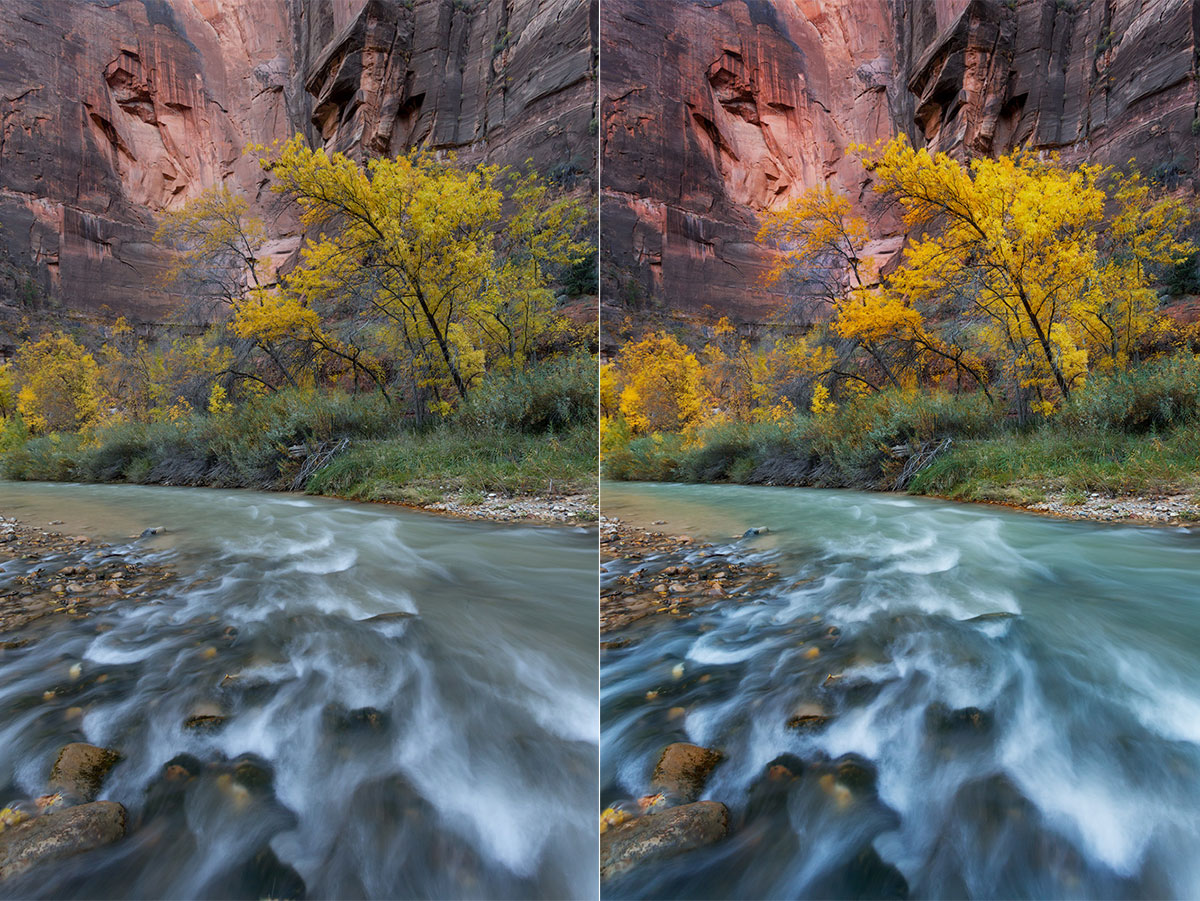
Approach to Processing
For this photo, my approach to processing was simple with the primary adjustments focused on contrast and color. I wanted the red sandstone, yellow leaves, and blue river to all be vibrant, so I individually adjusted each of these sections for the optimal color balance and tone (for example, I removed some of the cyan in the yellow leaves to make them the more vibrant yellow that I experienced in person). I also brightened the water to make the cascades stand out against the darker rocks and added some selective sharpening to bring out the texture in the water.

About the author: Based in the Rocky Mountain West, photographer Sarah Marino travels the country in a 25-foot Airstream trailer with husband and fellow photographer Ron Coscorrosa. Together they produce high-quality educational photography e-books and other nature photography resources. You can view more of Sarah’s work and read her travel stories at www.naturephotoguides.com.
Have something to add to the story? Leave a comment or email editor@outdoorphotographyguide.com.


Thank you Sarah for sharing your great shot and all the essential details that go into creating such a beautiful photo!
great work. love the compensation. did you use any other filters?
Thank you for the very helpful discussion of the making of this photo. I'm going to look for your e-books to learn more. Ann