Photography has an extremely interesting progression of learning attached to it. If you’re anything like most photography enthusiasts, you probably started out shooting during bright sunlit hours while avoiding clouds and the corners of the day. Then, you began wondering why your photographs lacked dynamic range and interesting color. Afterwards, you’d seek out the great light of sunrises and sunsets.
You worked hard, you tried new things, and you mastered your own personal brand of photography, developing your own style.

However, then something happened. You got complacent. There was no more learning. There were no more challenges attached to photography. Nothing gave you any drive.
It happened to me, too.
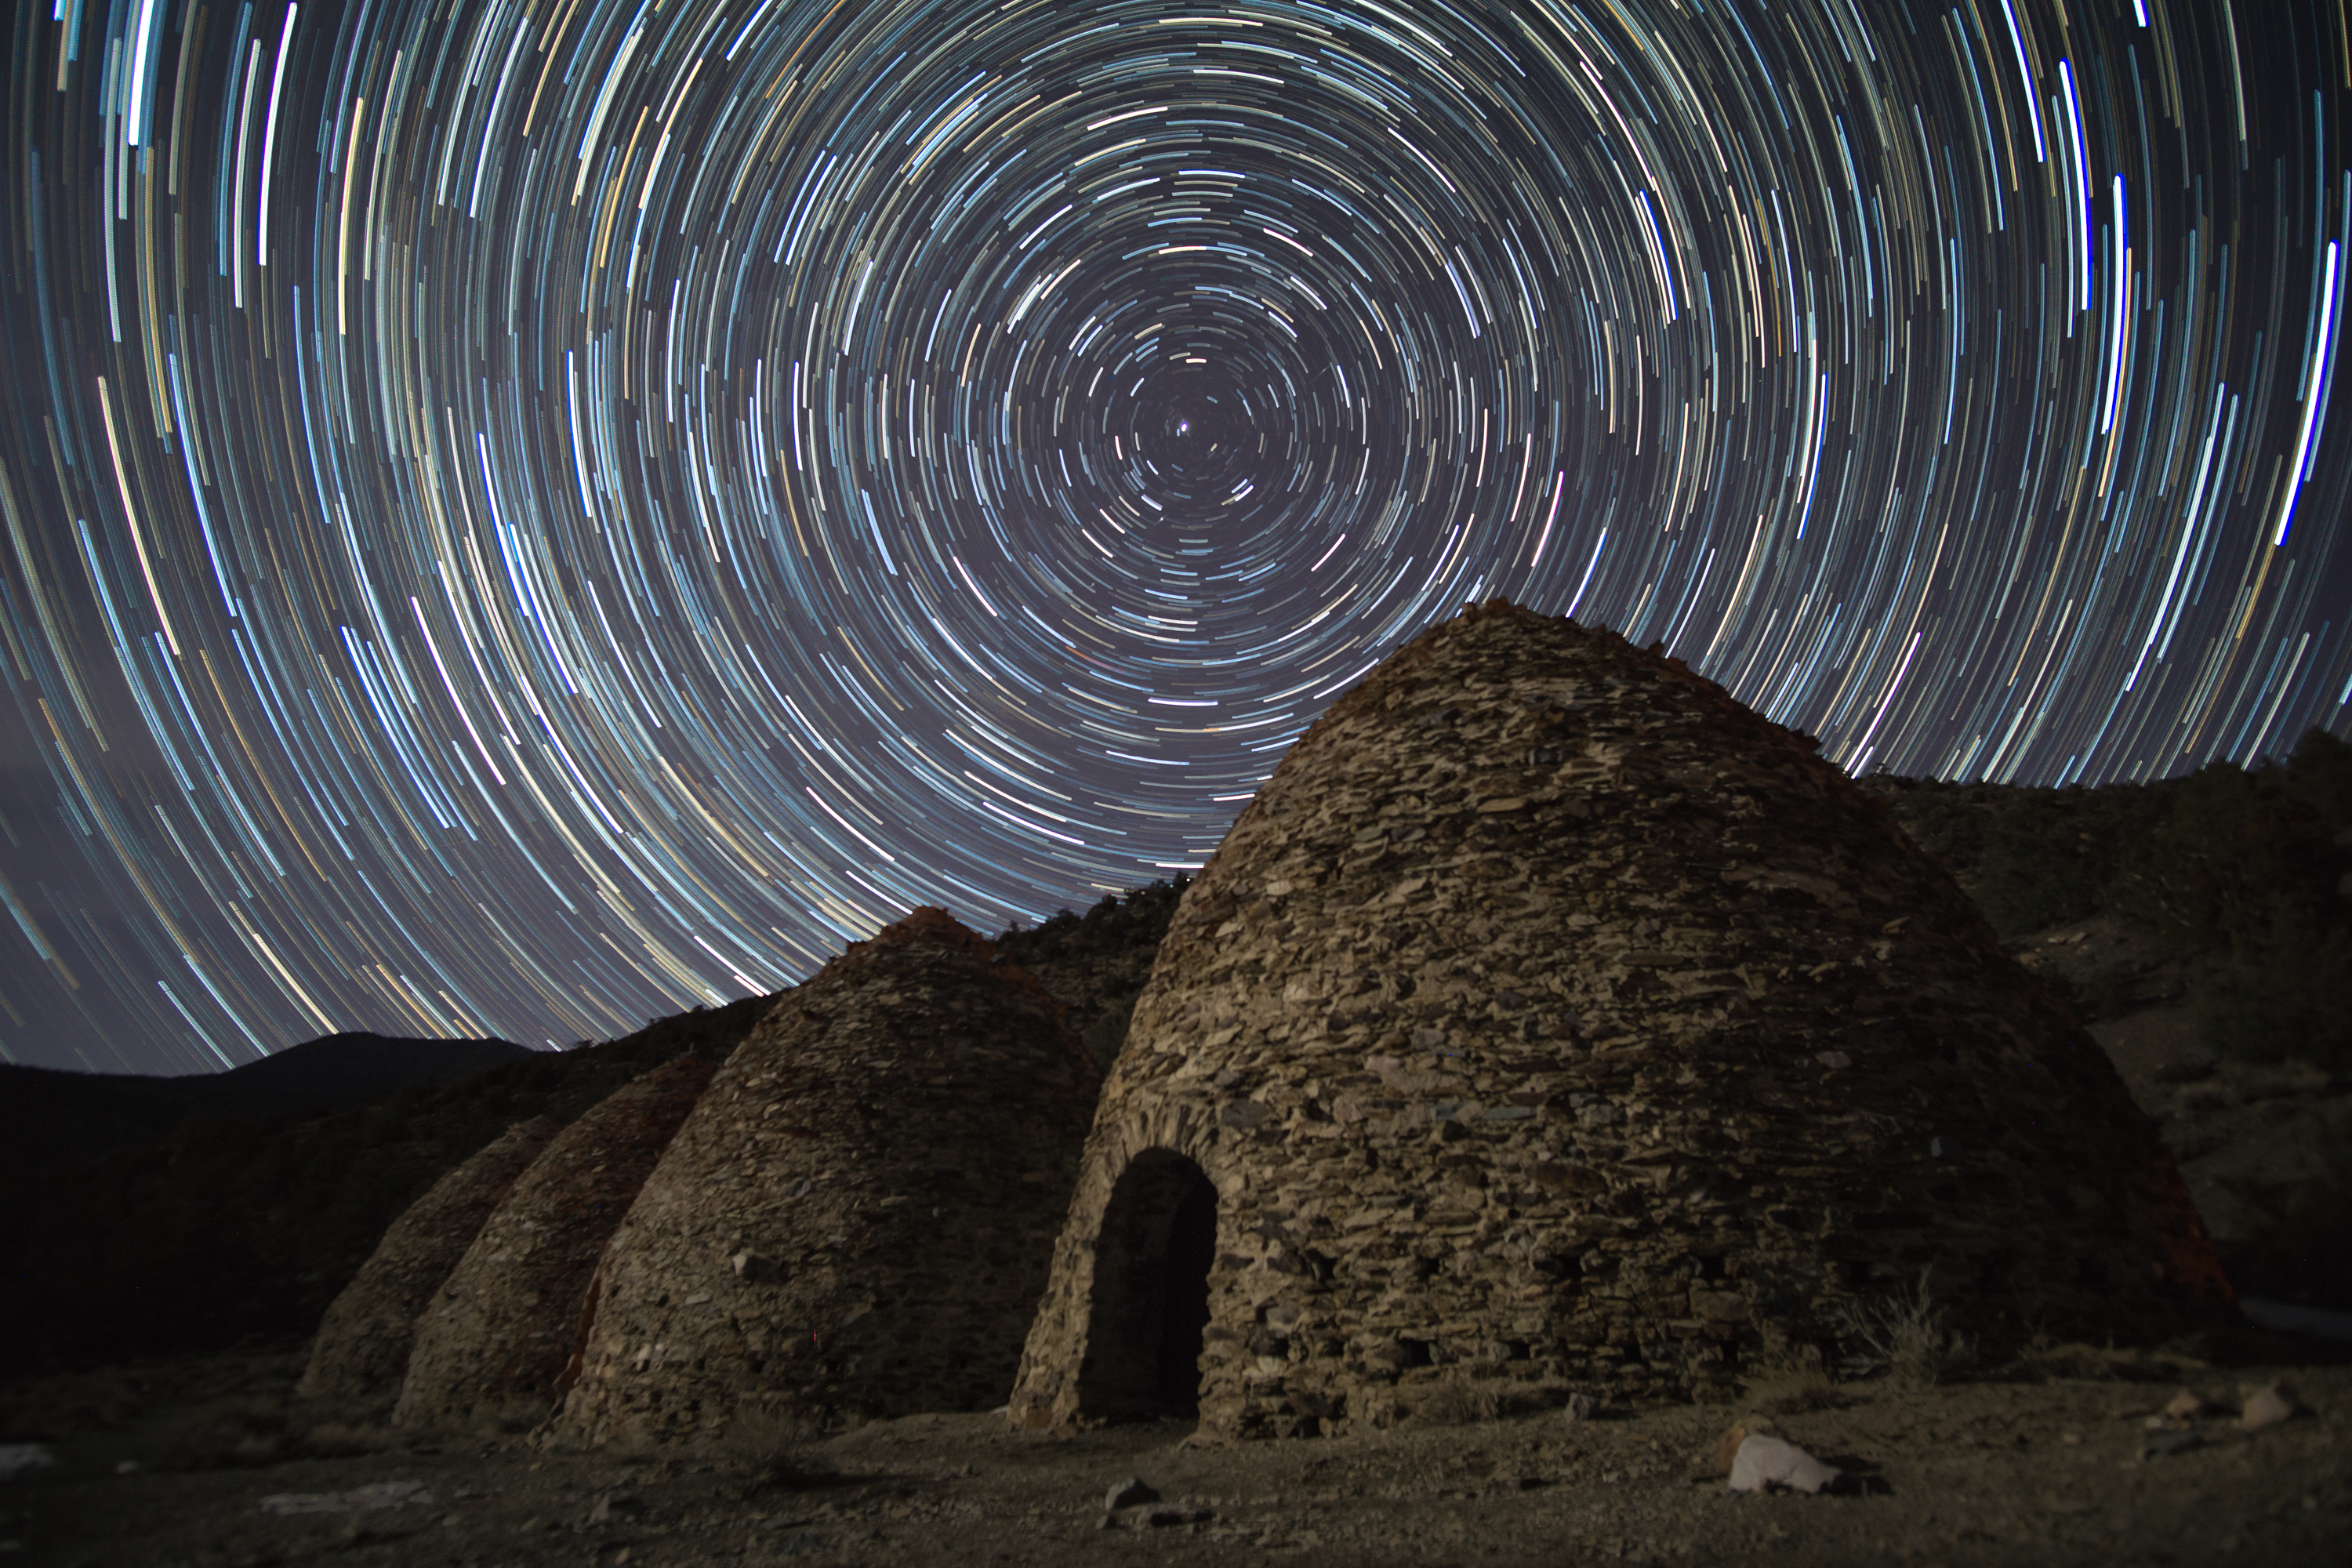
I actually set my camera down for a while until I found a photograph of the Milky Way. Finally! A new challenge! Immediately, a million questions ran through my head on how to shoot something like that. I studied aperture, exposures, and ISO for night photography (by the way, the most common setting used to shoot the night sky are 20 seconds, f/2, ISO 1600).
Yes, all of those things are crucial for night photography. But, to take your night photos to an entirely new level, you have to know the most important night-photography settings.
Use the Proper Kelvin Temperature
If you want your night photography to look realistic, selecting the correct white balance is extremely important. I’ve seen a large number of night photos that were strikingly beautiful, but they weren’t realistic at all due to the improper selection of white balance, like this example…
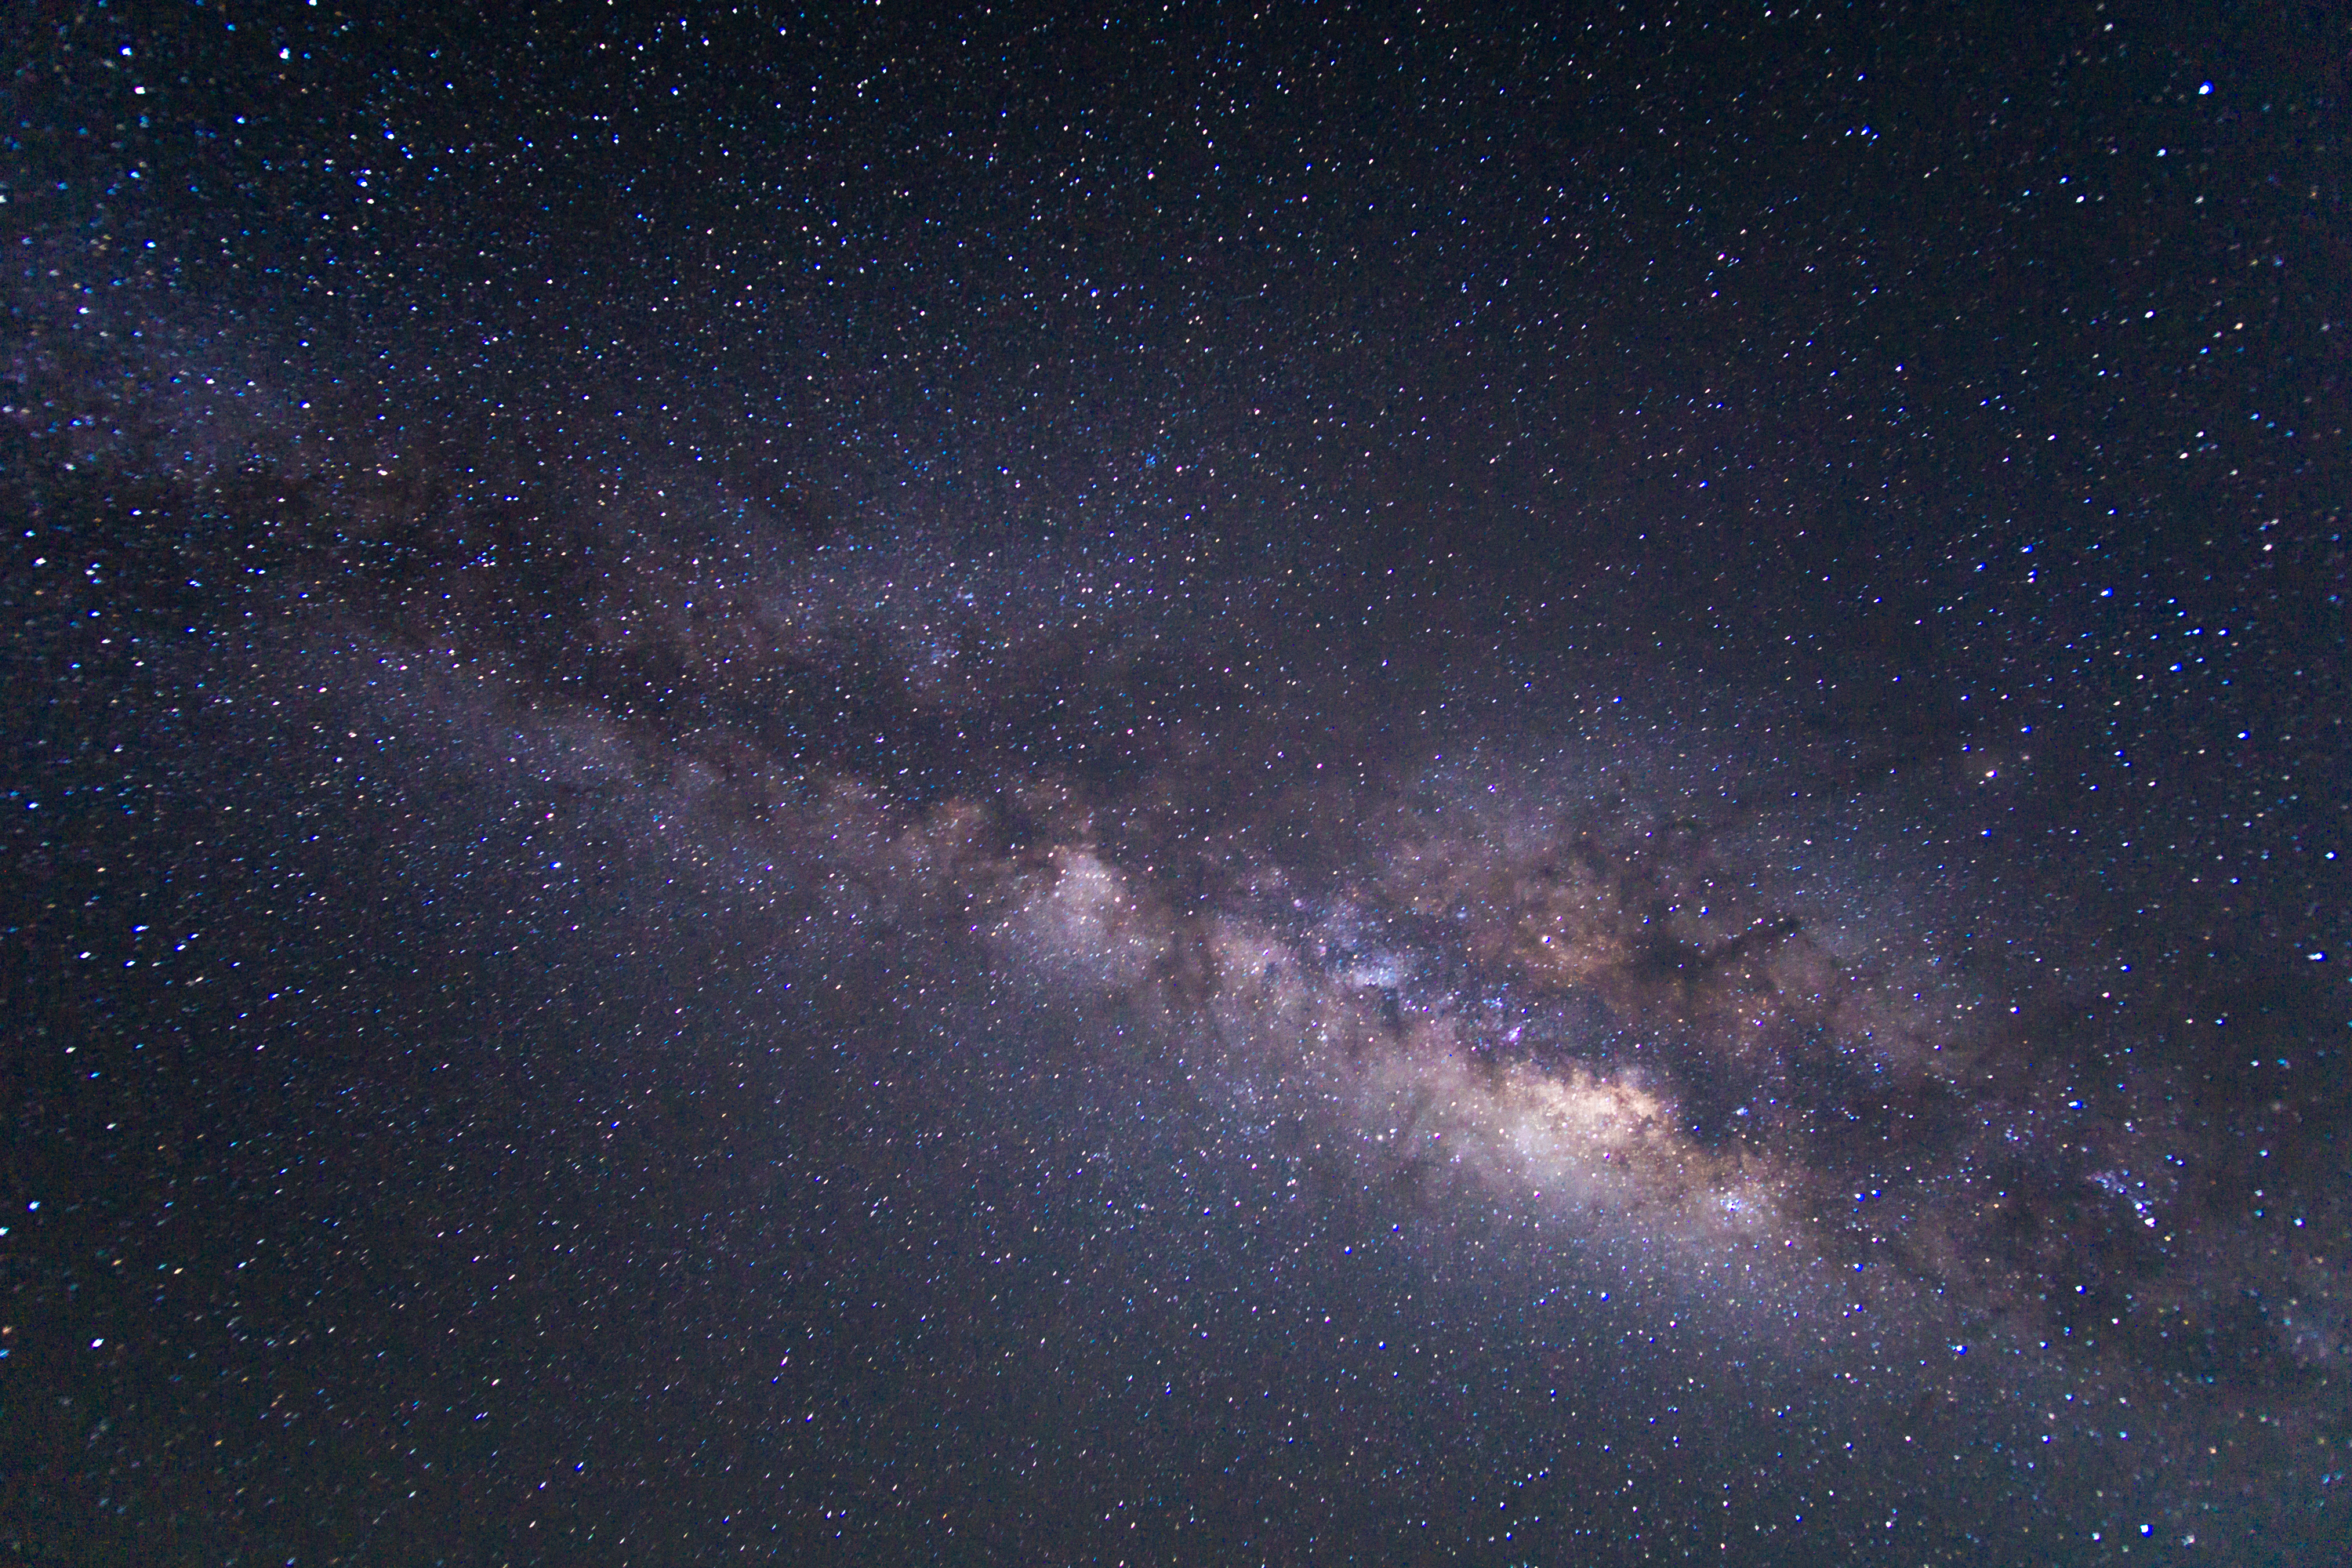
Granted, when I started out with night photography, I kept my white balance on auto and would welcome the deep blues and purples that the camera would produce. As I kept learning, I would strive for a realistic night-sky color instead of otherworldly color.
To produce the correct white balance in night photography, you need to use a Kelvin temperature white-balance value. If you have never heard of Kelvin temperature scales for setting your white balance, it is essentially a color-grading scale that represents the color temperatures that are present in the image. Those values usually range from two thousand degrees Kelvin to nine thousand degrees Kelvin.
To understand the best value to use in night photography, we need to narrow those values down a bit.
Since the night sky does cover a wide variety of blues and purples (depending on the ambient light and the moon phases), the Kelvin range will vary from four thousand to seven thousand. However, I prefer to use a more exact starting point of five thousand degrees Kelvin. That white balance value has given me the most realistic and most consistent results of realistic night sky color while preserving star color and foreground colors.
The one thing that’s going to give you the most problem when you’re selecting your white balance temperature is going to be your ambient light. Ambient light is defined as the light reflection or light pollution from surrounding areas that are usually areas of higher populations. The further away you are from ambient light, the darker the sky will be and the more natural the color will be. I remember one early morning shooting the Milky Way in Death Valley National Park, I could still see the ambient light glow from Las Vegas, even though I was roughly one hundred miles from the city.
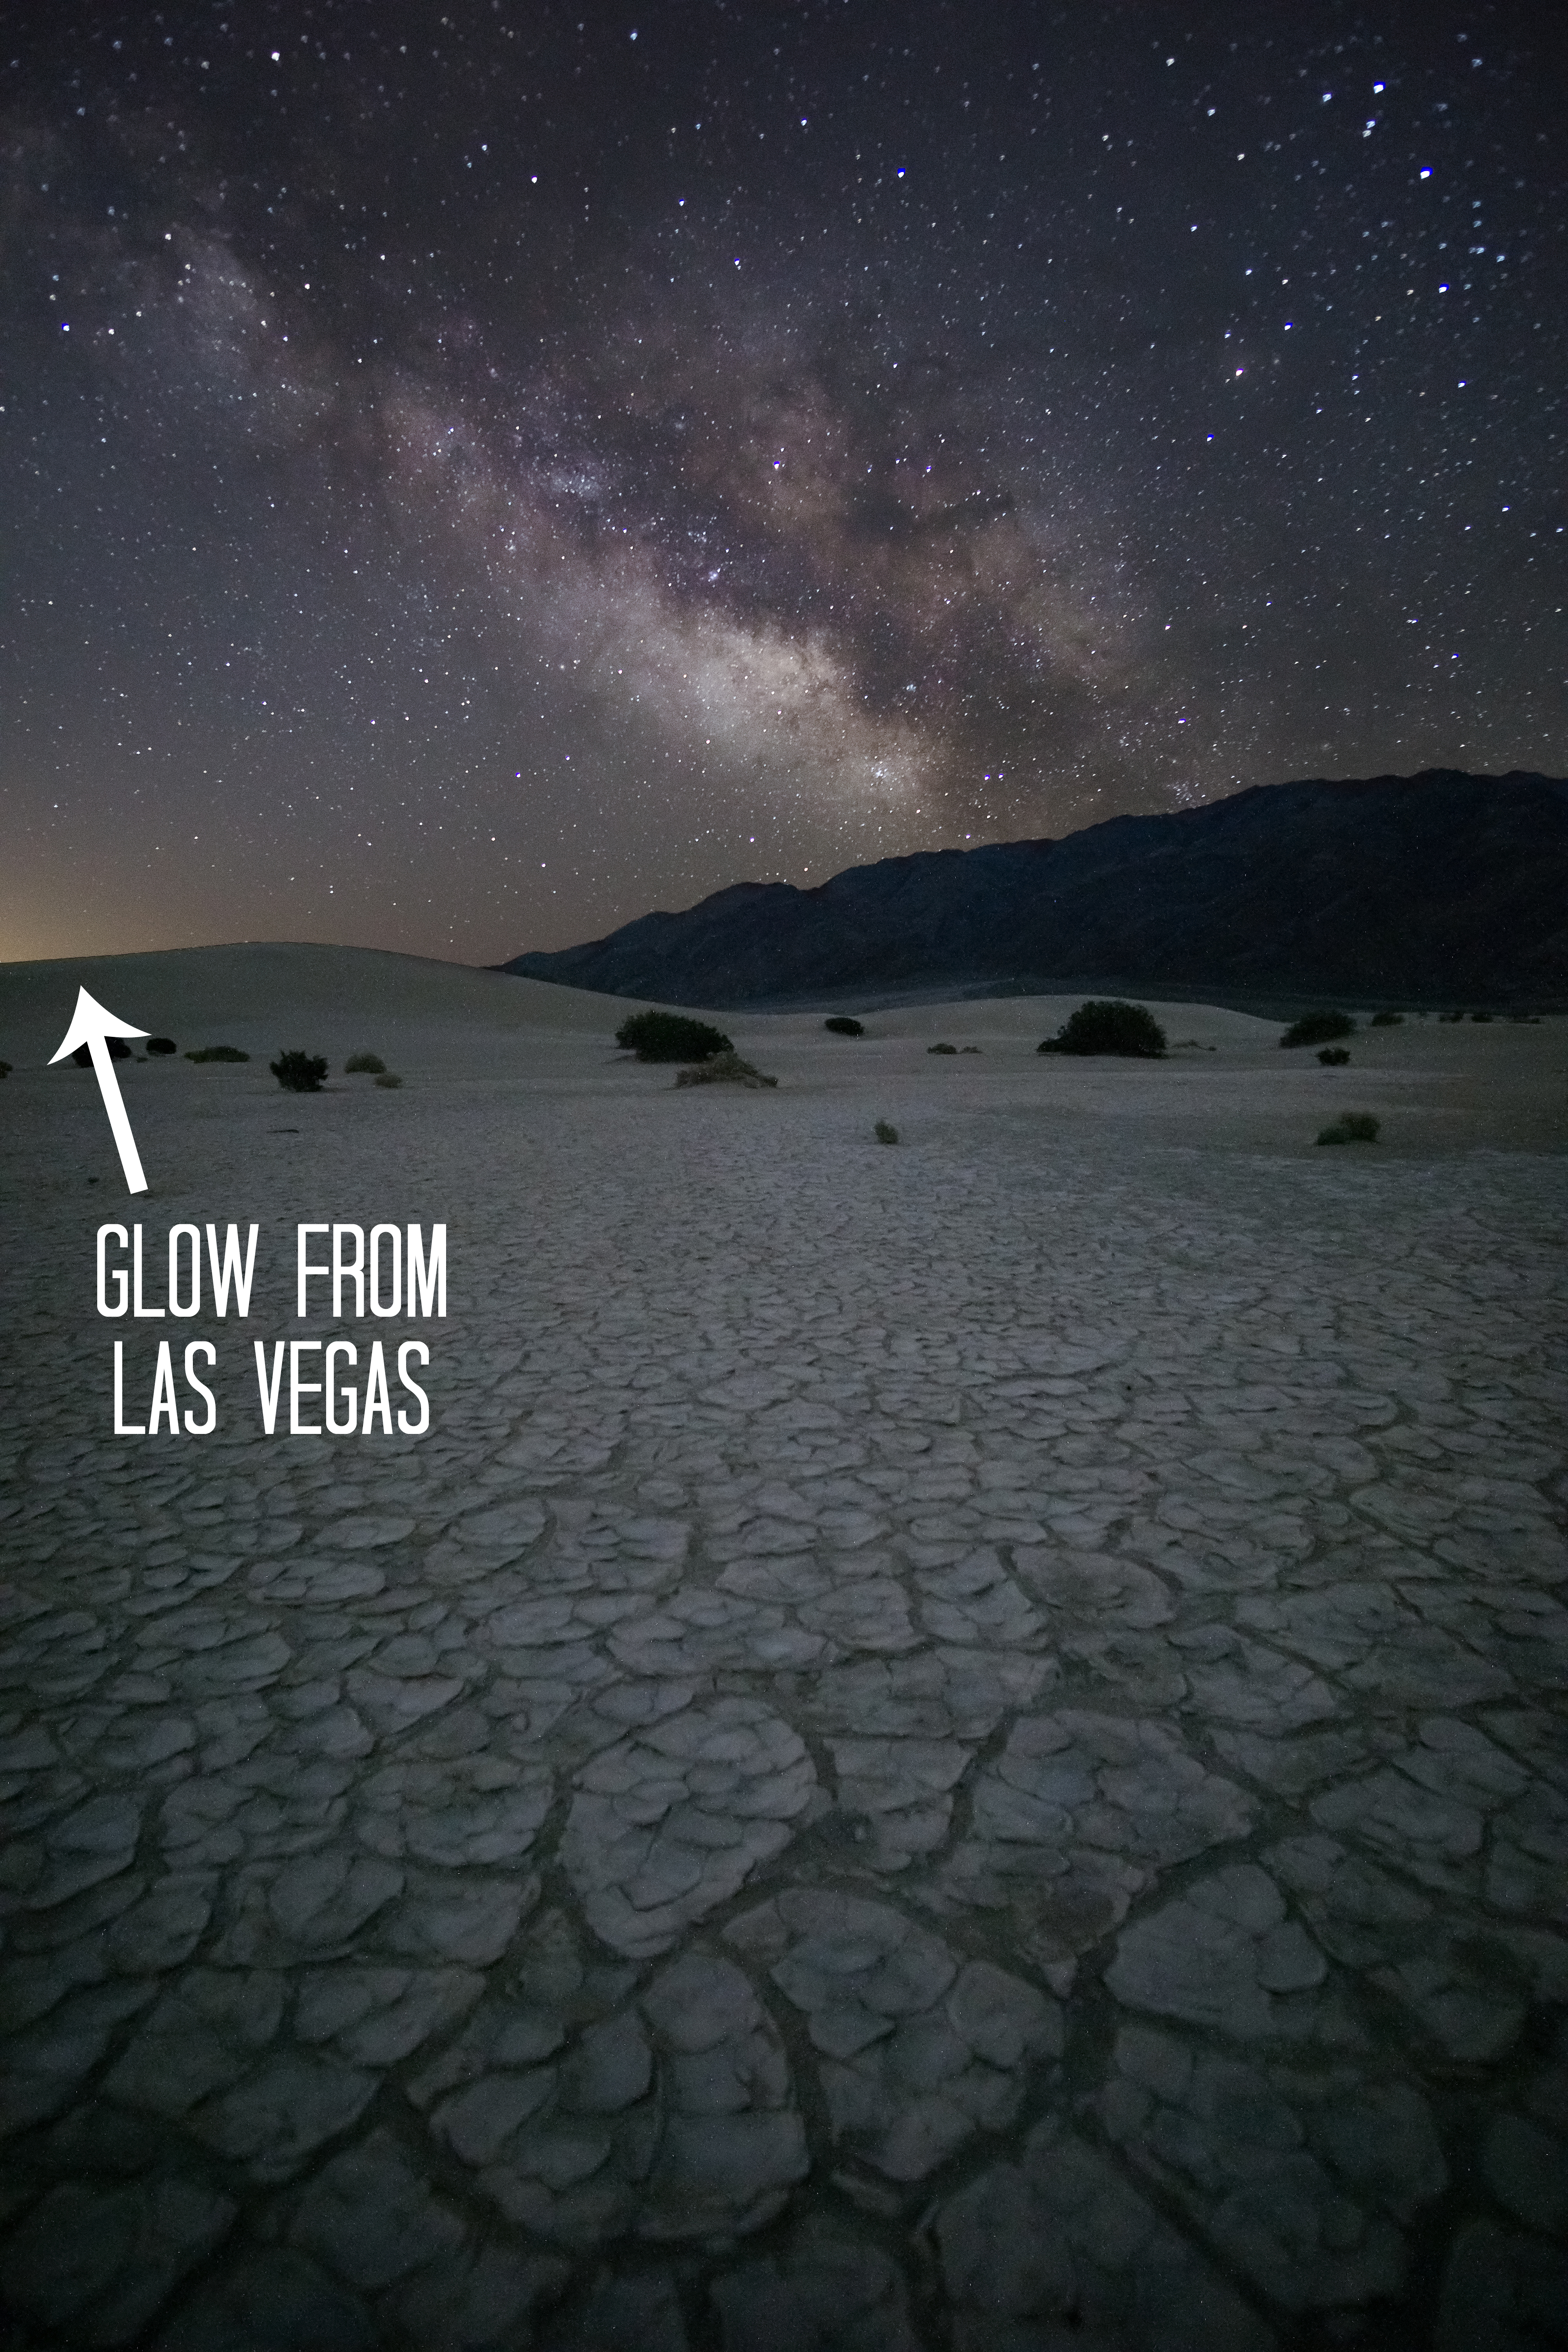
So, if you’re getting too much color variation from ambient light glow, simply adjust the Kelvin temperature of your white balance up or down to get the most accurate color of the sky and the foreground.
Focus
The second biggest mistake that I used to make with night photography was having some items in the frame out of focus. The most common thought with lenses and focusing is that if you just set your lens to focus to infinity, then everything into infinity will be in focus.
Technically, the answer to that is yes.
However, not all lenses have the infinity value that is exactly on the infinity mark of the lens.
Since you are typically shooting night photography with an aperture as wide as possible, getting your infinity focus is very important, or else either the foreground or the sky will be out of focus. Even if you have focus peaking on your camera, it’s going to be difficult to get a good reading due to the lack of available light.
To be sure you have the infinity point correct on your lens, use your live-view mode to zoom in on one of the brightest stars in the sky. You want it to be a bright star so that it will show up well in your viewing screen.
Once you have found a star, adjust your focal ring around the infinity mark until it’s in perfect focus. When you find the point, let go and look at your focus-to-infinity point on your lens. It may be on the correct infinity line, or it may be slightly off. If it is slightly off, I recommend marking the correct infinity point with a silver permanent marker.
You can even plan ahead with your proper focus to infinity point and set it during the day before you get into the field in the dark. Simply go through the same process with an item that’s far off in the distance that can mimic a star. You can even lock your focus ring in place by taping the focal ring down to the correct spot. Just be sure you have your lens set to manual focus so your lens doesn’t try to adjust what you have set!
Foreground Exposure
All right, let’s go one step further in the quality control of your night photography with getting the proper foreground exposures. To do this, I’ll take you through my step-by-step process of shooting the Milky Way rising over Mobius Arch in the Alabama Hills.
My friend Kevin Jordan and I scoped out Mobius Arch during the afternoon to be sure we would get the best spot to shoot. Using the PhotoPills app, we decided that we should probably be at an angle to the arch to get the best view of the Milky Way.
At about 2:00 a.m., we set out on the short hike to Mobius Arch and set up our gear. We got our focus correct, set the white balance, and started to fire off shots. With a basic twenty-second exposure of the night sky, you could definitely see the Milky Way over the arch, but the arch itself was only a silhouette. It was too dark to see.
To adjust to the lack of enough light to brighten up the foreground, we decided that we would have to shoot double exposures and blend them together in Photoshop later. So, we took turns shooting five-minute long exposures to get the correct foreground exposure of Mobius Arch. Yes, the night sky was completely blurred and overexposed due to the long exposure, but the arch was perfect and we knew we were going to blend the sky out anyway.
Where we would originally have just a silhouette of the arch, we got this.
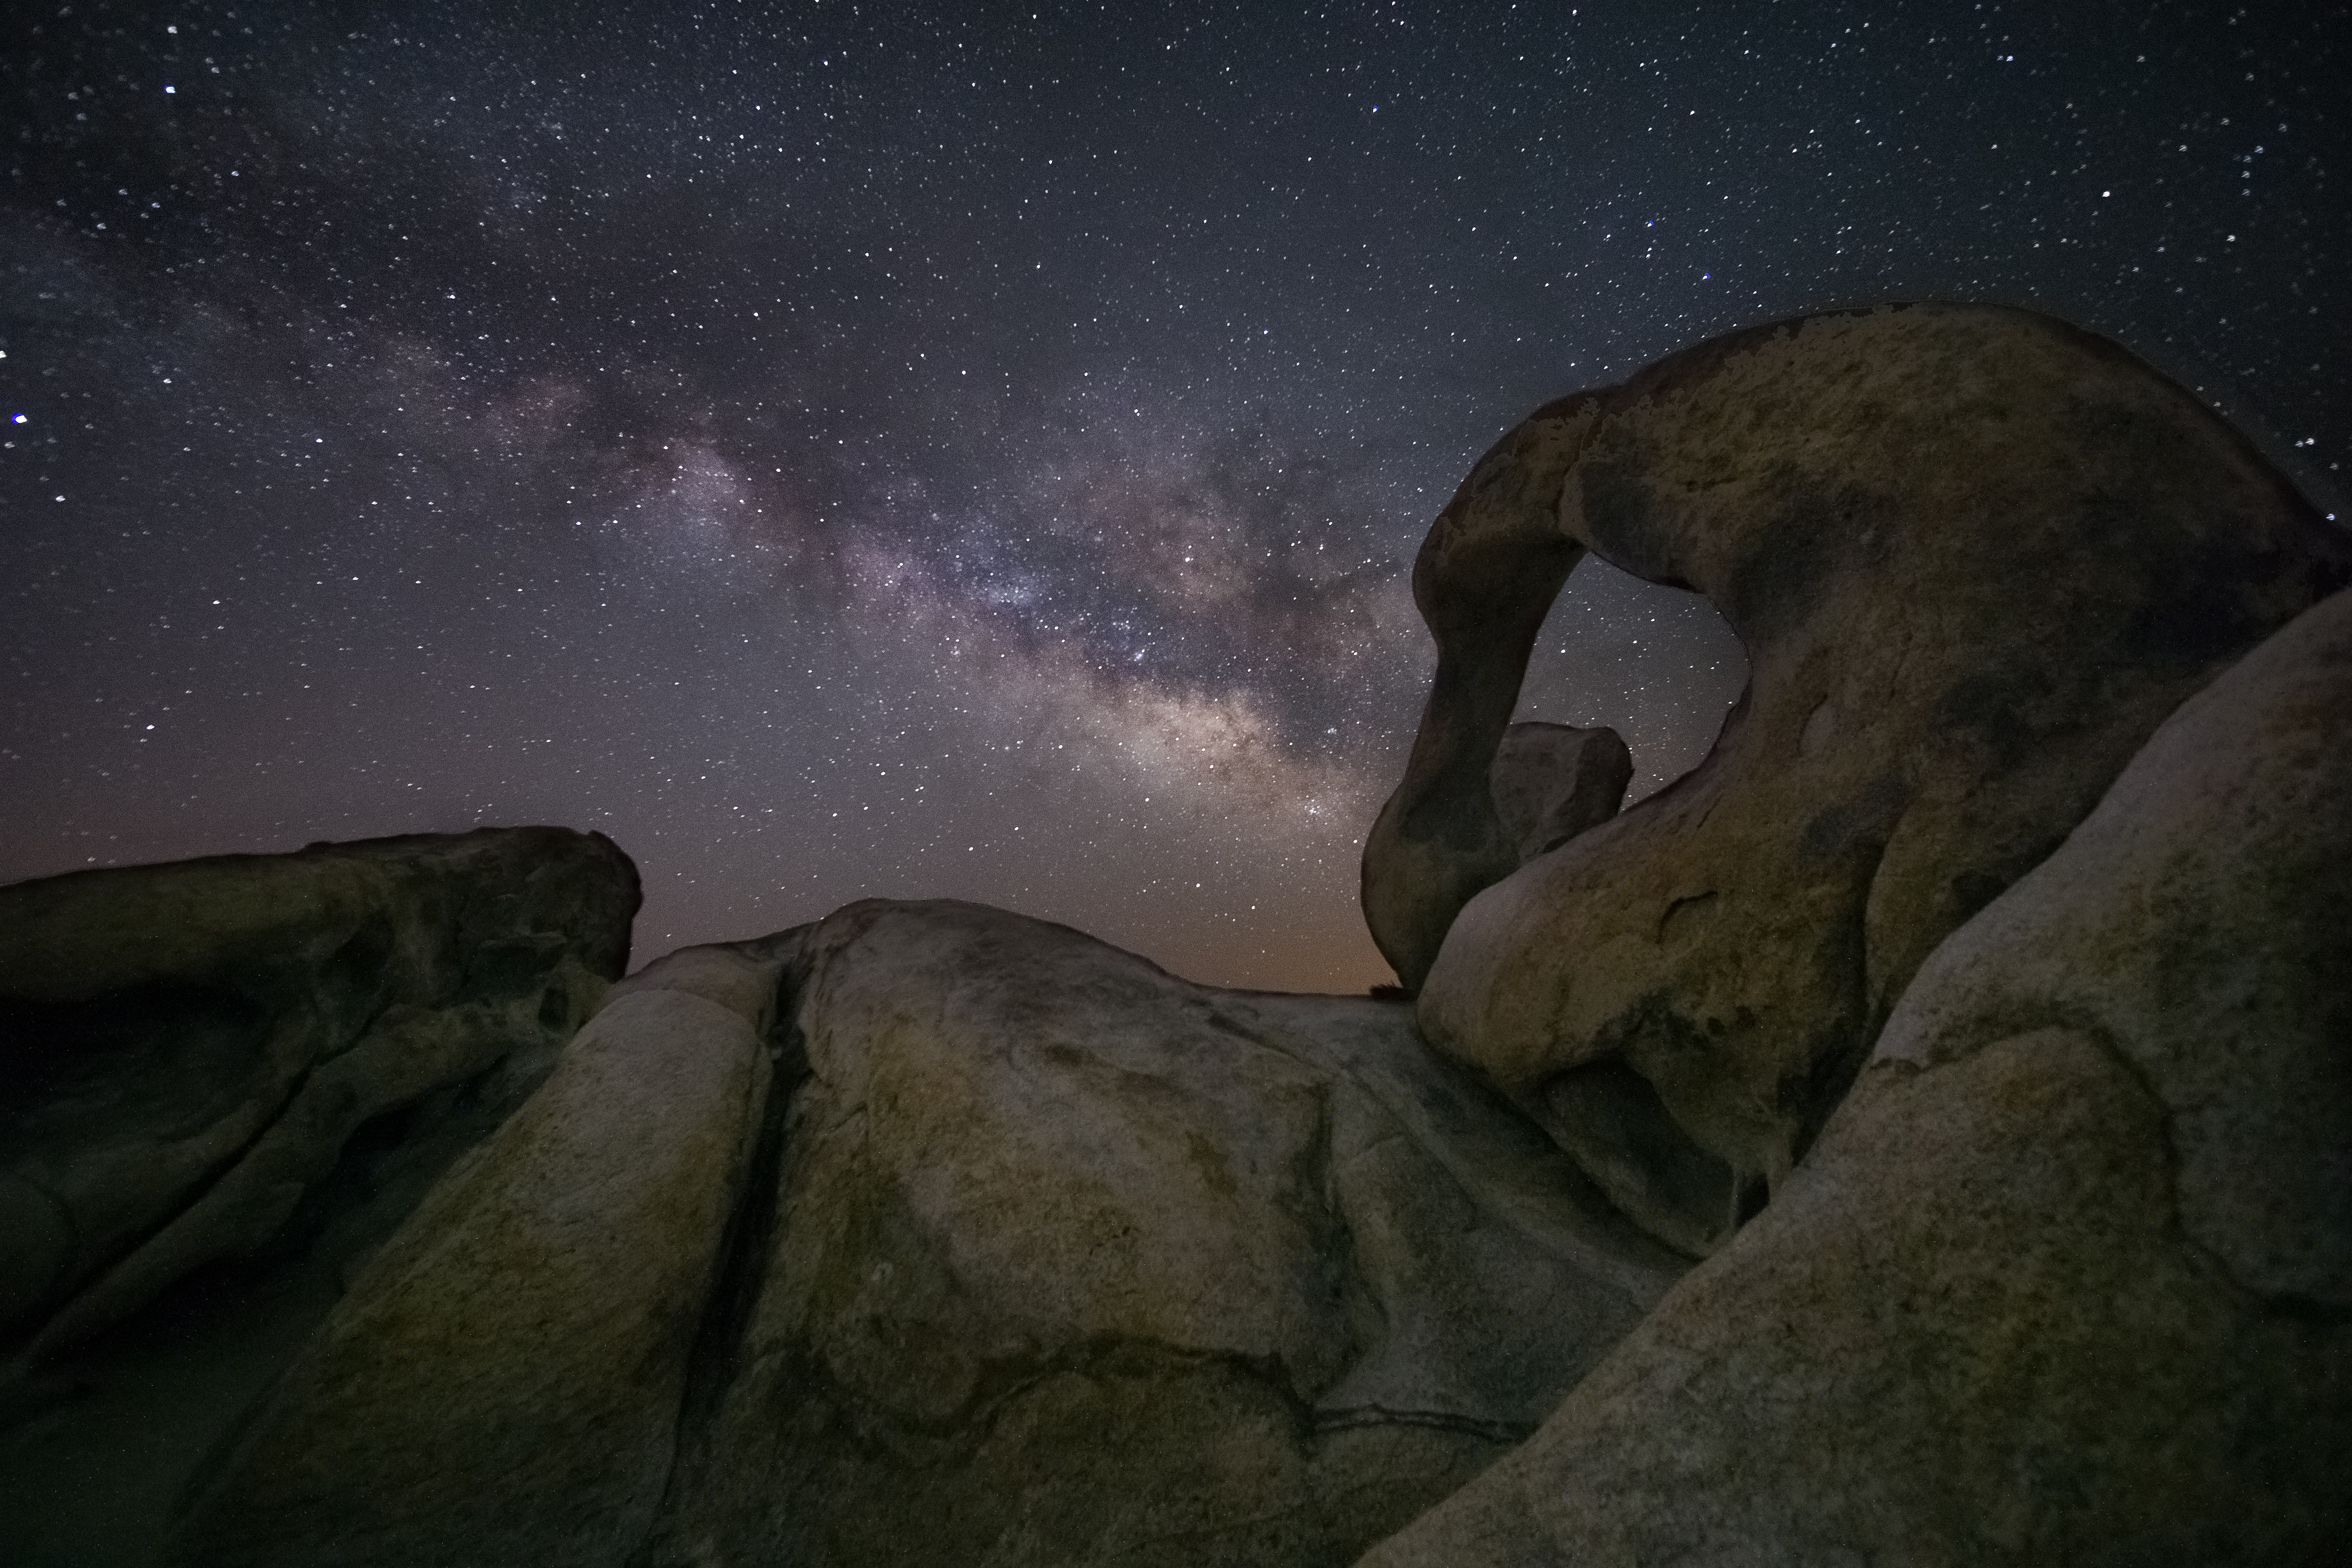
This is the best way to get your foreground into proper exposure without using light painting. I prefer to achieve foreground exposure with natural light. If I can’t or if I want to highlight a certain area, then I will use light painting to adjust for that.
Just like any photography subject, night photography take a lot of practice to master. It is probably the most time-consuming genre of photography because of the needed conditions and the times of year that certain elements of the night sky are available to shoot.
Keep these necessities of night photography in mind the next time you venture out into the wee hours of the morning. They will help you take your night photography to the next level.
 About the author: When David Johnston isn’t leading photography workshops and tutorials or hosting his popular photography podcast, Photography Roundtable, he can be found traveling the world taking photos to awe and inspire his viewers. David has a passion for sharing his knowledge of photography and has many educational offerings designed to help photographers improve their work. Visit his website at https://www.davidjohnstonart.com/.
Have something to add to the story? Leave a comment or email editor@outdoorphotographyguide.com.
Which Nikkor lense should I use with my Nikon D7500 to get the best result? Is it possible to venture with 18-55 mm ED VR 3.5 Nikkor lense ?
soon as Im accepted to the gold members facebook page I can do these challenges
Great tips. Thank you. I am doing a night flight down towards Antarctica in April to photograph the Aurora Australis. Are there any tips for that kind of photography?
Very informative. Learned much. Thanks .
As far as I'm concerned, the author makes every mistake in the book. Sure, he gets good photos but with the double-exposure in the foreground, the picture comes out as fake...looking like an HDR image rather than a natural photograph. If you like that kind of shot, then fine; go for it. Now, I'd like to discuss my own means but honestly I don't live near an area even remotely dark enough for such shooting, though I could possibly arrange something reasonably close without driving too far despite the fact that I live on the Northeast Corridor.
<strong> Ticket 18407 Im experimenting with night photography as part of my growth. What size lens would you suggest? I have a 50mm with a1.4f but Ive been told a 24mm is better? Your thoughts?