Welcome to your second assignment in the Outdoor Photography Guide Challenge! This challenge is all about learning to creatively use exposure. A camera sensor cannot record the same range from light to dark as our eyes can perceive. By getting creative with this technological limitation, one can create compelling photos that challenge viewer perceptions.
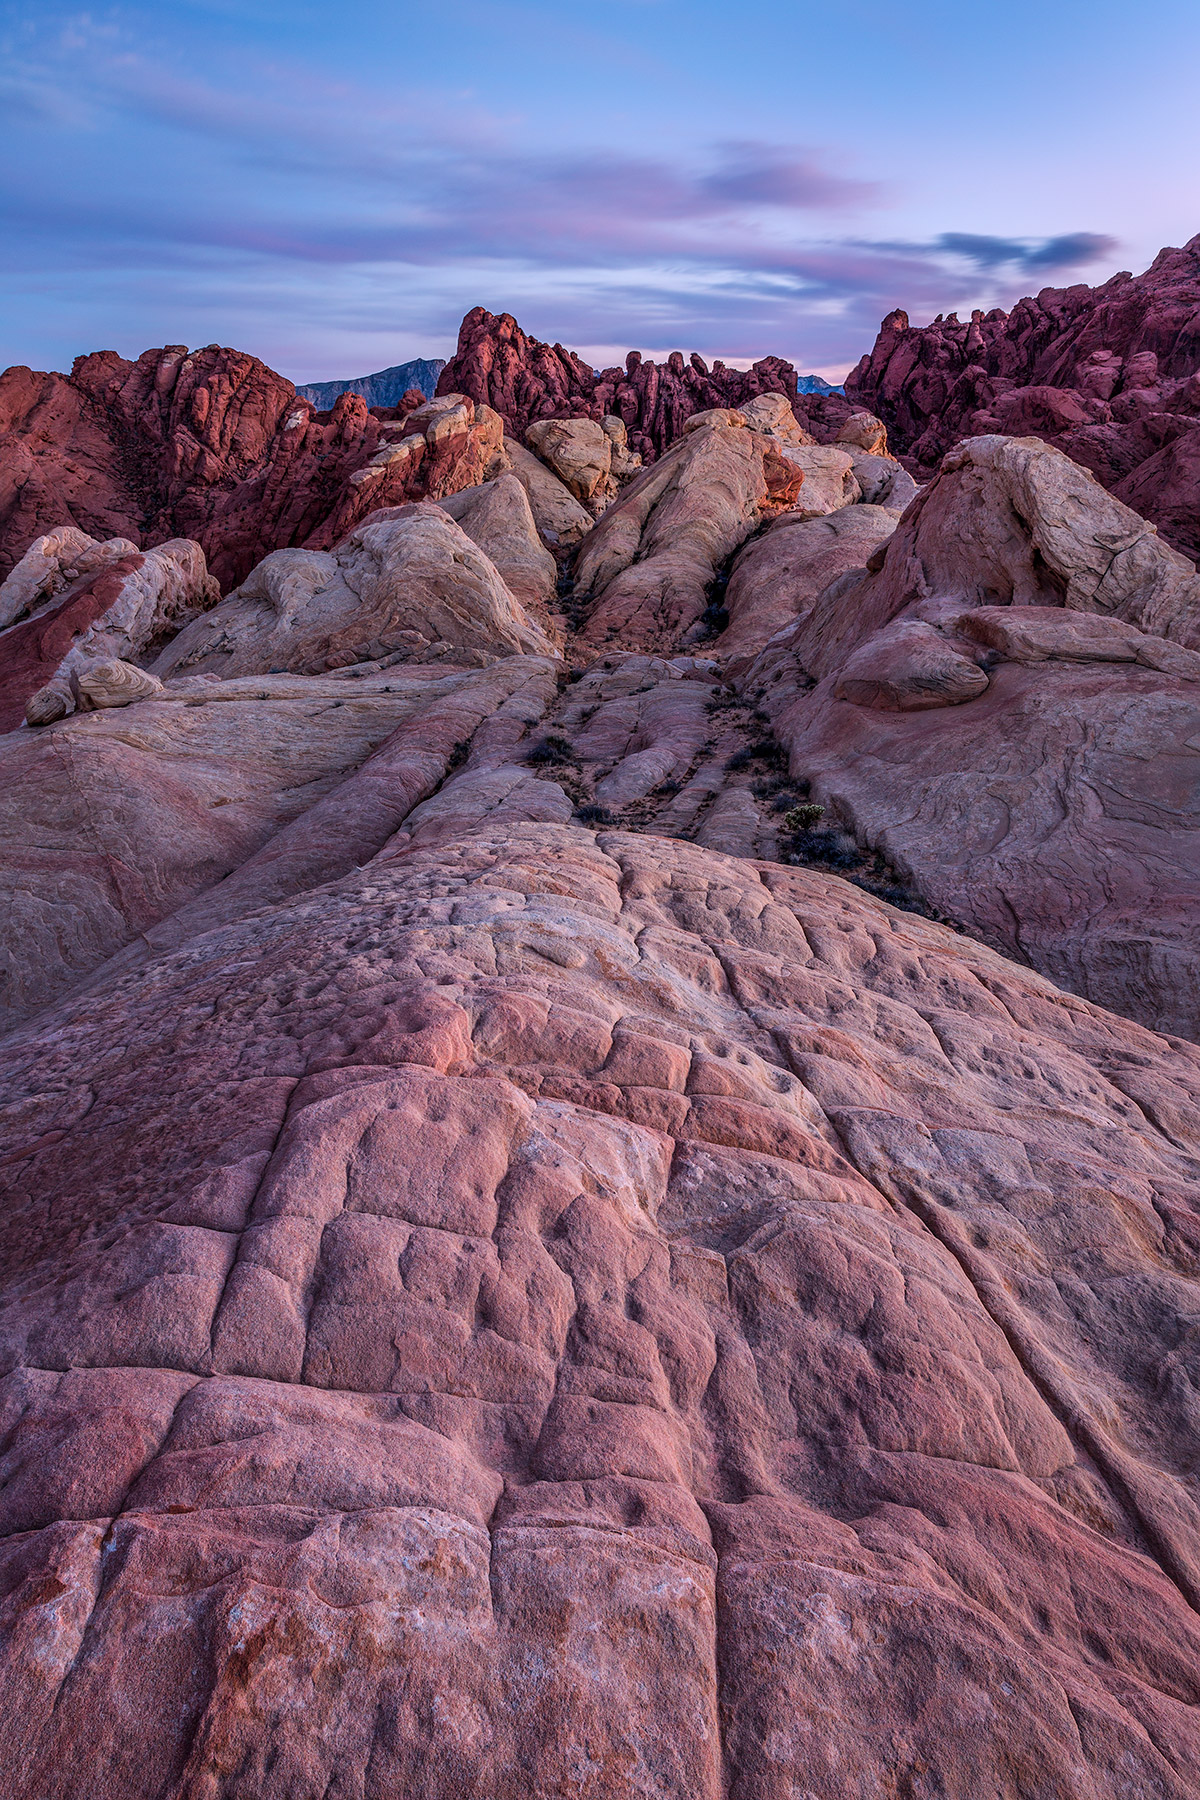
Sometimes, a “proper” exposure is called for, one that shows a histogram with a fat bell curve in the middle. Such was the case with this twilight photo.
But never forget that “sometimes” doesn’t mean “always.” If you really want to stand out as an artist, you need to learn that a “proper” exposure does not exist, and that it is not always desirable to “get it right.” Exposure is just another arrow in my quiver of creative expression, a variable that I can alter to achieve my artistic goals.
I especially enjoy making dramatic and moody images that conventional wisdom would call “underexposed,” with just a hint of light piercing the gloom. I discuss below how alternative exposures can be used to powerful create effect.
For this week’s Challenge, we want to see your creative use of exposure. Although I have a personal bias towards underexposure, we’d love to see some artistically overexposed photos as well!
The reduced dynamic range of cameras—compared to human eyes—means that many scenes and subjects will look different when photographed than they appear in real life. For this photo, the leopard was spotlit by early morning sunlight filtered through some trees. By setting my exposure to capture the sunlit leopard and preventing the highlights of its fur from being overexposed, the animal’s surroundings are rendered almost black, although they appeared much brighter to the eye.

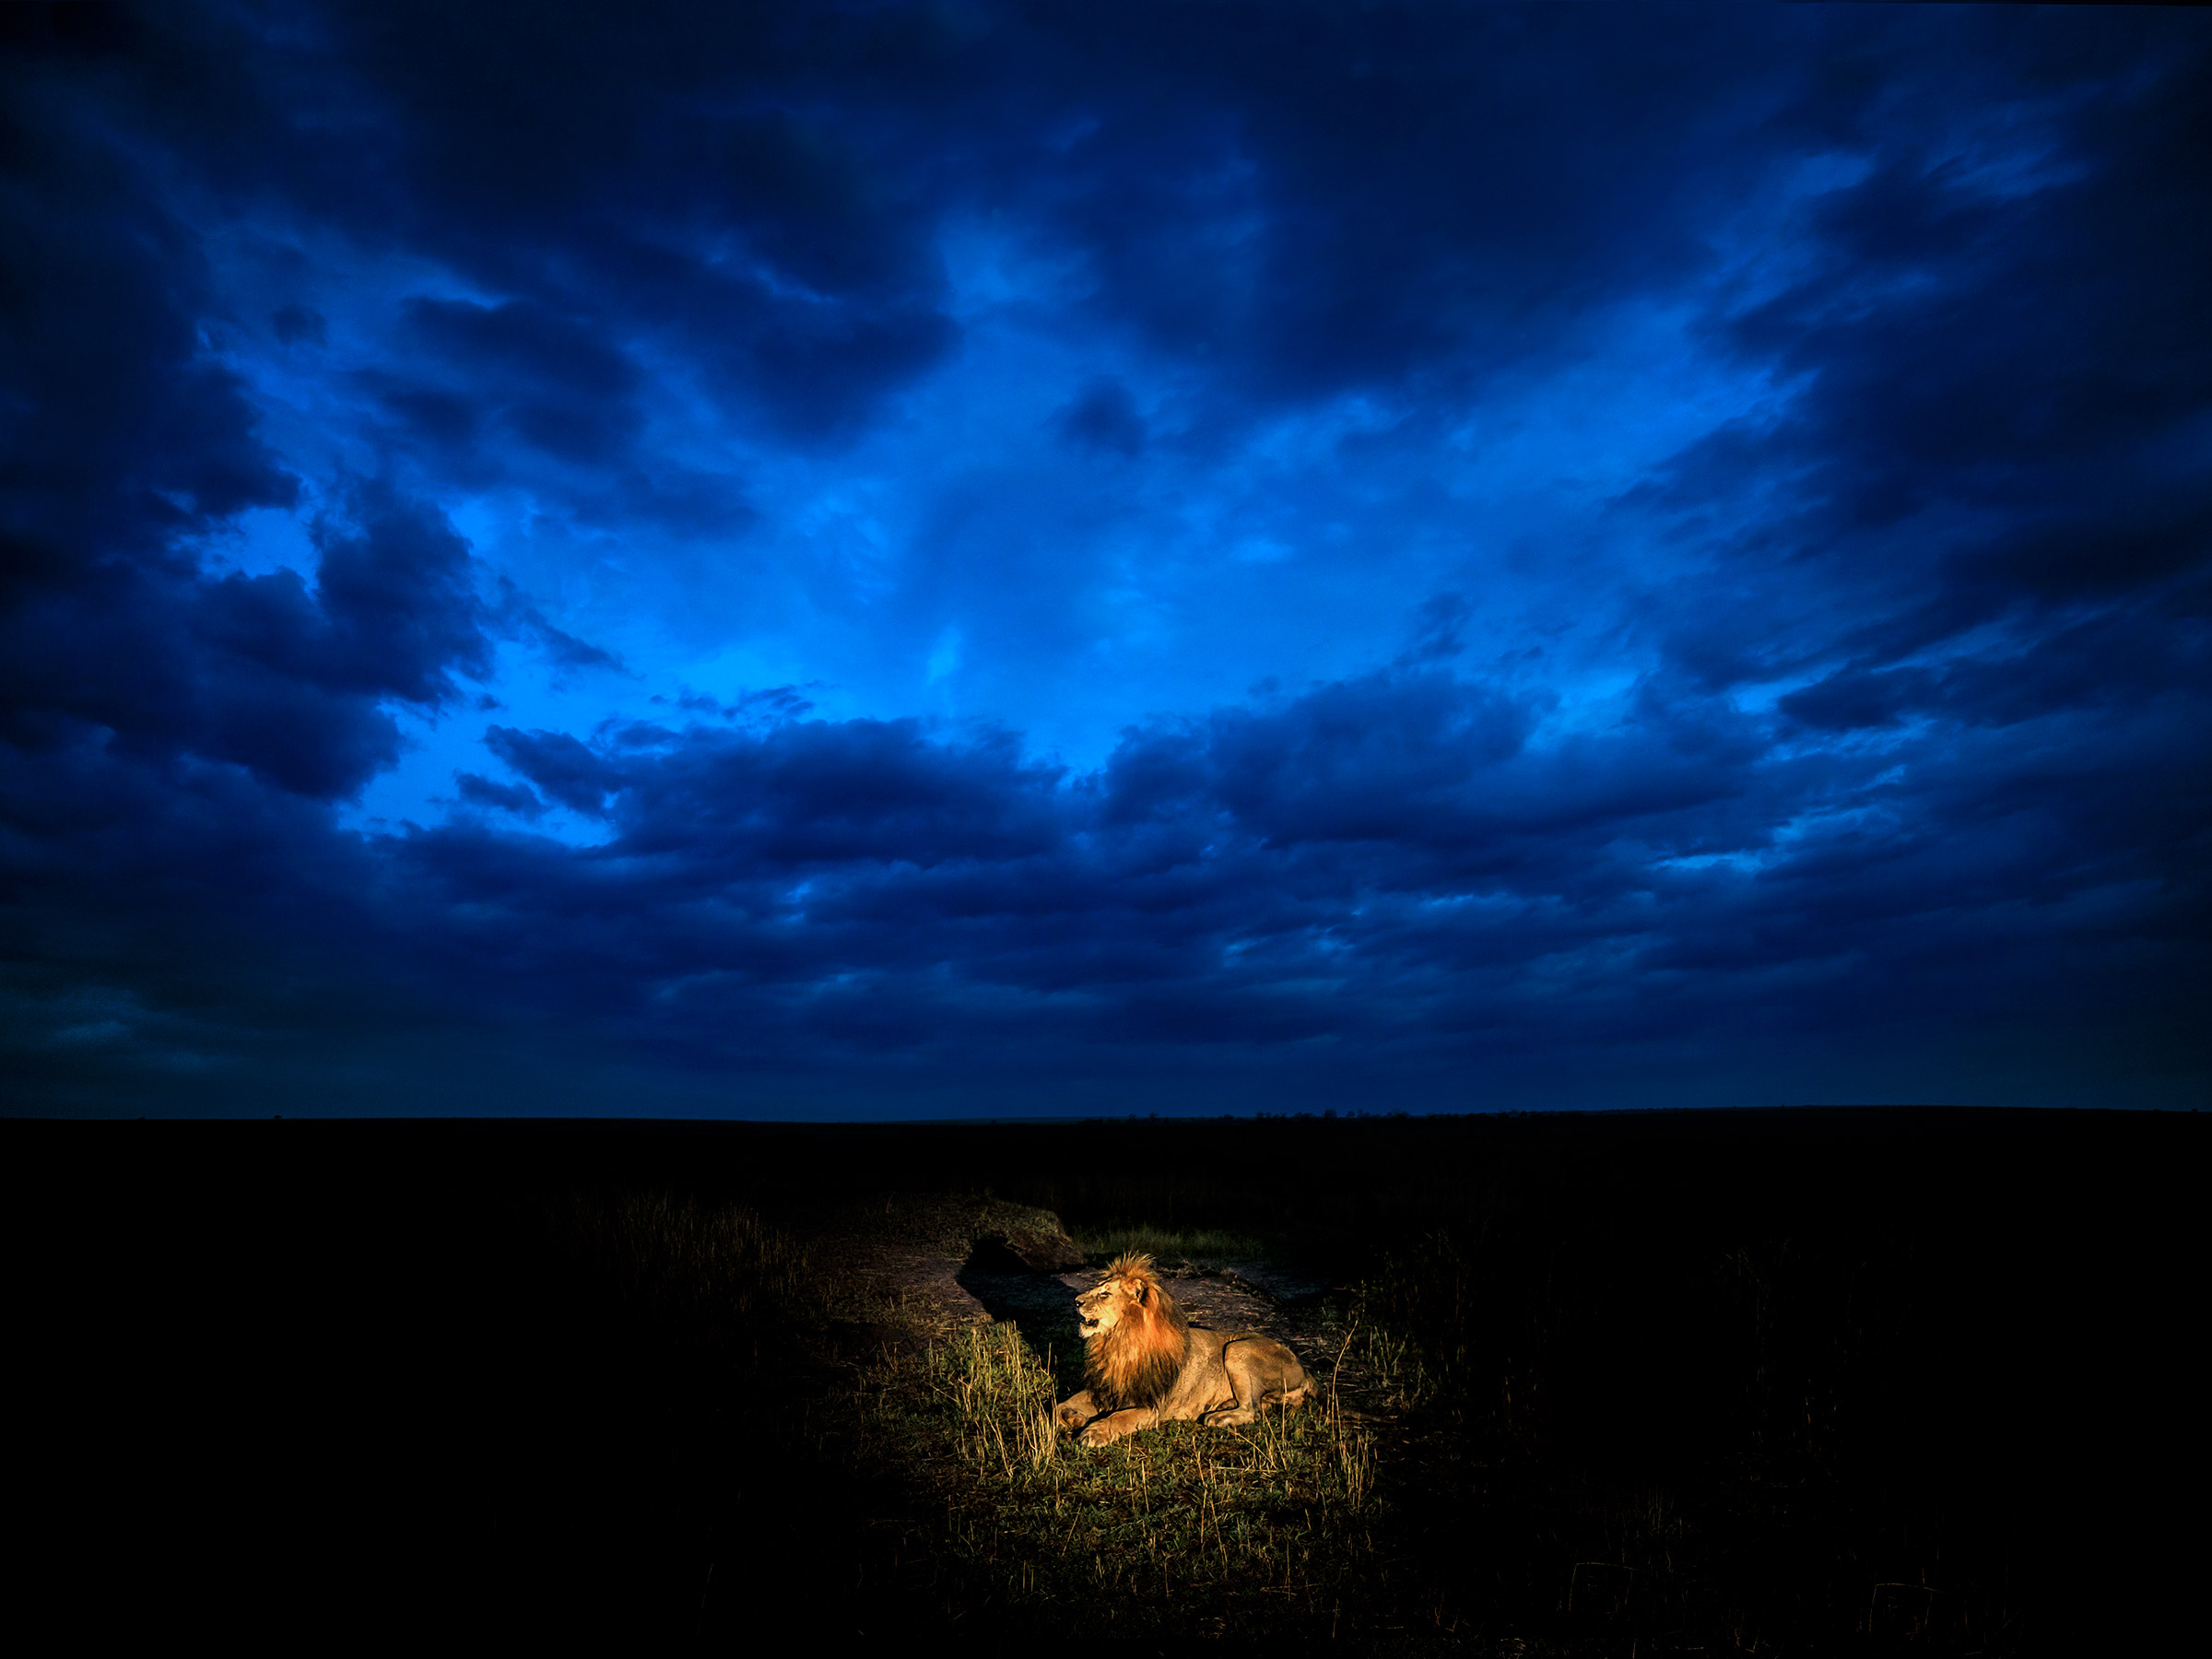
For this wide-angle lion photo below, I chose a dark exposure (-3 exposure compensation) to capture the gloominess of the stormy twilight sky, and to let the landscape fall into shadow. I used a flash to selectively illuminate the lion in the grass.
Silhouettes are one of my favorite “unseeing” techniques, and are the result of extreme underexposure. A silhouette is basically a dark outline of someone or something juxtaposed against a lighter background. Alternatively, parts of a scene that go dark are often referred to as being “in silhouette.”
Note that as the dynamic range of modern digital cameras continues to improve, it is becoming increasingly difficult to render shadows as silhouettes even when taken in extreme lighting conditions. When processing the image file, adjustments to overall exposure and contrast, and perhaps even selective darkening of shadows, might be necessary to achieve the desired silhouette look. Silhouettes were much easier to capture in the old days of color slide film!
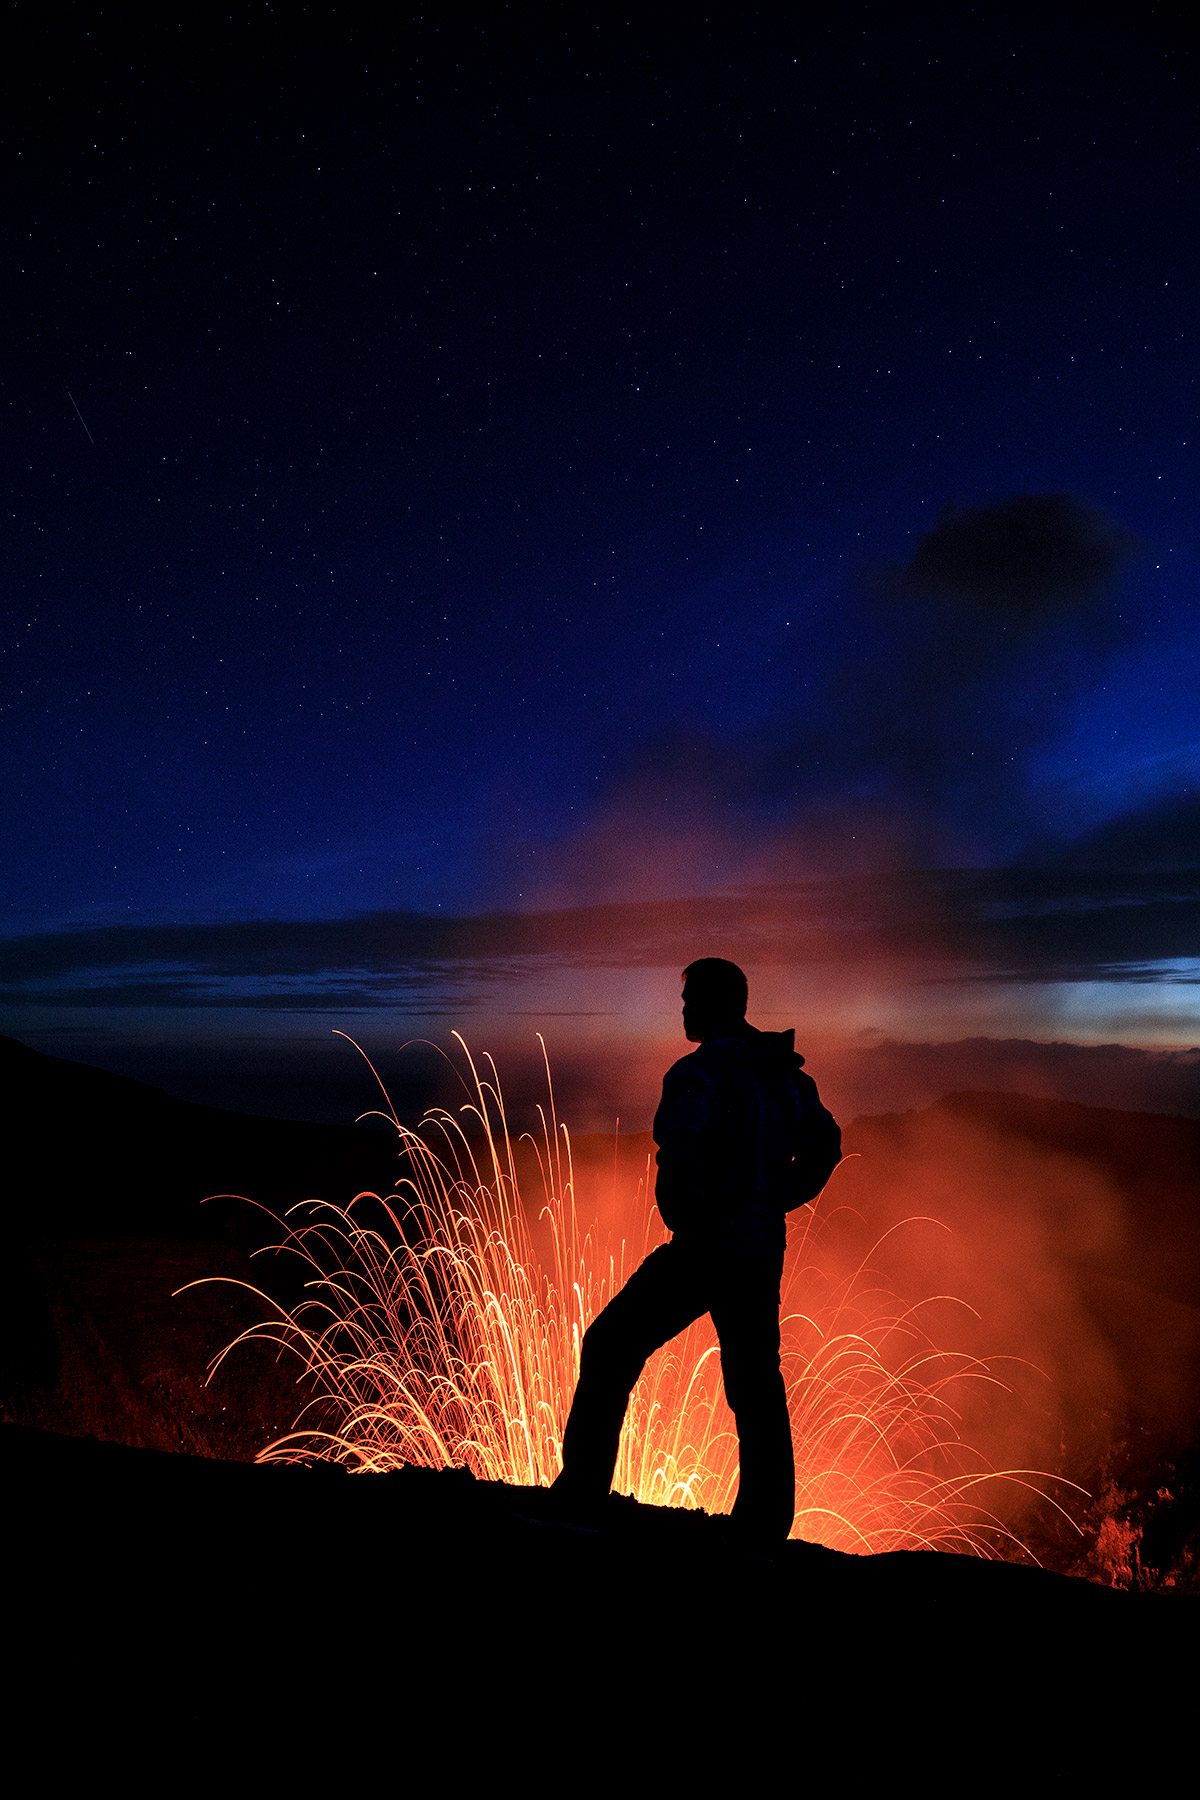
For this self-portrait, I stood on the crater rim of a volcano, positioning myself where I knew the volcano would hurl magma bombs into the air (this particular volcano is fairly consistent). A bright explosion rendered me in silhouette, adding drama and visual interest to the composition.
For this portrait of a female lion backlit by the rising sun, I chose an extremely dark exposure (-3 exposure compensation) to render the lion in almost complete silhouette. Only her fur is exposed, creating an effect that is known as rim lighting, which occurs when a subject with translucent edges (such as hair, feathers, or fur) is put directly in front of a bright light source. The effect was further enhanced by adding contrast and darkening the overall exposure during the raw conversion process.

Remember to join the Photo Challenge Facebook Group to share your shots from this week’s assignment!
About the author: Managing Editor of Outdoor Photography Guide, world-renowned professional photographer and Tamron Image Master Ian Plant is a frequent contributor to leading photo magazines including Outdoor Photographer, Popular Photography, and Landscape Photography Magazine. You can see more of his work and download his free photography how-to eBook “Essential” at www.ianplant.com.
Ready for your next assignment? Here’s what’s coming up next:
Assignment 1: Lenses
Assignment 2: Exposure
Assignment 3: Perspective
Assignment 4: Focus
Assignment 5: Shutter Speed
Assignment 6: Supplemental Light
Reminder that backlighting or limited lighting of background can be very exciting. Great photos! Thank you for sharing.
I am a newbe. I really appreciate the range of cameras explained in a clear and easy to understand format