Human vision sees the world with considerable depth of field, allowing us to simultaneously perceive everything from close to far away as sharply in focus (although some of us need glasses, contact lenses, or corrective laser surgery to realize our fullest vision potential). Actually, we don’t really see everything with such perfect sharpness all at once; rather, our eyes rapidly sample multiple parts of the scene, and then our brains assemble a composite “image” which forms the basis of our perception (cool stuff, really, but well beyond my area of expertise or the scope of this challenge).
By using small apertures, especially with wide-angle lenses, it is usually possible to create photos that appear sharply focused throughout the picture frame. Although this seems to closely approximate human visual perception, this “deep focus” effect can have an important impact on the way viewers perceive your photos. At the other extreme, using large apertures and narrow depth of field allow you to create “selective focus,” which can render photos with a distinct abstract look.
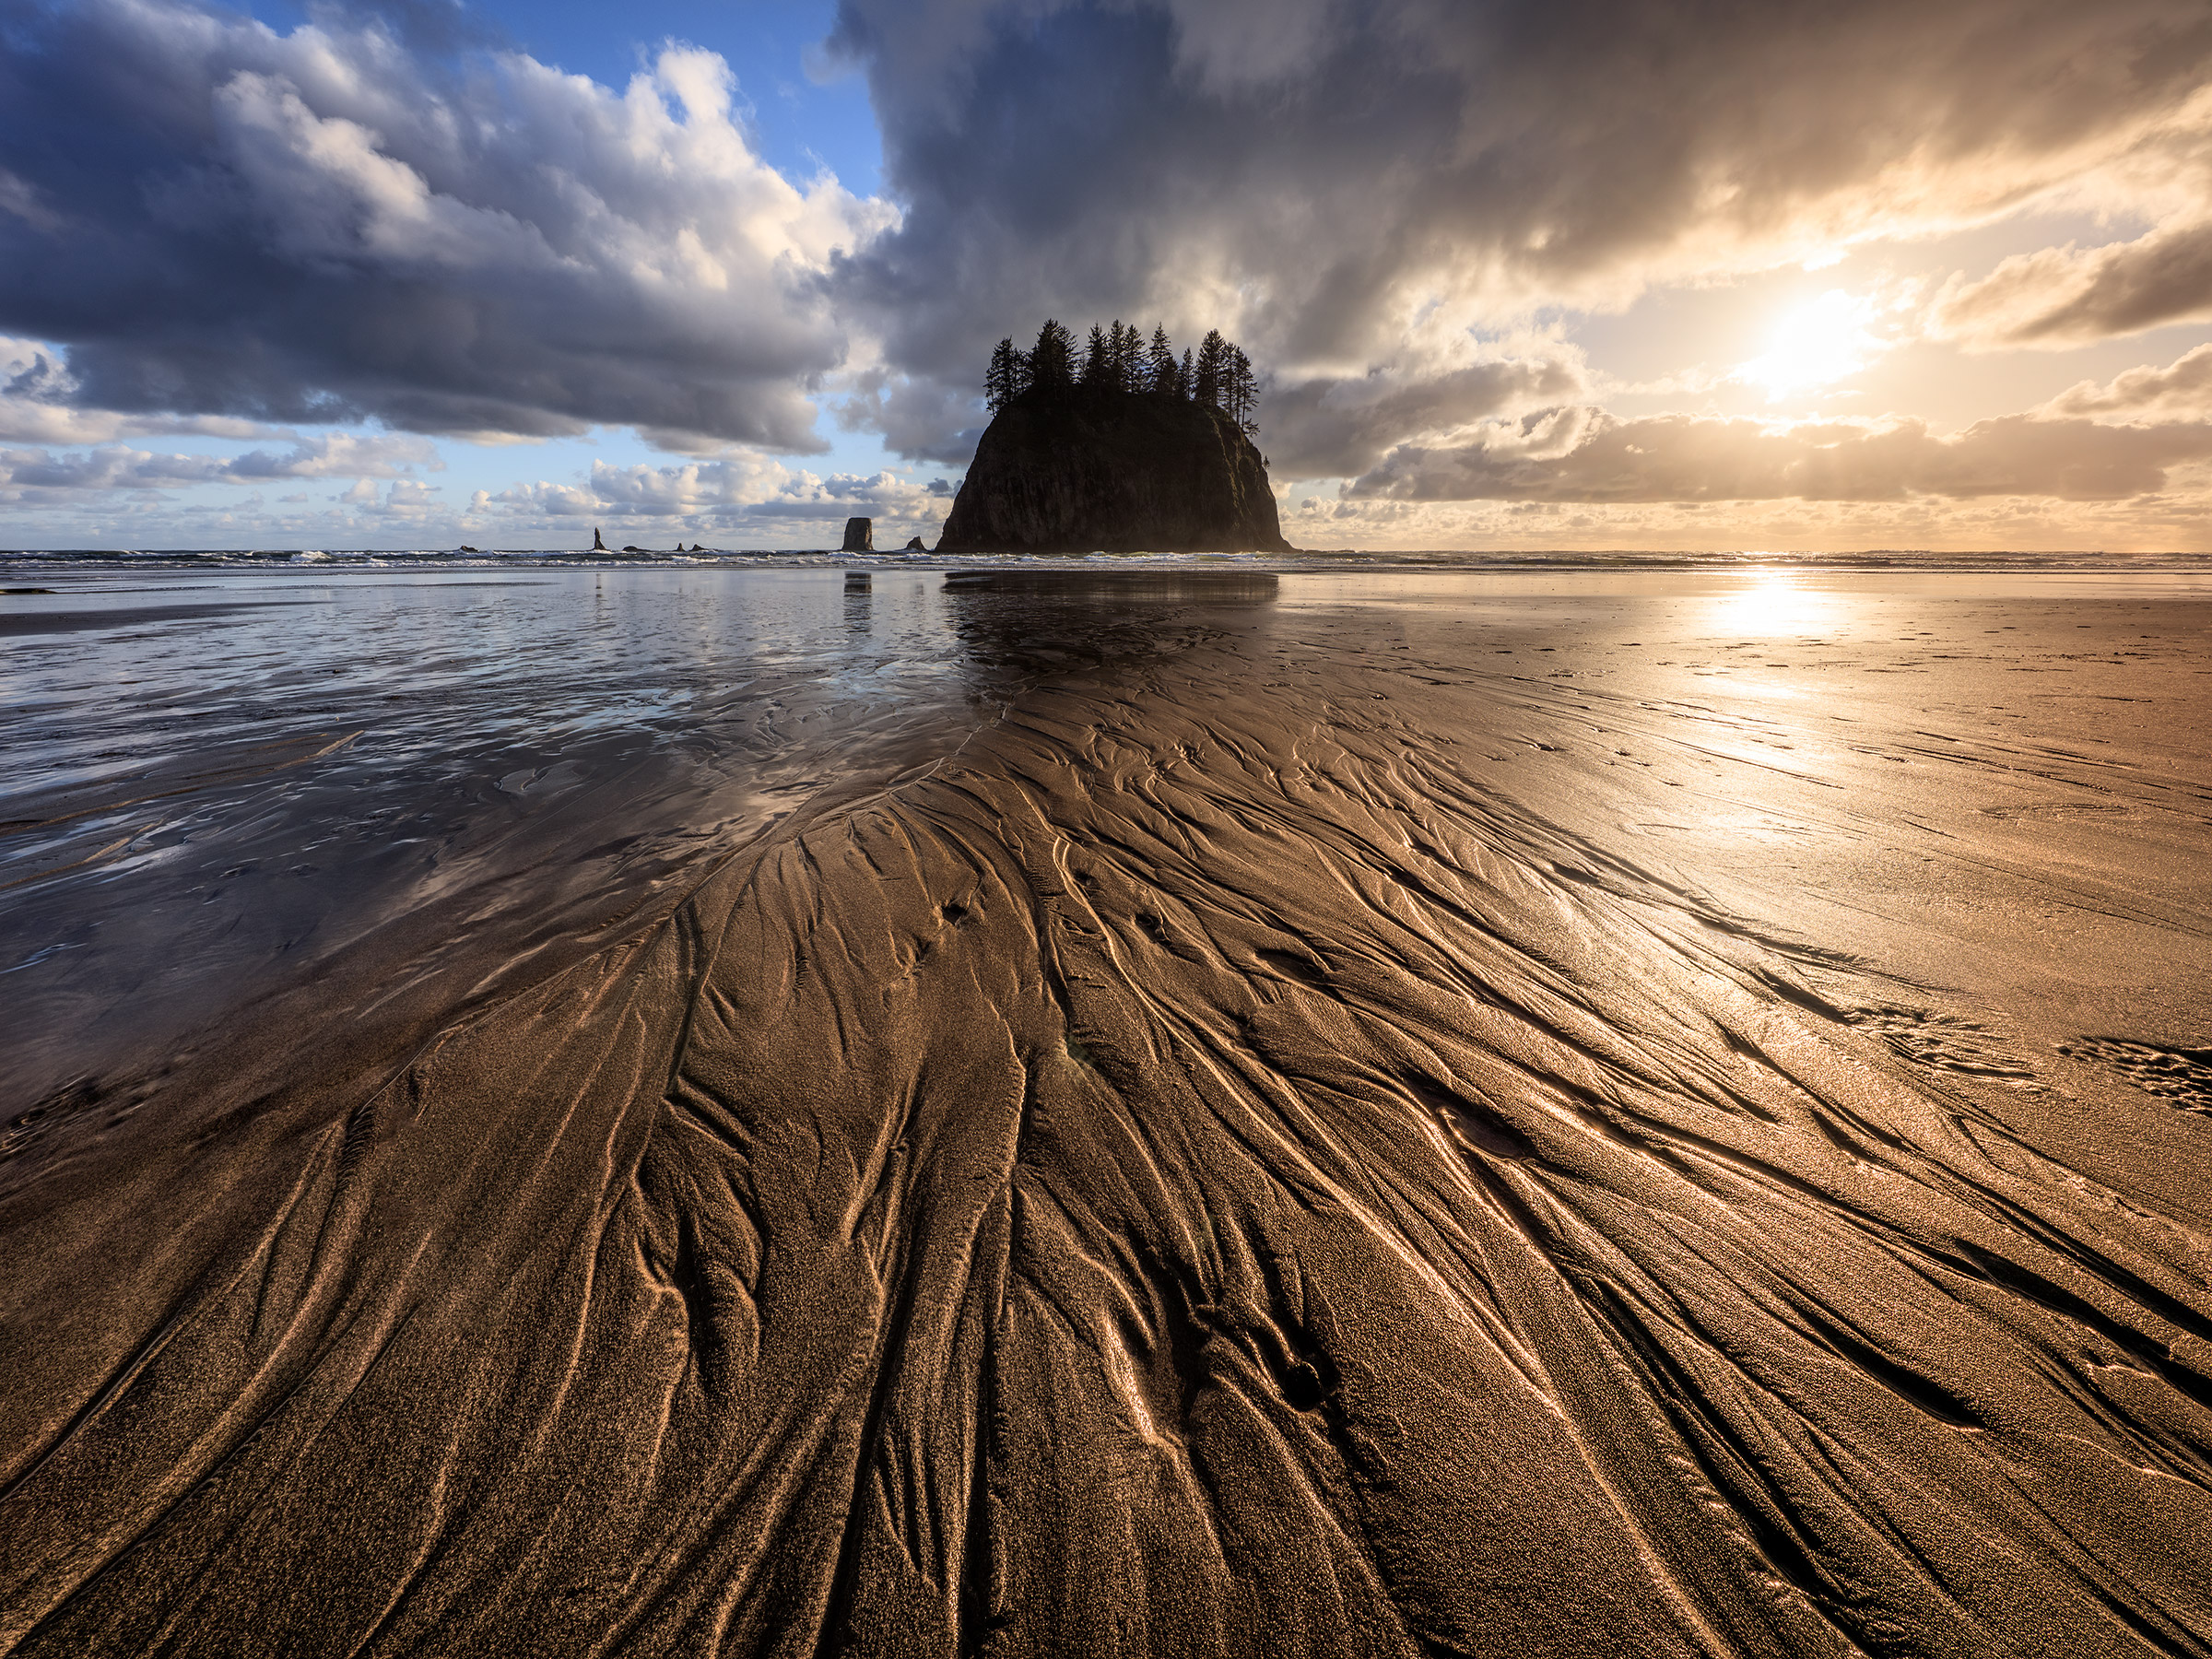
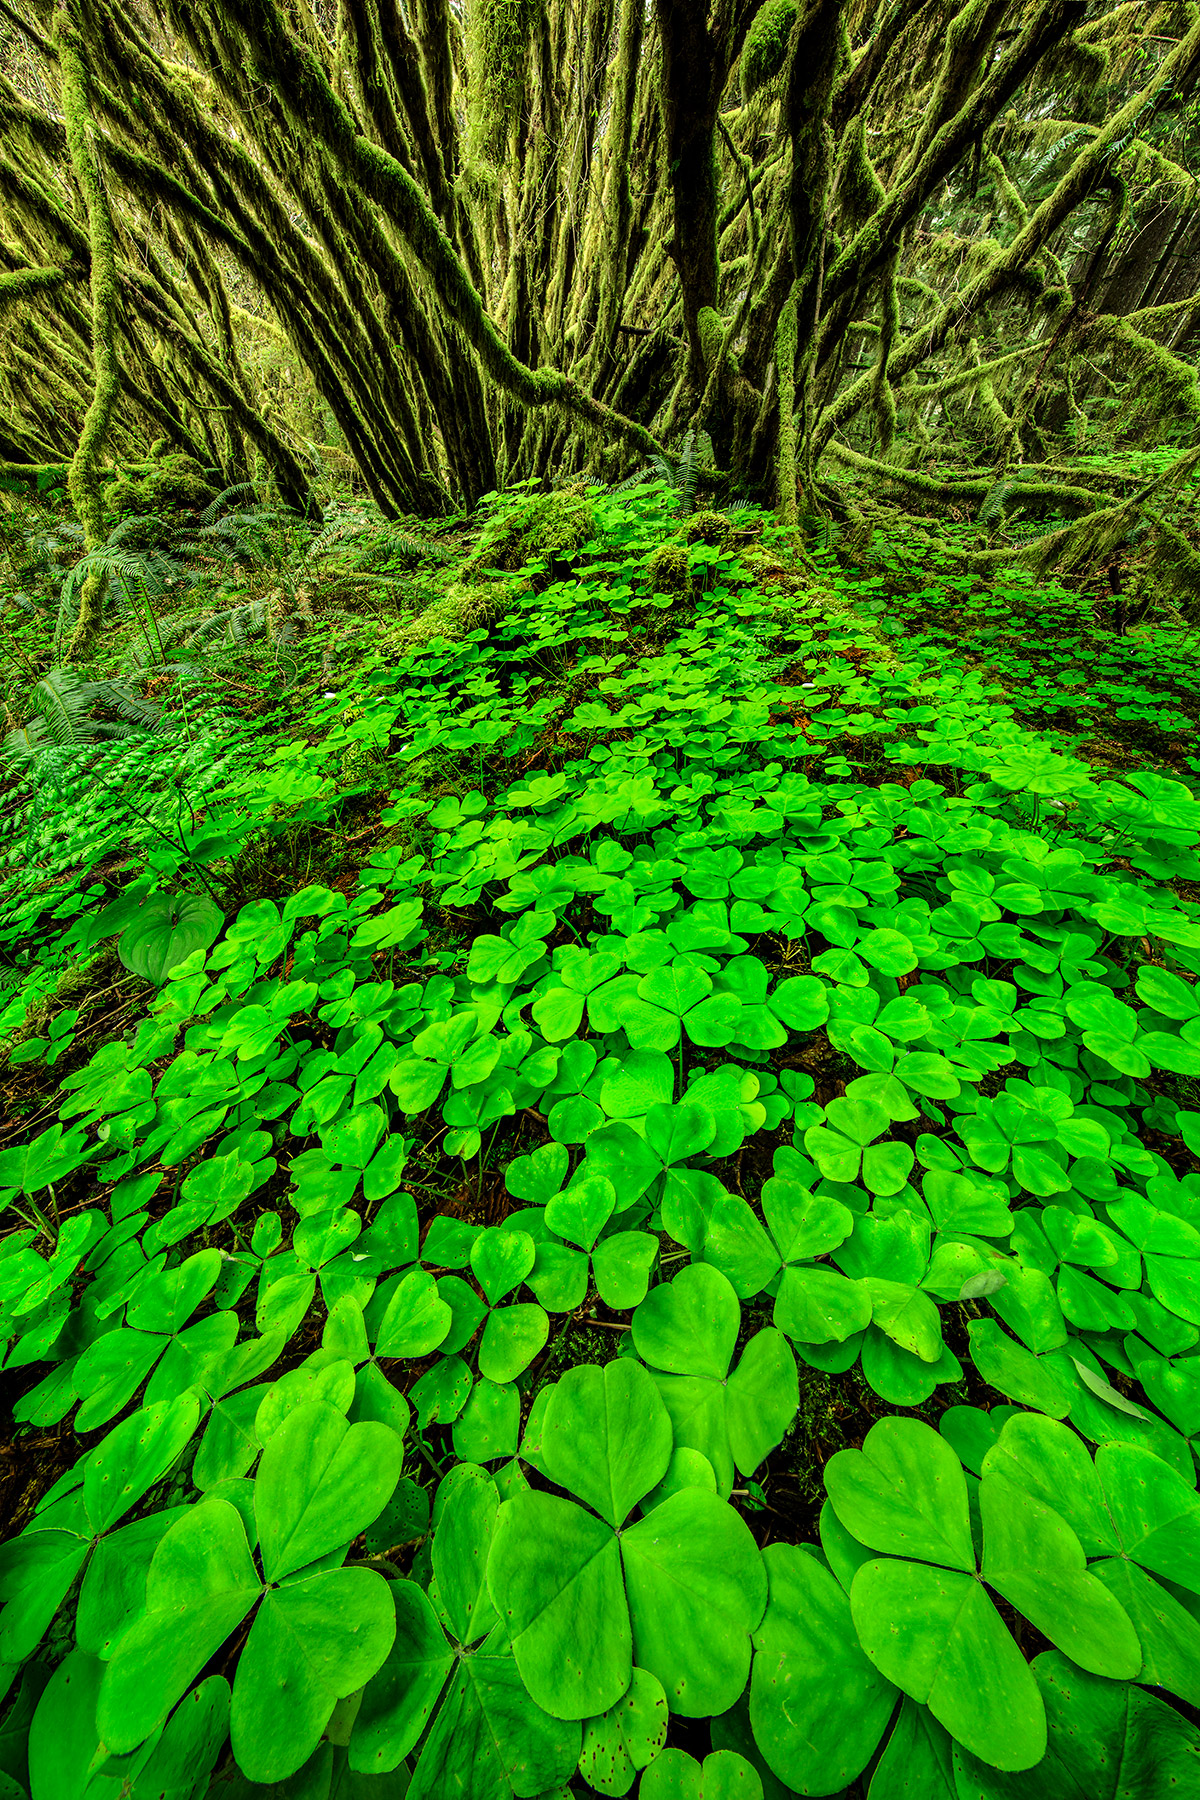
Although perfect depth of field approximates the way most scenes appear to our eyes, the effect of extreme near-far focus can creatively alter how viewers perceive a two-dimensional photographic representation of the scene. Anything that is out of focus would immediately attract the viewer’s attention, while perfect sharpness throughout focuses the viewer’s attention instead on other aspects of the photo, such as color, light, and your overall composition. For example, when I found this enchanting grove deep in the rain forest of the Pacific Northwest, deep focus allowed me to visually entice the viewer to explore the composition. Small apertures, and techniques such as focus stacking, can be used to achieve the deep focus effect (FYI: to learn more, check out my Focusing for Landscape Photography course)
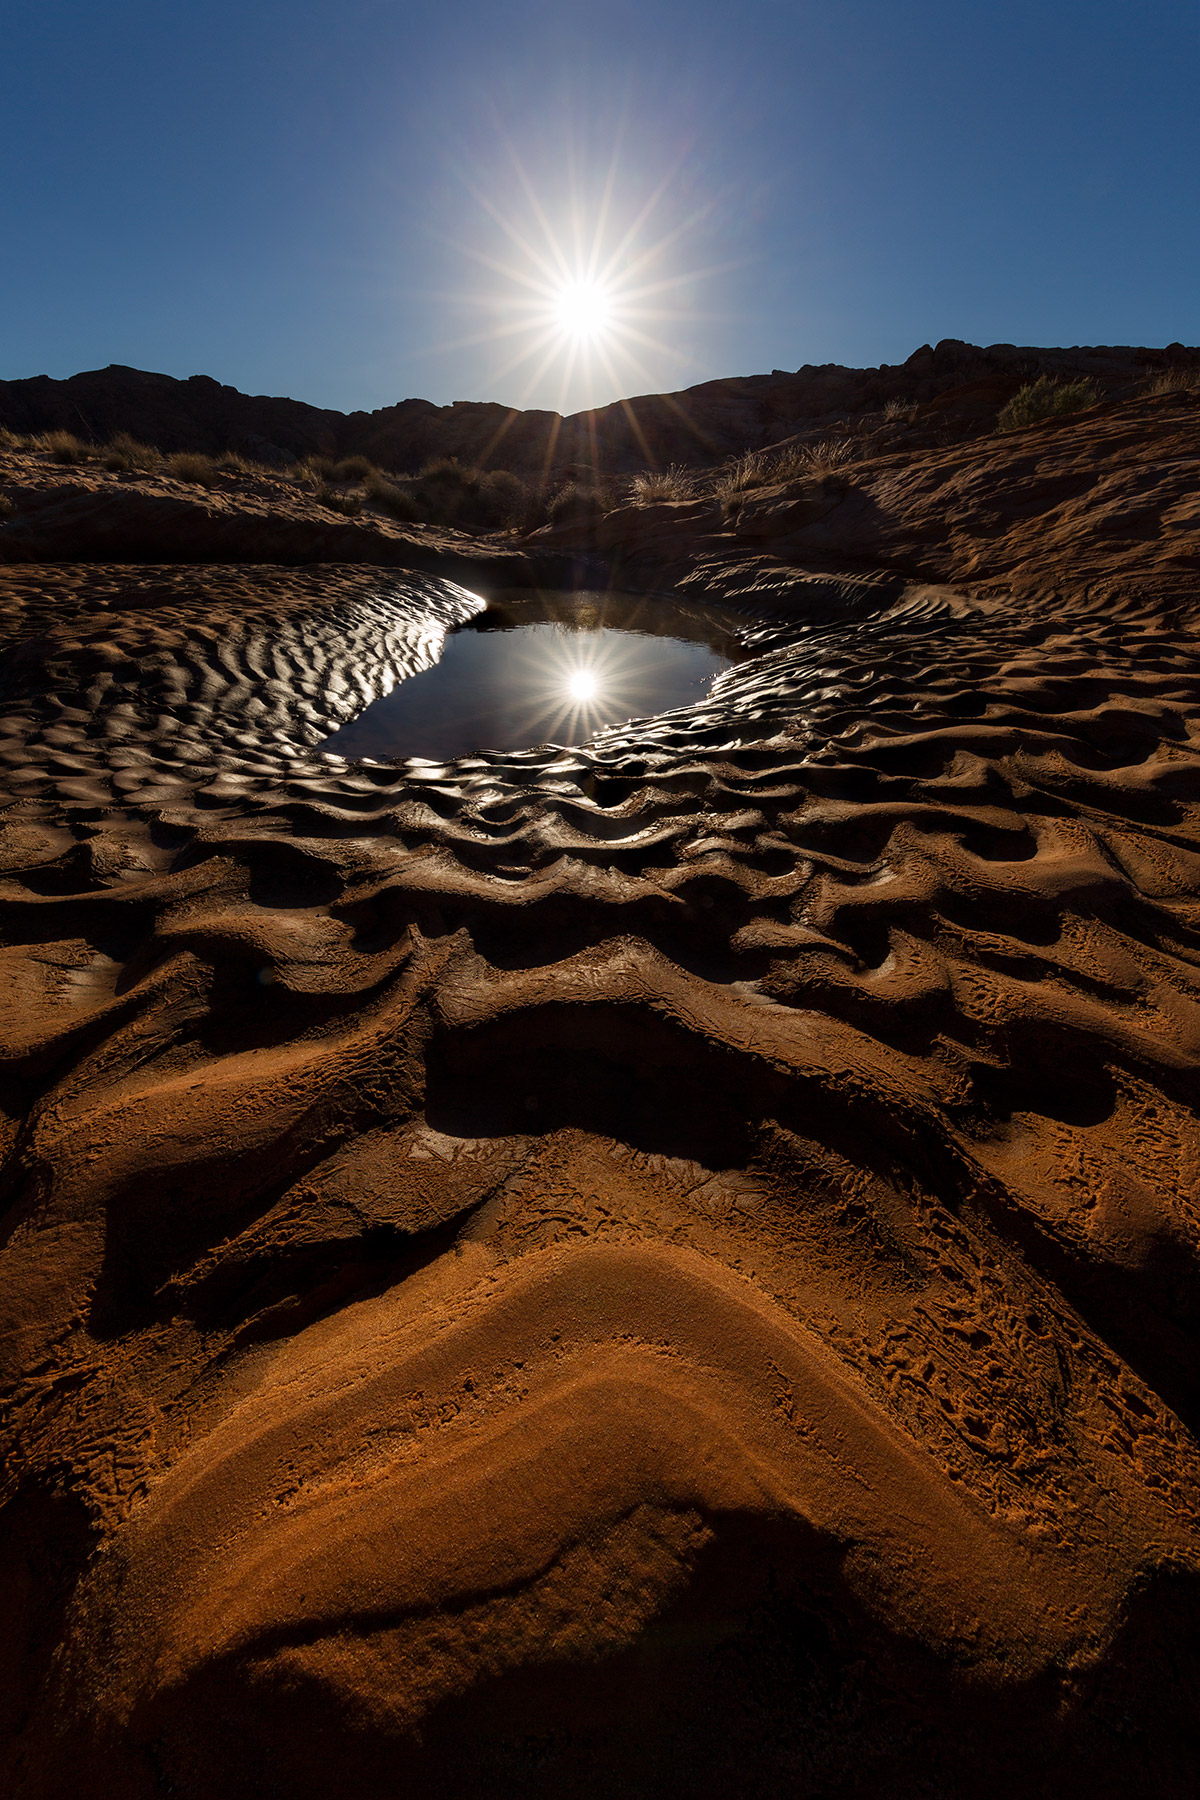
This is another benefit of deep focus: it can allow you to achieve extreme perspectives that challenge the normal perceptions of viewers. For this photo, I got only inches away from these interesting patterns in mud with an ultra-wide lens. Even though the individual ripples were at most a few inches in size, by getting extremely close to the foreground ripple, I make it appear much larger. This extreme manipulation of perspective allowed me to craft a compelling composition, one that is far more interesting than if I had backed up a few inches and captured a conventional perspective instead.
Anything that is out of focus will be perceived by the viewer as an anomaly—because it differs from the way we typically see the world—so it has the potential to immediately attract the viewer’s eye. So, you have to be extra careful when working with selective focus to ensure that out of focus areas don’t distract the viewer from important parts of the composition. Rather, you must make sure that out of focus areas work to lead the viewer to your subject and complement the overall design. If out of focus areas don’t compete for the viewer’s attention, then the eye will naturally be drawn to your sharply focused subject.
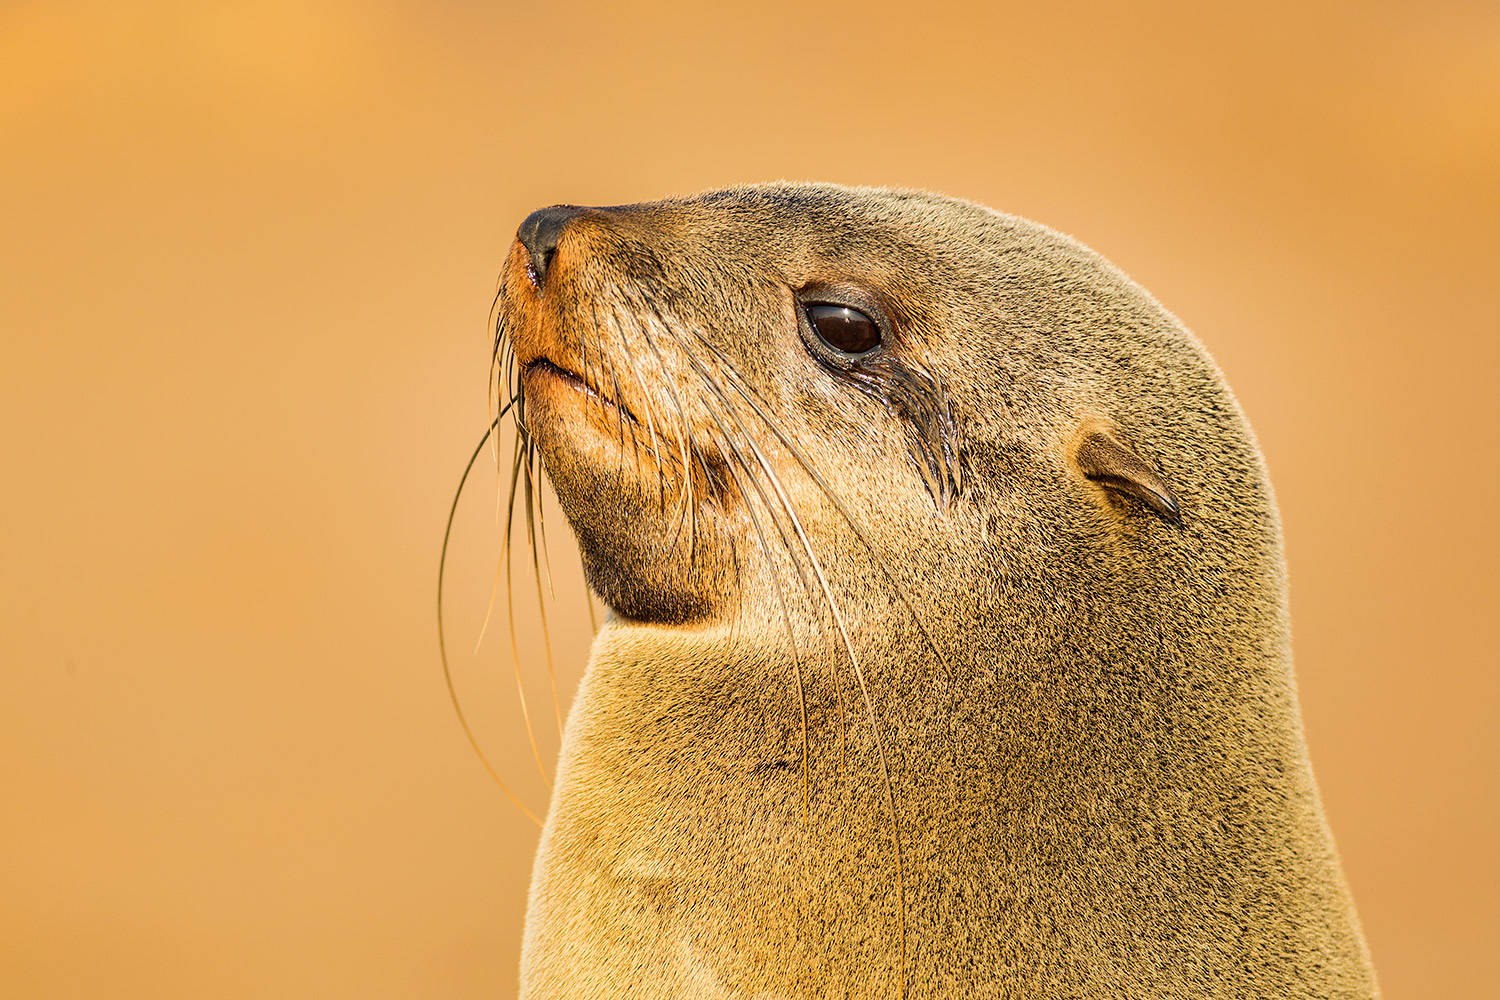
One way to achieve this is to put your subject against a clean background to maximize the selective focus effect. Background objects that aren’t sufficiently blurred will distract from your main subject, so look for ways to simplify your background. This can be as simple as finding a clean background (one that doesn’t have a lot of visual detail to begin with). You can also select a background that is farther away from your subject (the farther away the background is, the more it will be thrown out of focus). Even better, if you can get very close to your subject, as I was able to do with this Cape fur seal, then even relatively near backgrounds will be thrown out of focus. Here, the background is blurred almost completely, focusing all of the viewer’s attention on the seal and creating a more pleasing artistic look for the photo.
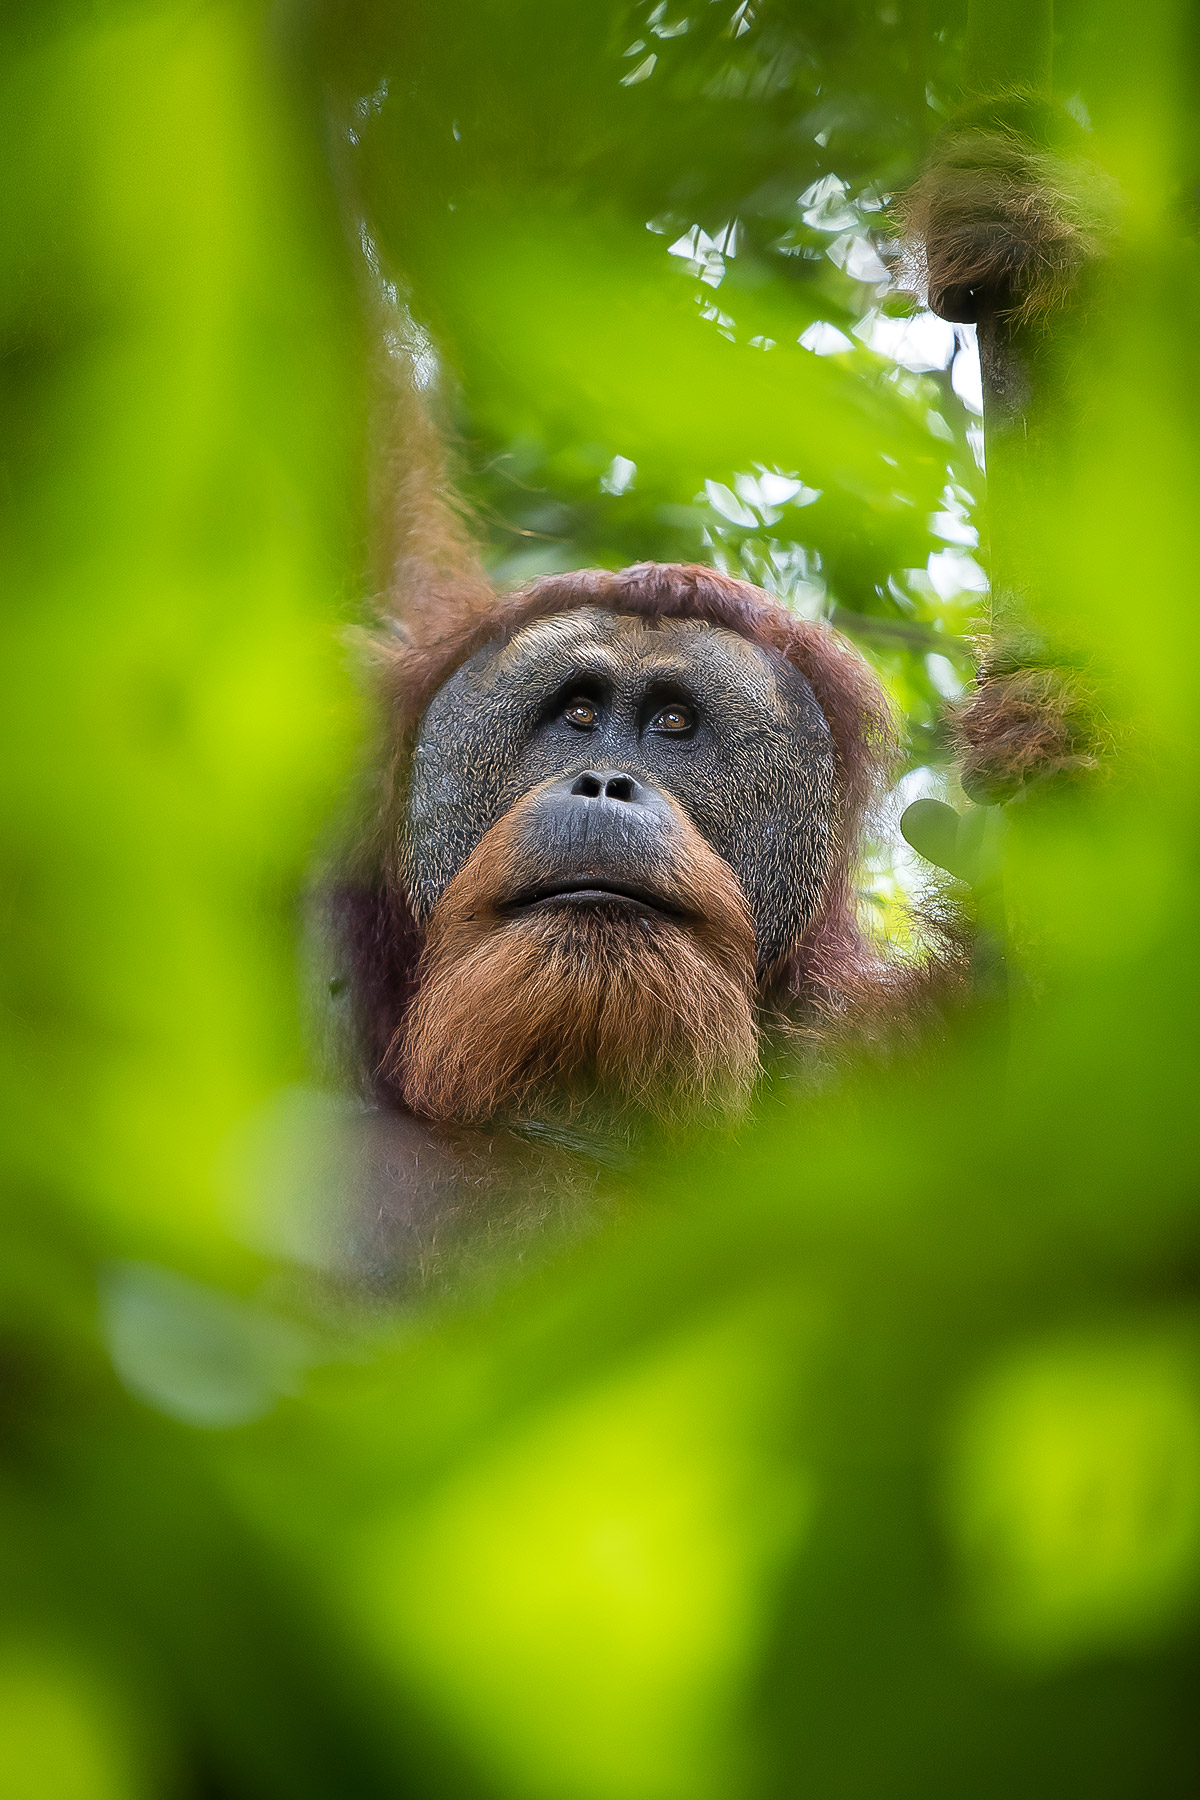
But rather than always trying to simplify my selective focus compositions, I instead look for ways to use out of focus areas creatively: they become as important to the overall design as my focused subject. For example, with this photo of a male orangutan, I got extremely close to a clump of leaves, shooting my subject through a gap in the leaves using the lens’ maximum aperture. This rendered the leaves considerably out of focus, with the appearance of an abstract wash of color that frames the orangutan.
So, this time, let’s see you get artistic with focus! As always, I want you to really push past your creative boundaries here. Don’t just try different focus effects, but think critically about how deep or selective focus forces you to change your approach and way of seeing the world. Good luck!
About the author: Managing Editor of Outdoor Photography Guide, world-renowned professional photographer and Tamron Image Master Ian Plant is a frequent contributor to leading photo magazines including Outdoor Photographer, Popular Photography, and Landscape Photography Magazine. You can see more of his work and download his free photography how-to eBook “Essential” at www.ianplant.com.
Ready for your next assignment? Here’s what’s coming up next:
Assignment 1: Lenses
Assignment 2: Exposure
Assignment 3: Perspective
Assignment 4: Focus
Assignment 5: Shutter Speed
Assignment 6: Supplemental Light
Thus enjoying the Travel and Mastering Photography courses. Plan to order other classes...