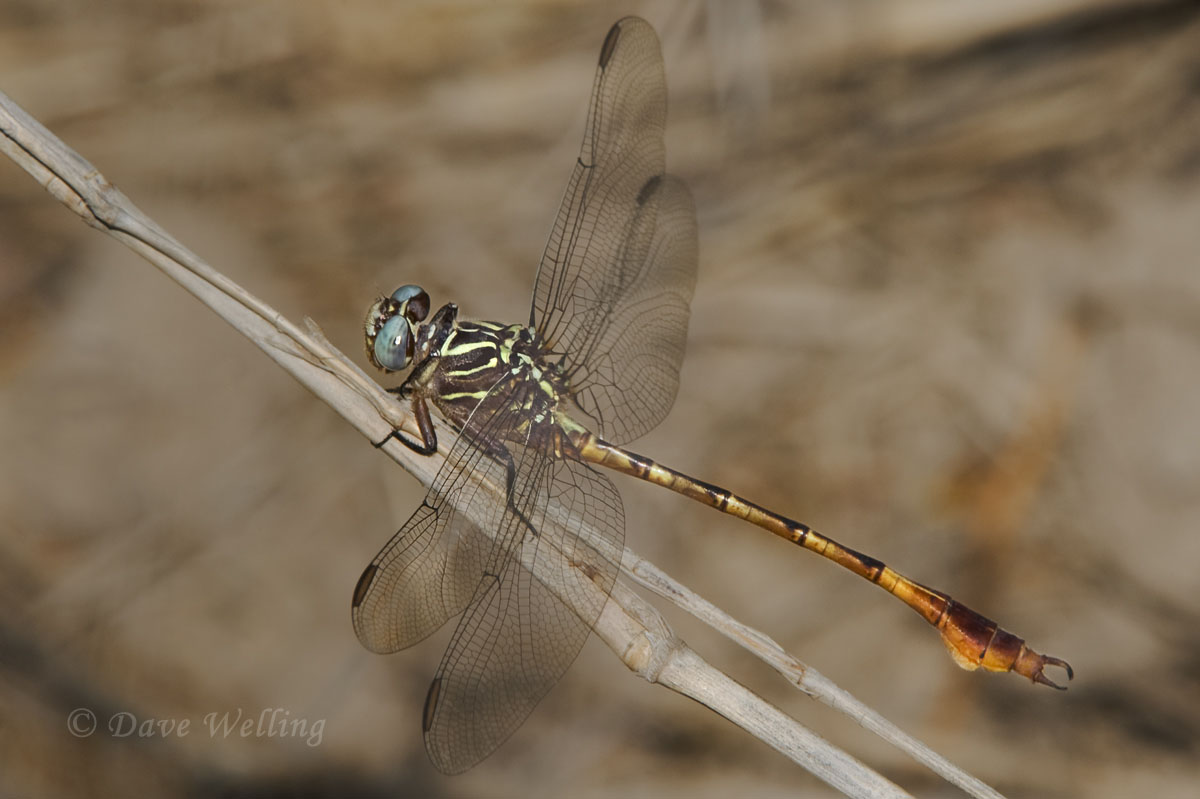
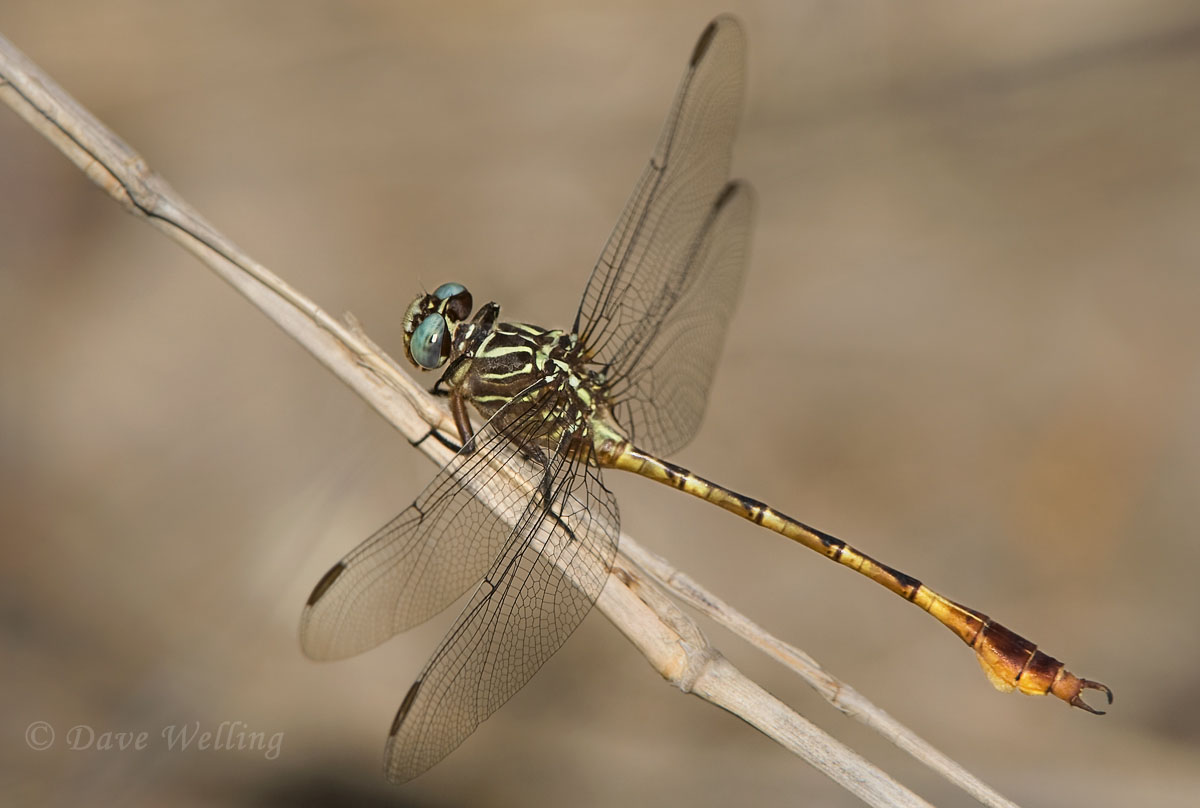
Compare these dragonfly images. The “large” depth of field image has background clutter that affects the quality of the dragonfly subject. Compare that image with the “shallow” depth of field image where the soft background makes the dragonfly stand out. The “right” lens aperture for optimum apparent sharpness can make or break your image, especially a wildlife subject where you cannot always move to eliminate extraneous background elements. How you compose your subject and background is always up to you but, generally, softer backgrounds work better in close up situations.
On a side note: telephoto macro lenses have inherent shallower depth of field at a given aperture than 50 to 90mm macro lenses and diffuse your backgrounds even further.
Lens Aperture Settings
Using shallow depth of field does not mean just shooting with your lens wide open. The construction of the shutter blades in all lenses can cause light entering the lens to diffract slightly at wide open apertures, typically f2.8 or f4, as well as minimum light transmission apertures like f22 or f32. You want to set your aperture, if possible, between those settings to maximize image sharpness. Try initial settings in the f8-f11 range. Determining the right shallow depth of field for your subject, (with the background out of focus) is a combination of lens structure, creativity, and how parallel you are to your subject. If you cannot get parallel to your subject, you may need a smaller aperture to maximize the sharpness.
Test Your Settings by Utilizing the Viewfinder
Generally, when you look through the viewfinder of any modern lens you see the subject with the aperture wide open, regardless of your specified settings. As you stop down your aperture, you do not see any change looking through the viewfinder because these lenses are designed to remain wide open until you press the shutter. This is where your camera’s depth-of-field preview button can help. Most DSLRs have this feature but many point and shoot or consumer cameras do not. Pressing the depth of field preview button causes the lens to stop down to your aperture setting without triggering the shutter so you can see what is in focus. Depth of field preview may look dark making it harder to clearly see your image. You can get around this by starting with maximum aperture and slowly step down as you look through the viewfinder. You can also use the LCD display on the back of current DSLR and most consumer cameras to view overall sharpness by changing your display magnification to 100%. This can give you a very accurate display but LDC displays often wash out in bright light.
Finding the perfect depth of field takes practice, and is different for every photograph. Try out different apertures to find what best fits your needs.
About the author: Dave Welling is a full time professional photographer specializing in wildlife, landscape and nature with over 75,000 6×7, 6×4.5, and 35mm film and digital images. He has been capturing evocative images of the natural world for over 25 years, producing the highest quality images for publication. His images often capture unique behavioral characteristics of wildlife or special lighting or weather conditions of landscapes. You can see more of his work at www.strikingnatureimagesbydavewelling.com.
Have something to add to the story? Leave a comment or email editor@outdoorphotographyguide.com.
Thank you for sending this great informative article. It will help me in the future as I get outside and start living again after the year we had.....
What about the theory that the best performance of a lens is about two stops less than the lens's maximum aperture? Bokah should be watched but to what extent?
Thank you. Will change my approach after reading this article.
Article was very informative.
I LOOK , I LEARN. THANK YOU.