Macro photography often opens entirely new worlds to nature photographers. It also brings the photographer some new challenges in terms of adjusting for lighting conditions, especially if you are photographing outdoors in “natural” light.
You can often approach a macro subject like this robber fly as a “portrait in natural light.” Now, usually when you think of portraits you think of people but, just because your subject is small doesn’t mean you can’t look at it as a portrait situation. You want to isolate your subject against a soft, slightly darker background and make it the sole element of your image. In the photo above, overcast and direct natural lighting lit the subject very nicely. Additionally, a somewhat shallow depth of field (f11) rendered the background a soft green tone.
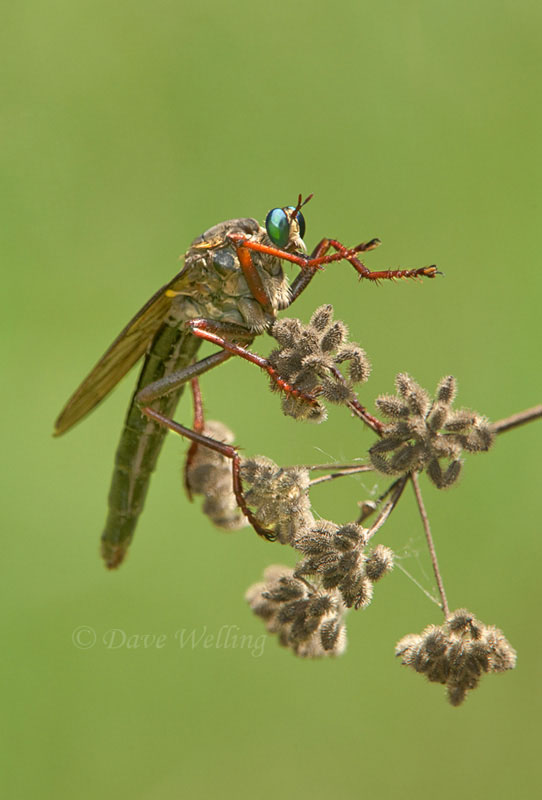
Remember, in macro photography a shallow depth of field is going to be larger than you would normally consider due to the narrow range of apparent sharpness. This is because you are working at very close relative distances to your subject.
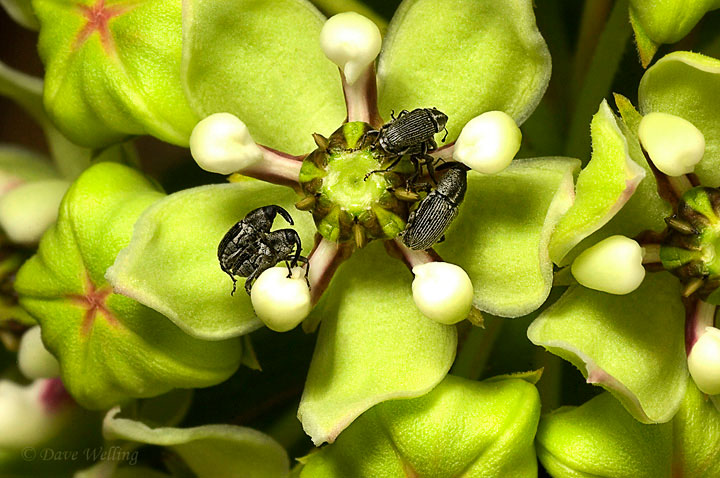
The image below of the agave billbugs, on the other hand, has some problems with the direct natural lighting. In this case the overhead light is midday harsh lighting with no diffusing overcast. Here, the ambient lighting would turn the billbugs completely black and burn out the highlights on the flower because this was a film exposure using Velvia50 transparency film (notorious for its high contrast characteristics). Some form of adjustment was definitely necessary since even scanning and post processing would still leave the image with too high a contrast and loss of detail, especially in the black billbugs. Using fill flash to even out the contrast brought out the detail in the billbugs and evened out the bright spots in the flower. Sometimes, like regular natural light portraits, the situation needs a little help with the lighting.
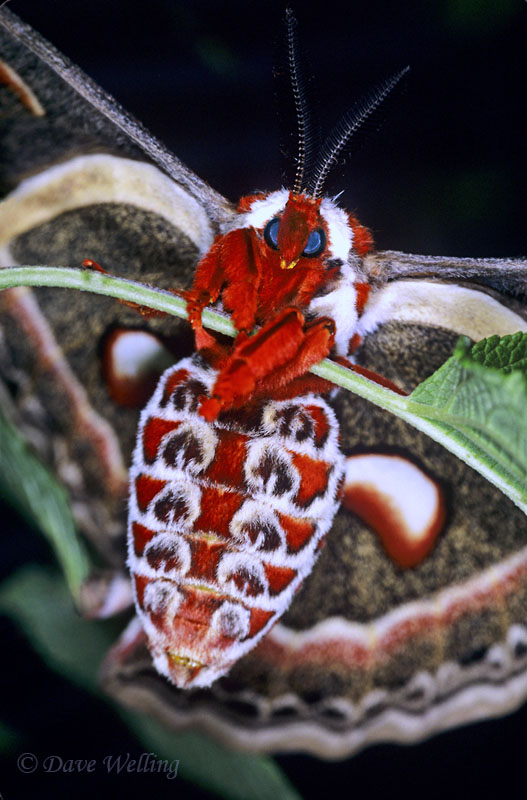
Another situation that usually requires some form of lighting compensation is shown in the first image below of the cecropia moth (top). Here, heavy overcast, dull light at an angle to the subject produces shadows and turns it slightly blue due to the color temperature of the overcast light. The whites are an off blue color and there is distracting shading on the left side of the body and the facial area, not acceptable. The use of fill flash at -1 compensates for the angled light and warms the subject eliminating the blue cast providing a pleasing image (bottom). The background was not balanced but left dark due to a chaotic mess of branches that would have made the background cluttered and detract from emphasizing the colorful body of this huge moth.

About the author: Dave Welling is a full time professional photographer specializing in wildlife, landscape and nature with over 75,000 6×7, 6×4.5, and 35mm film and digital images. He has been capturing evocative images of the natural world for over 25 years, producing the highest quality images for publication. His images often capture unique behavioral characteristics of wildlife or special lighting or weather conditions of landscapes. You can see more of his work at www.strikingnatureimagesbydavewelling.com.
Have something to add to the story? Leave a comment or email editor@outdoorphotographyguide.com.
Enjoyable and educational. Thank you for writing and sharing this information. Very helpful.
Been playing around with macro for awhile. I want to get a dedicated macro/micro lens for my nikon. something around$500 or less. recommondations?
Here is a link to a web site that shows you how to remove fence in post processing https://www.picturecorrect.com/tips/how-to-remove-fence-lines-from-zoo-photos/
Could you rewrite this sentence please? "Remember, in macro photography a shallow depth of field is going to be larger than you would normally consider due to the narrow range of apparent sharpness."
Could you please tell me how to shoot thru fencing to capture an animal in a cage (without the fencing)
Could you please tell me how to shoot thru fensing to capture an animal in a cage (without the fencing)