Photographing Water: Ideas for Creating Great Photos

I love photographing water, whether in the form of waterfalls, streams, ponds, or coastal scenes. Creating water photos is fun and easy, if you know how to do it right. To help you get the most out of your water photography, here are some of my top tips and ideas for creating great water photos.
I photographed this rushing spring stream with sunset light on the trees in the background, allowing me to capture colorful reflections in the water. Great Smoky Mountains National Park, USA. Canon 5DII, Nikon 14-24mm f/2.8 lens with Canon adapter, polarizer filter, ISO 50, f/11, 3.2 seconds.

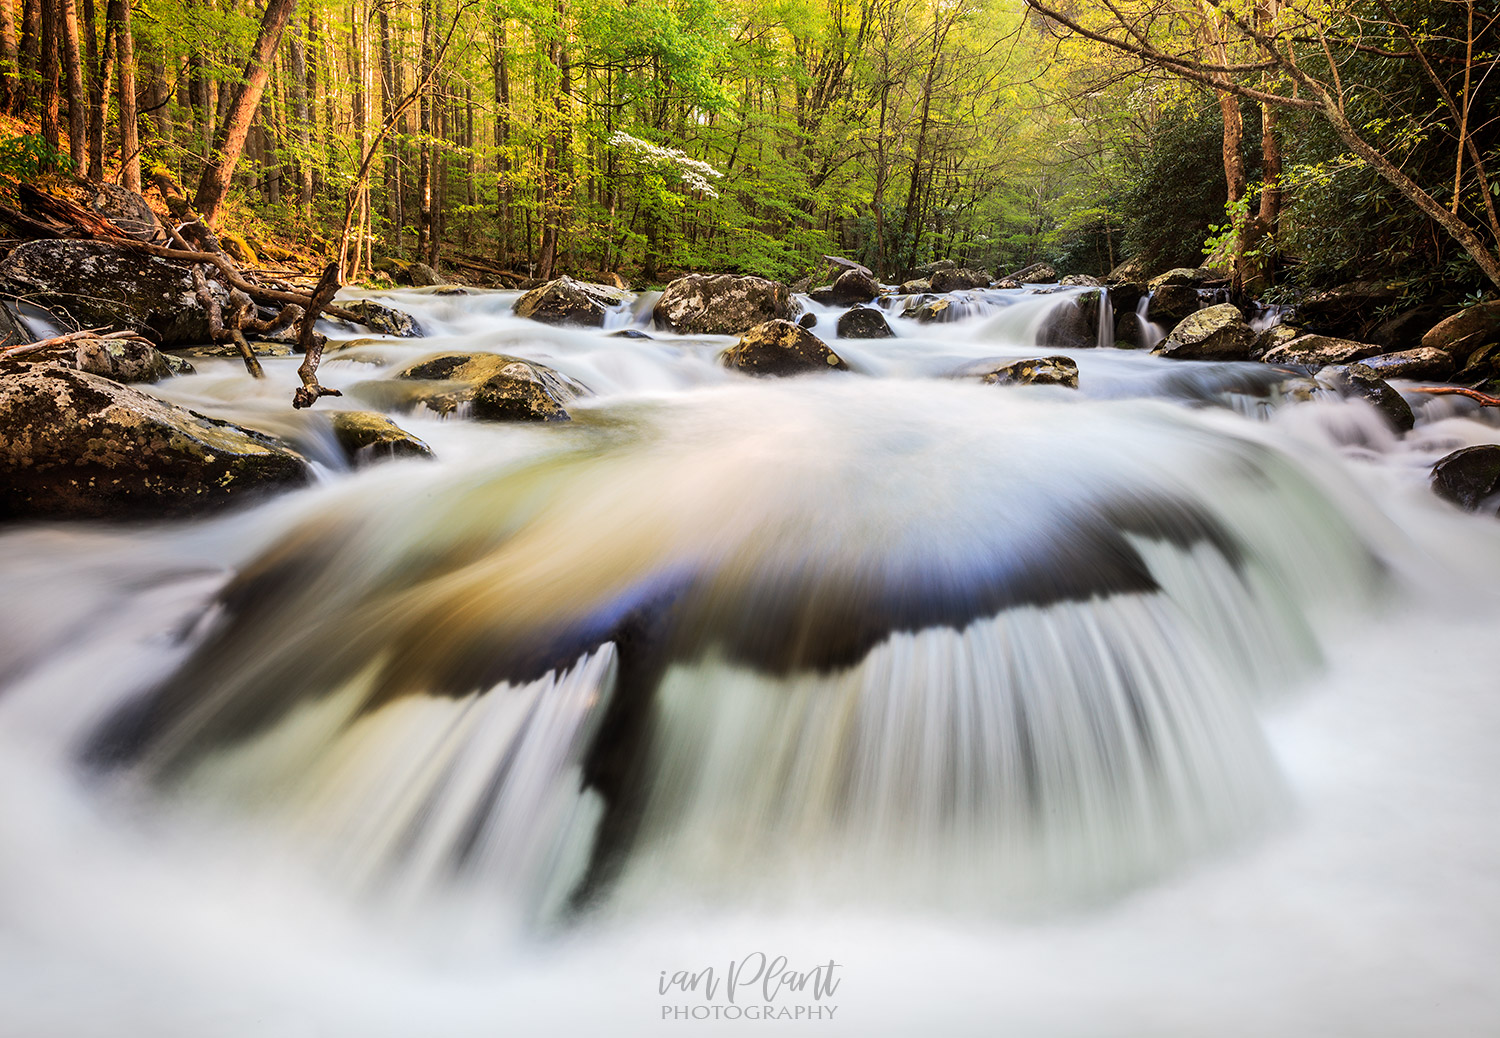
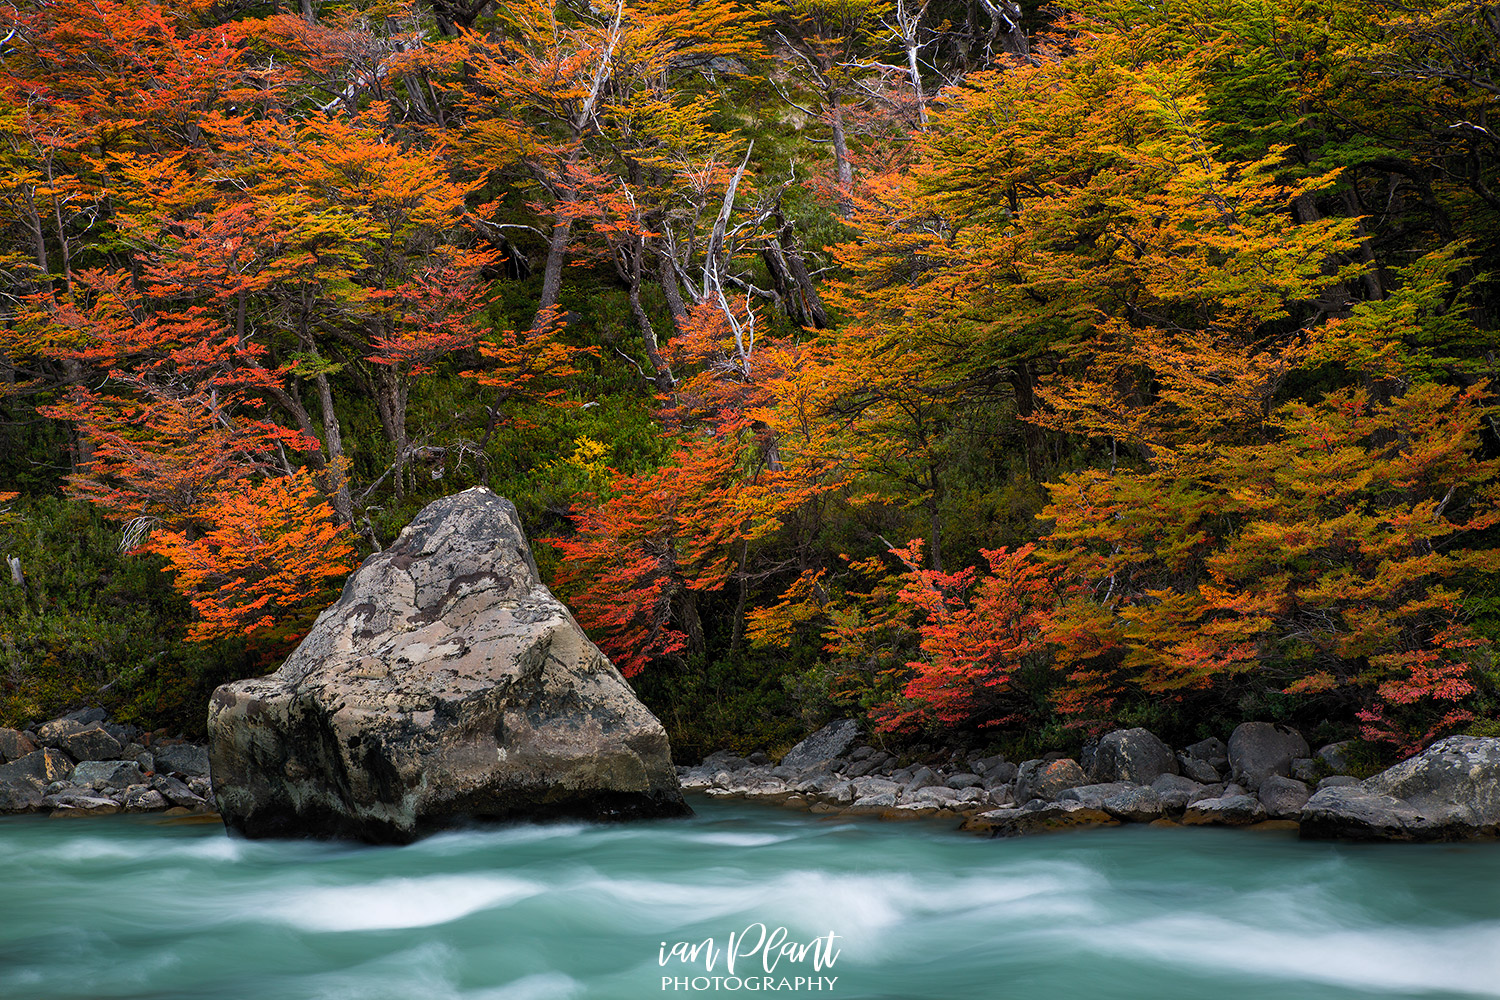
Use long exposures for a pleasing blurred water effect

Moving water often looks best when captured using long exposures. If you use a short exposure, the water will appear frozen, like ice; by adding some motion blur, you can improve the look of your water photos. Typically, shutter speeds of 1/30 second or longer will start to blur moving water. Shutter speeds longer than several seconds will create a “misty” look, with detail and texture in the water starting to disappear. Often, something between 1/8 and 1 second will yield the most pleasing results, blurring the water yet retaining some texture in the water, but results will vary depending on the speed and volume of the moving water. Experiment with different shutter speeds and review images on your camera’s LCD screen until you achieve the desired motion-blur effect.
During a long exposure, swirling foam beneath a waterfall creates interesting shapes. Cascade River State Park, USA. Canon 5DIII, Canon 16-35mm f/4 lens, polarizer filter, ISO 200, f/11, 13 seconds.

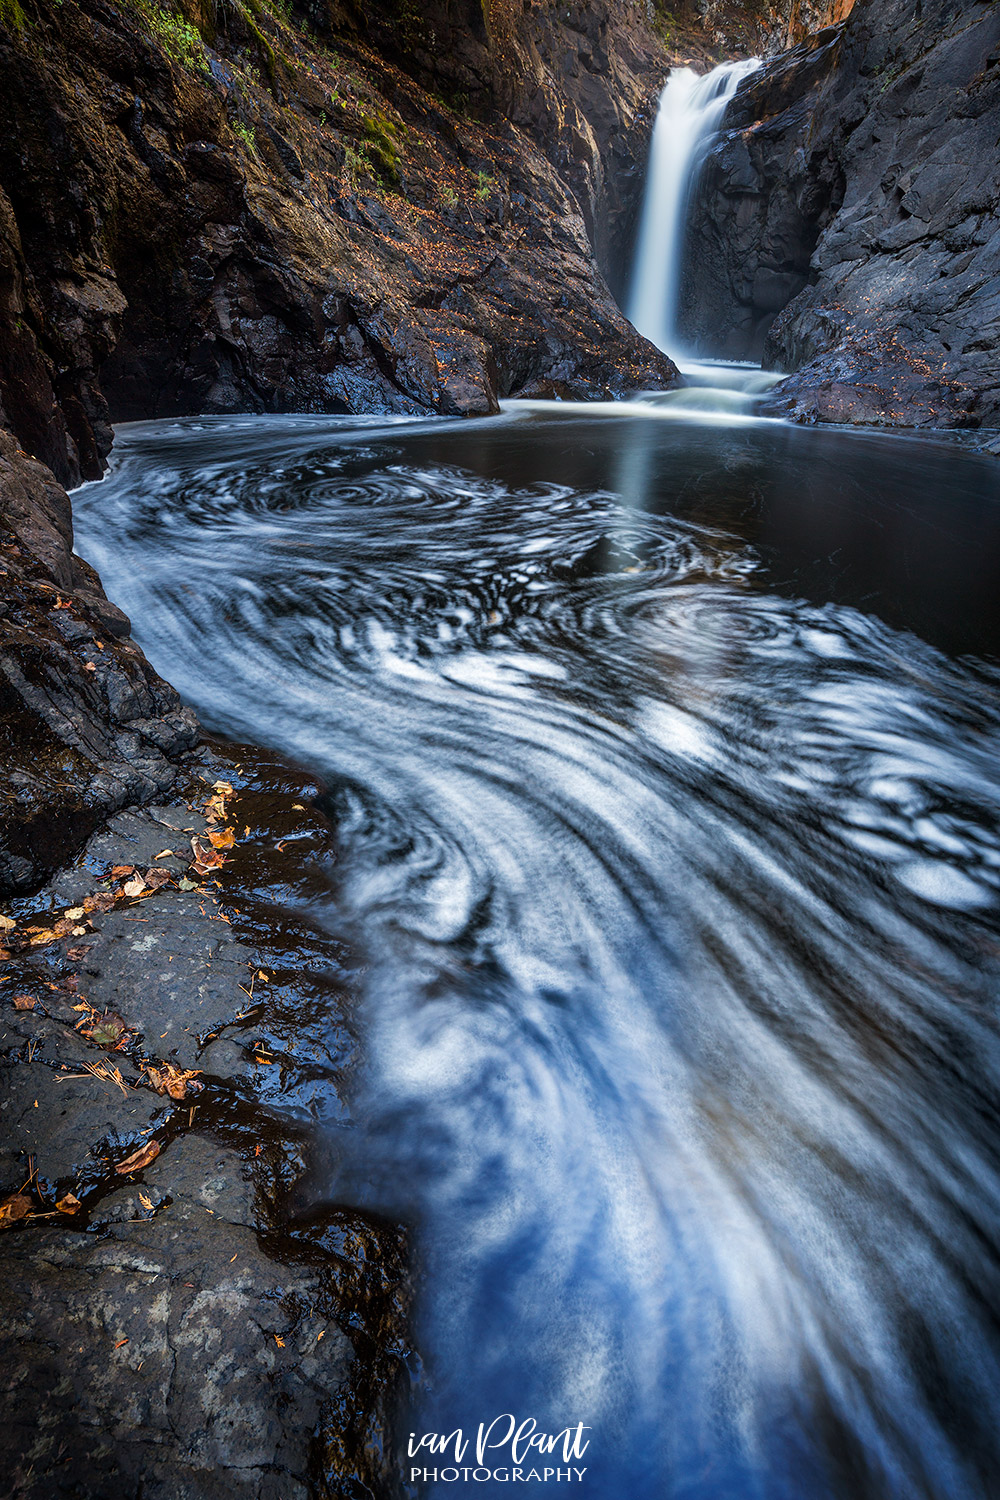
Reflections add color to your water photos

Photographing water is a great source for reflections, so find a way to use reflections to add a dash of color and impressionism to your shot. Still water can act like a mirror, producing a perfect reflection, while moving water produces a less distinct reflection, often nothing more than a surreal blur of color.
I made this photo of a hippo floating in the water, surrounded by colorful reflections of foliage on the far bank of the river. Lower Zambezi National Park, Zambia. Canon 5DIII, Canon 200-400mm f/4 lens with built-in 1.4x extender, ISO 800, f/5.6, 1/200 second. A favorite technique of mine is to photograph sunlit foliage reflected in water, usually with interesting objects (such as boulders, logs, or water plants) sticking out of the water. This technique usually works best when the reflected subject is in the light, and the water is in shadow.
I waited until the colorful autumn foliage on the far bank of this pond was in direct sunlight. Acadia National Park, USA. Canon 5DIII, Canon 100-400mm f/4.5-5.6 lens, polarizer filter, ISO 100, f/22, 2 seconds.

Get your feet wet!

I don’t like limiting my options to only what I can photograph from the shore. Getting in the water is the key to finding unique angles and producing the composition you want. Sandals, wading boots, or fishing waders can come in handy; when I am working in very deep or cold water, I will sometimes put on a wetsuit or dry suit.
A photographer wearing chest waders to safely get in the water for a waterfall shoot. Shenandoah National Park, USA. Canon 5DII, 17-40mm f/4 lens, polarizer filter, ISO 400, f/11, 0.4 seconds. Stay safe and away from potentially dangerous water. Also, remember that surfaces underwater can be slick, uneven, or muddy, so watch your footing. Be especially careful if working near deep or fast-moving water, or coastal environments where waves are high (and always keep an eye out for exceptionally large incoming “rogue” waves).
I got in the water wearing chest waders to capture this perspective. Brúarfoss, Iceland. Canon 5DIII, Canon 16-35mm f/2.8 lens, polarizer filter, ISO 100, f/11, 0.5 seconds.

Waterfalls

Waterfalls are a landscape favorite. Overcast light typically works best; the soft, diffused light reduces contrast in the scene, helping to prevent distracting “hot spots” from forming in the water and on rocks. It is best to photograph waterfalls right after a soaking rain, as it can make streams and waterfalls more attractive by filling them with water, darkening rocks, and intensifying the colors of foliage. When working in dry conditions, I spend a few minutes splashing water over rocks in the scene to wet them down and replicate the drenched look found after a soaking rain. A polarizer filter is useful when shooting waterfall scenes, to remove glare from wet foliage and rocks, enhance contrast, and intensify colors.
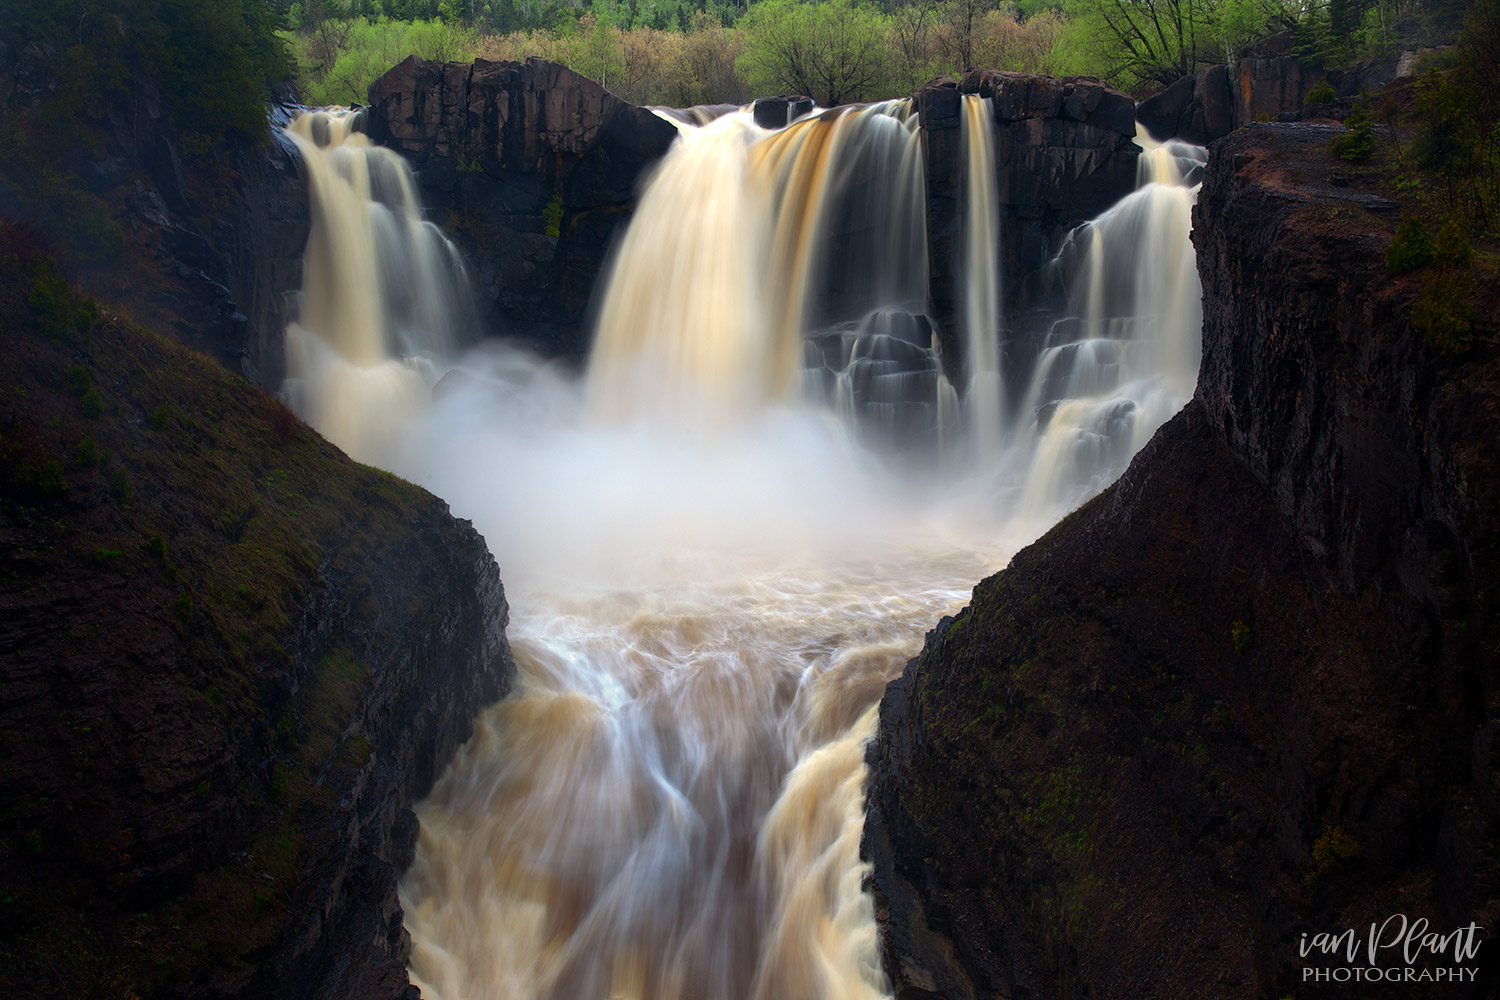
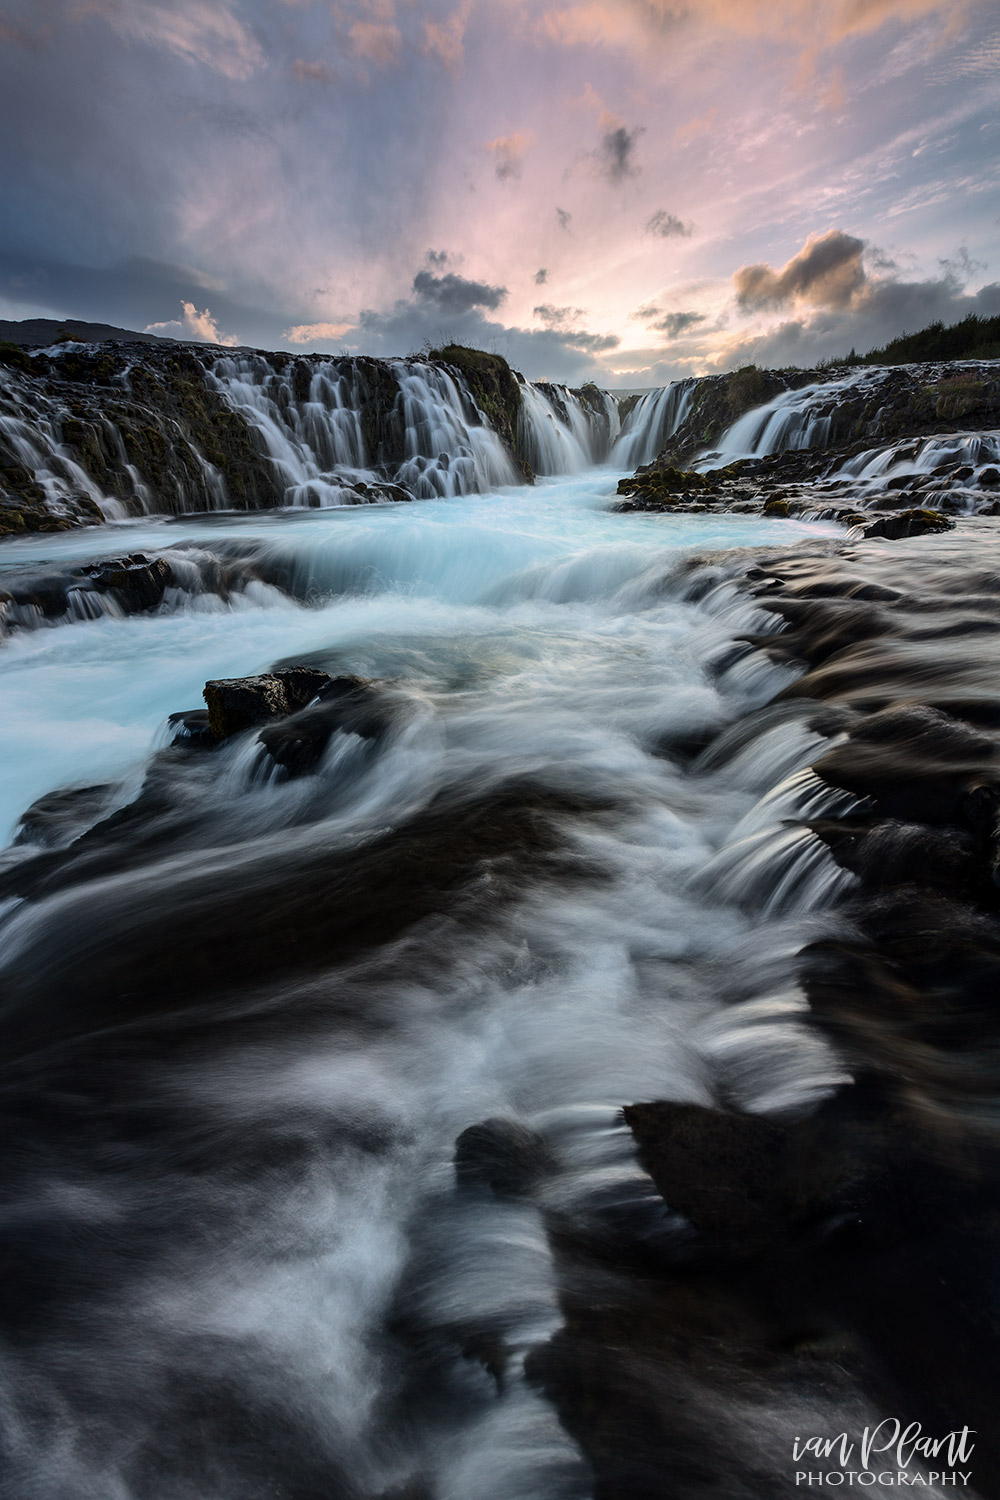
A light, soaking rain darkened the rocks around the waterfall. Grand Portage State Park, USA. Canon 5DII, Canon 24-105mm f/4 lens, polarizer filter, ISO 50, f/16, 0.6 seconds. Look for an interesting curve or zig-zag in a watercourse and make this an element of your composition. Get in close to foreground elements, such as small rapids beneath a waterfall, to create compositional interest and a sense of scale and perspective. Eddies and swirl pools also make very interesting foreground features. Waterfall and stream scenes look best when surrounded by color, such as spring or autumn foliage.
I like to include colorful foliage when photographing streams and waterfalls. Los Glaciares National Park, Argentina. Canon 5DIII, Tamron 24-70mm f/2.8 lens, polarizer filter, ISO 100, f/11, 1.3 seconds.

Coastal Photography

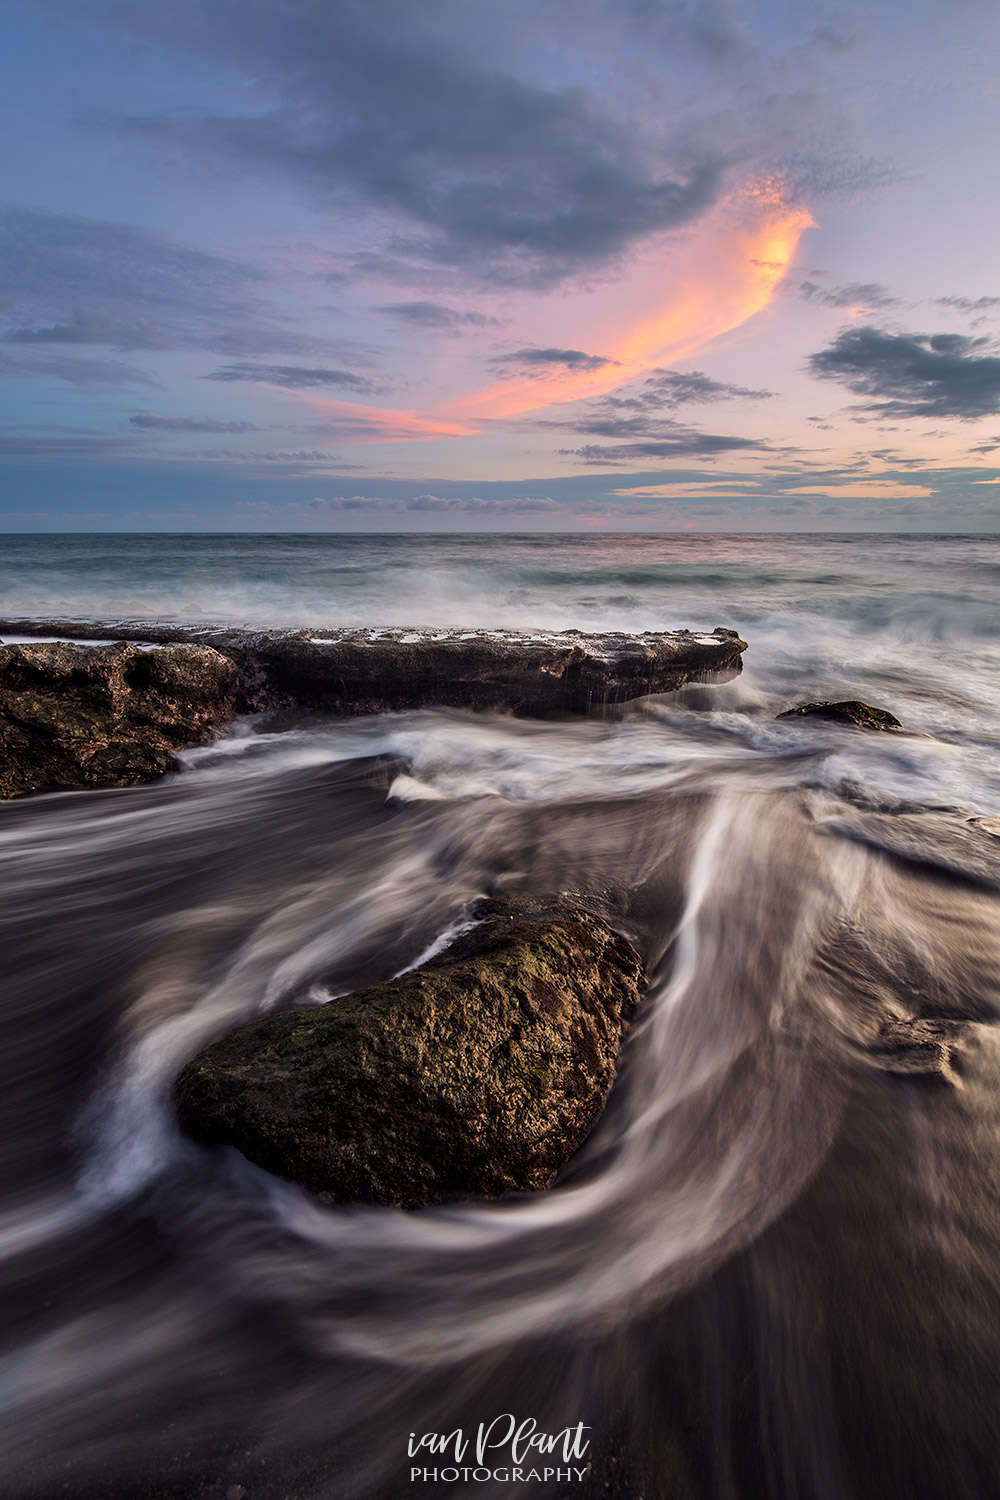
The key to successful coastal photography is to find a pleasing convergence of land, water, and sky. Coastal areas often have unique land forms, such as arches, sea stacks, and sea caves; also keep an eye out for interesting features or patterns in rippled sand, tide pools, creeks flowing into the water, and marine life washed up on shore (such as shells, seaweed, or starfish). Get low and close to interesting foreground features, such as rocks emerging from the water. Sunrise and sunset light are especially important for coastal scenes; the colorful light at these times brings coastal scenes to life. Shoot towards the most colorful part of the sky to maximize the reflected light in the water.
A beautiful sunrise is reflected in churning ocean waters, Assateague Island National Seashore, USA. Canon 1DsII, Sigma 12-24mm f/4.5-5.6 lens, ISO 100, f/22, 1/6 second. When working in a tidal area, always check tide times before photographing, as coastal scenes change dramatically with the tides. Some scenes work best with low tides, others high, and even others somewhere in between. Tide information is easily obtained online, and tide chart apps for smart phones are readily available, giving you instant tide information at your fingertips.
Low tide revealed a boulder that I used as a foreground for this ocean sunset. Osa Peninsula, Costa Rica. Canon 5DIII, Tamron 15-30mm f/2.8 lens, ISO 200, f/11, 1 second.

Protect your gear

Handle your equipment with care around water. If necessary, store cameras and lenses in a dry bag or waterproof container, only taking them out when you are ready to shoot. Pay extra attention to tripod placement when setting up in moving water: you have to be careful that the current or waves aren’t strong enough to sweep your tripod away or send vibrations up your tripod legs to your camera, which can lead to blurry photos, especially during long exposures.
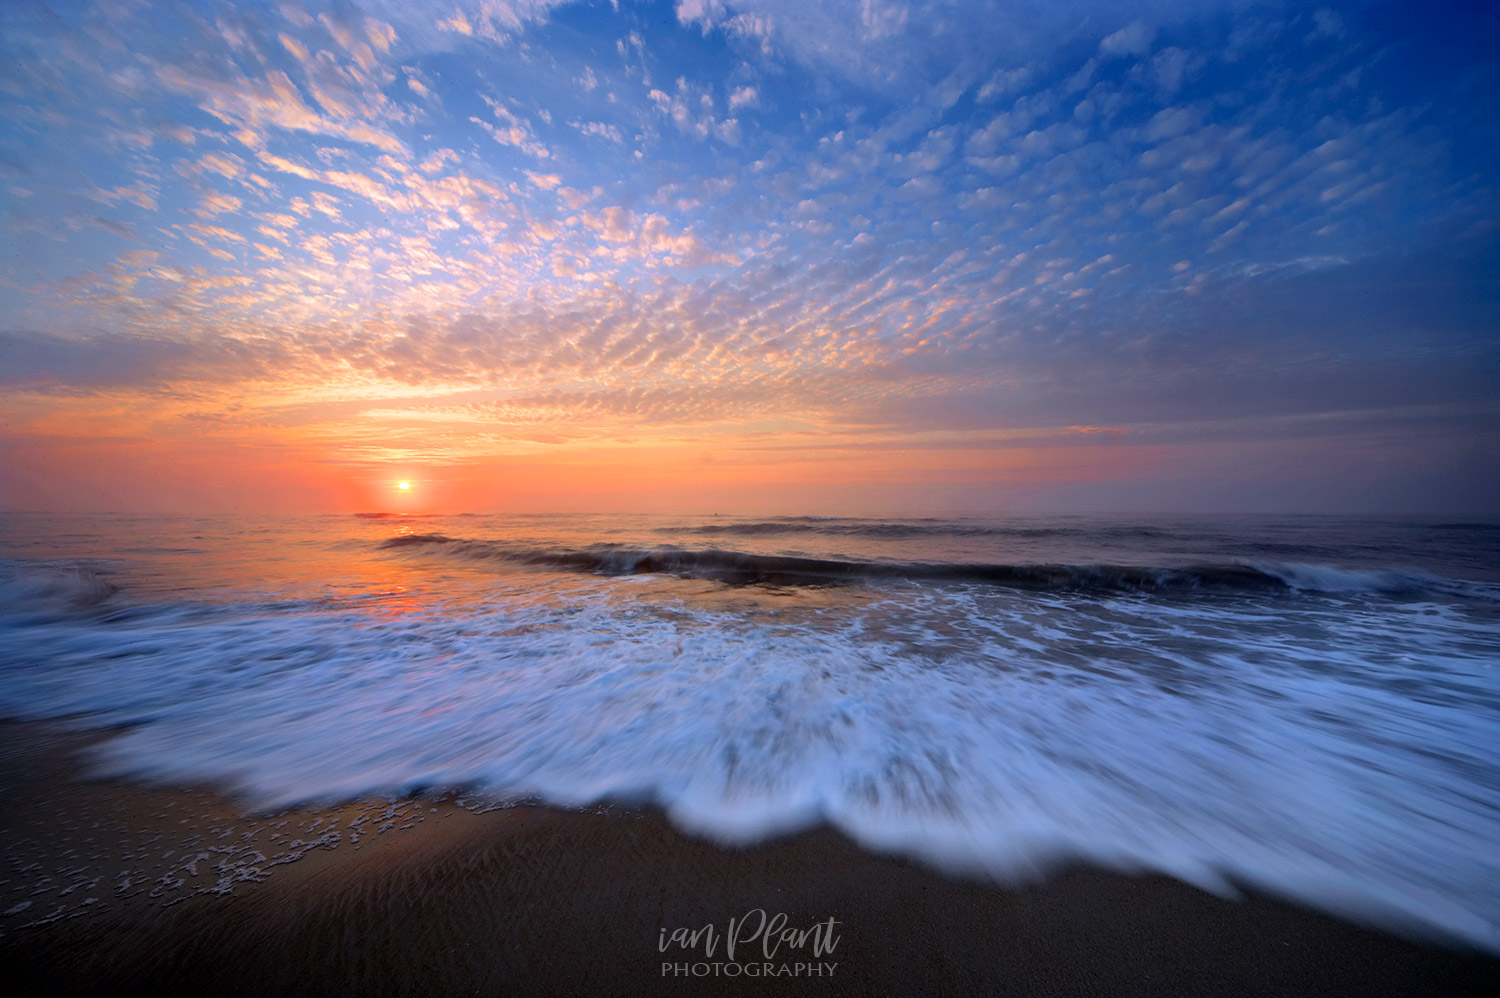
I swam to this “sea cave” along the coast of Lake Superior with my camera and tripod safely nestled within a dry bag. Pictured Rocks National Lakeshore, USA. Canon 1DXII, Canon 11-24mm f/4 lens, ISO 100, f/11, 0.5 seconds.

Catch the wave!

Waves make excellent foreground elements for your water photographs. Long exposures create streaking lines, adding visual interest and energy to your compositions. Use an electronic shutter release to trigger the shot precisely when wave action is at its best. Outgoing waves can be particularly effective for coastal photos, especially when water rushes around objects emerging from the surf.
I triggered the shutter as an outgoing wave flowed around a boulder. Reynisdrangar, Iceland. Canon 5DIII, Canon 16-35mm f/4 lens, ISO 160, f/11, 0.5 seconds.

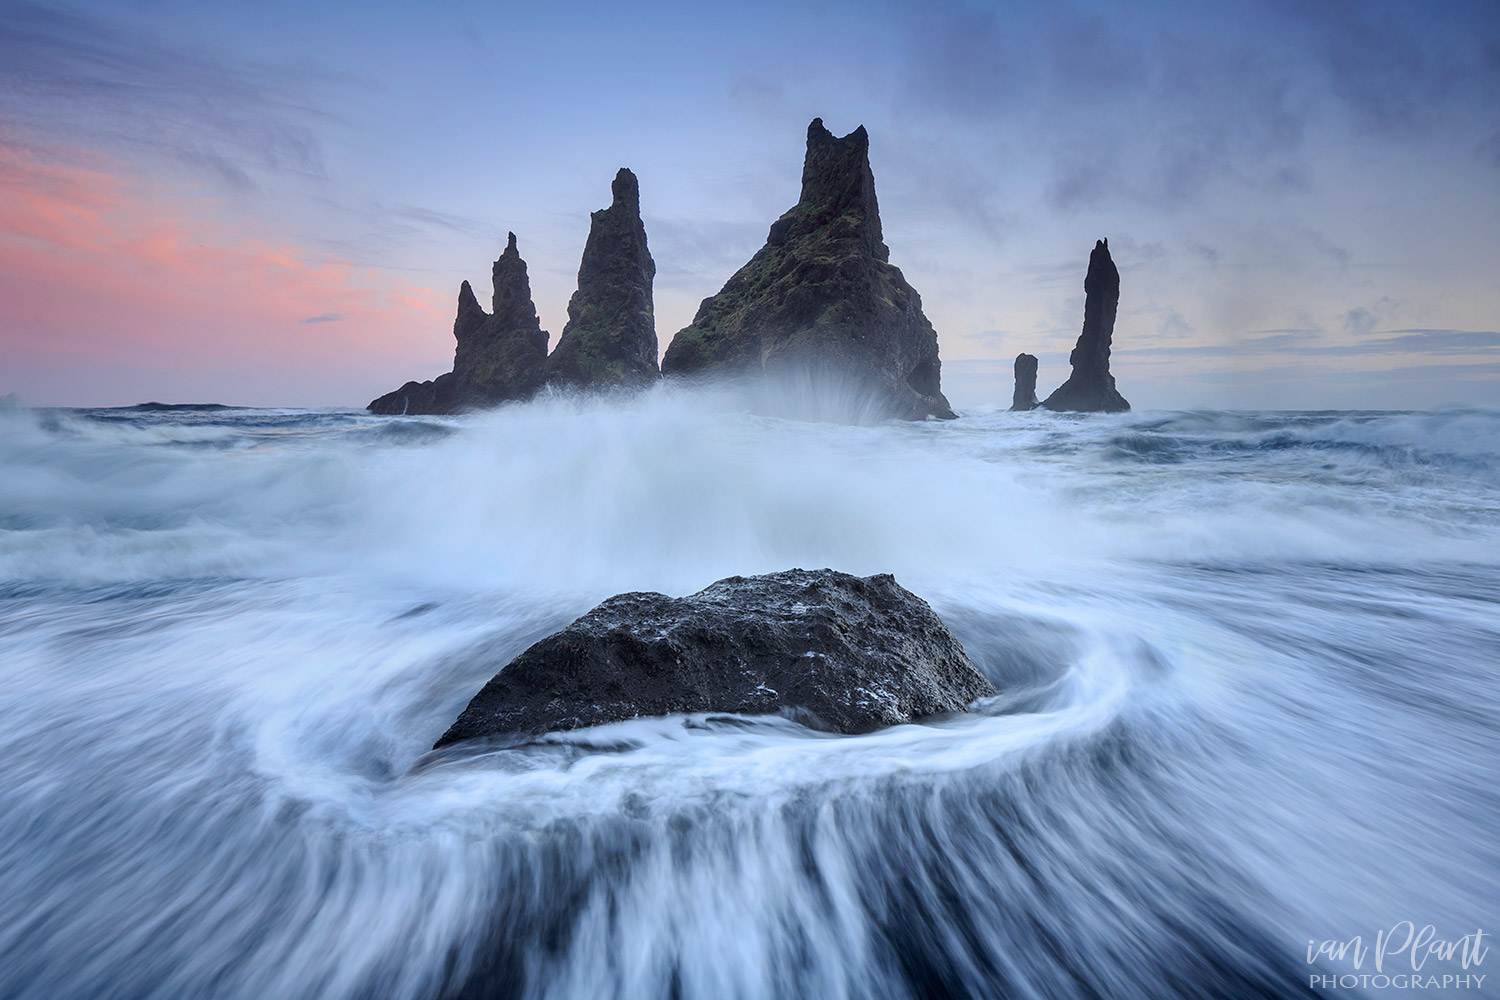
Photograph splashing water

One time to use a fast shutter speed is when photographing large waves crashing against the shore, or when a person or animal is moving quickly through the water. That way, you can dramatically freeze the water droplets as they fly through the air.
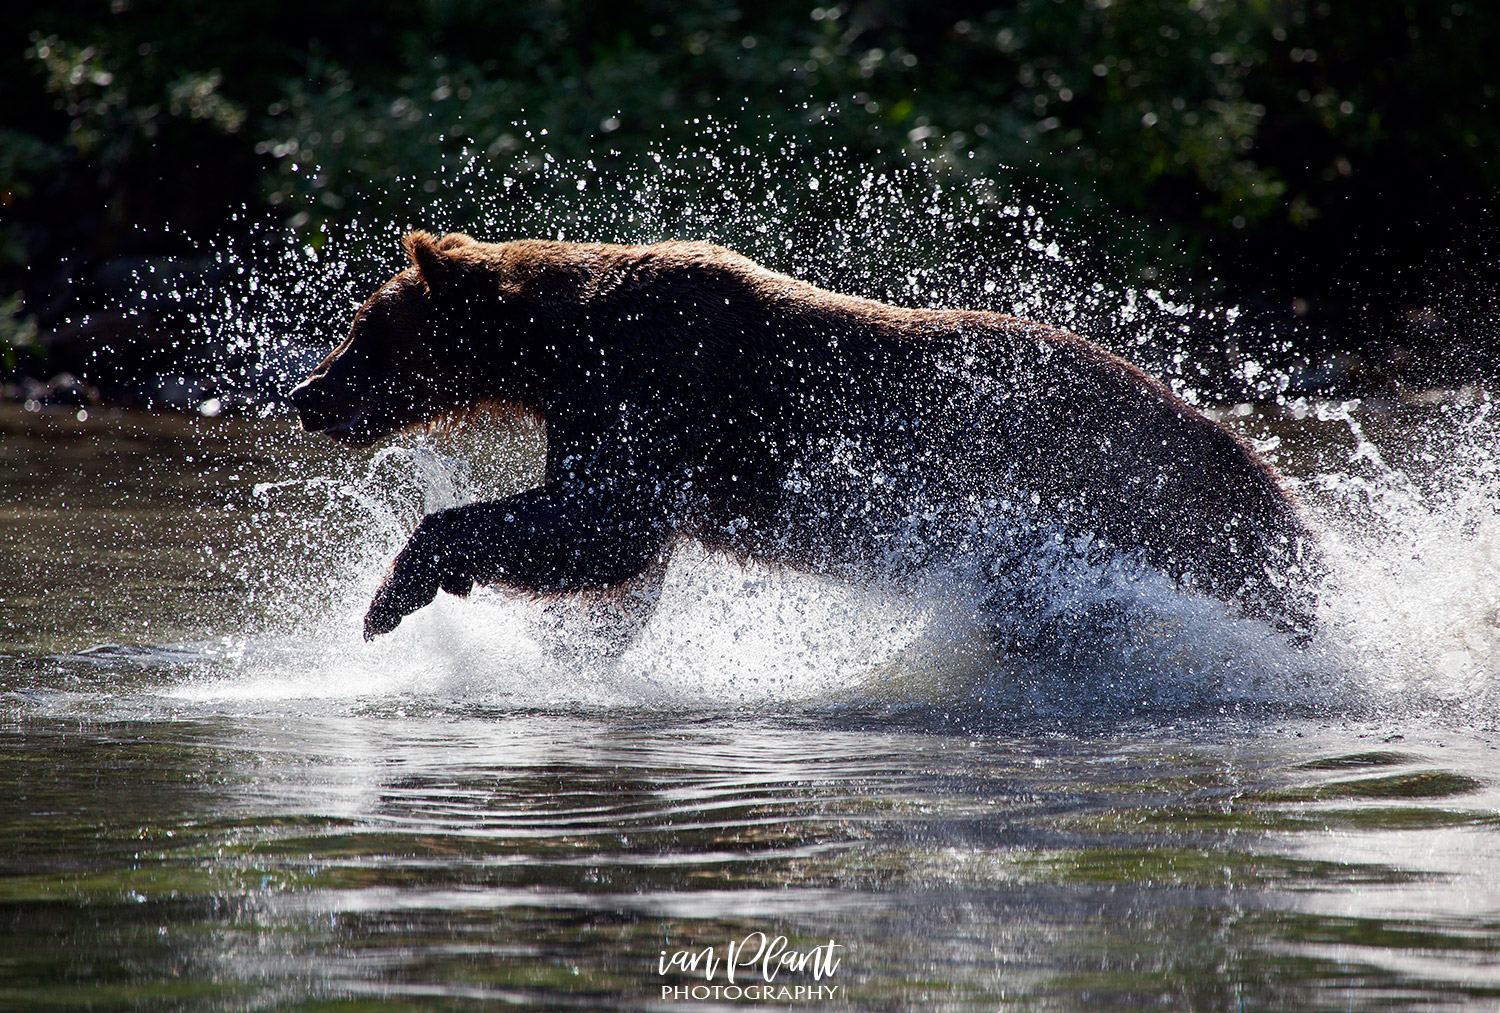
I like photographing animals as they charge through water, like with this brown bear fishing for salmon. Lake Clark National Park and Preserve, USA. Canon 5DII, Canon 100-400mm f/4.5-5.6 lens, ISO 800, f/5.6, 1/2500 second.

Conclusion

You have many creative options when photographing water. So, roll up your pant legs, take off your shoes, and (safely) plunge right in!
ian-headshot-test 
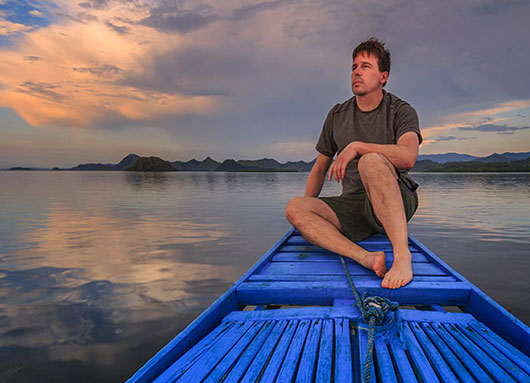
About the author: Whether hanging over the rim of an active volcano, braving the elements to photograph critically endangered species, or trekking deep into the wilderness to places most people will never see, world-renowned professional photographer Ian Plant travels the globe seeking out amazing places and subjects in his never-ending quest to capture the beauty of our world with his camera. Ian is a frequent contributor to many leading photo magazines, managing editor of Outdoor Photography Guide, a Tamron Image Master, and the author of numerous books and instructional videos. Known for his inspiring images and single-minded dedication to creating the perfect photo, Ian has reached hundreds of thousands of people around the world in his mission to inspire and educate others in the art of photography. You can see more of his work at www.ianplant.com. Have something to add to the story? Leave a comment or email editor@outdoorphotographyguide.com.
Make a comment
  • (will not be published)

21 Responses to “Photographing Water: Ideas for Creating Great Photos”

  1. Mick

    It’s a real pity that you only included 3 reasonable photographs instead of the Great Photos that you mentioned in the title. The information that was included in the page WAS good information, however. ;-)

    Reply
  2. Mohan

    Elaborate and easy narration to understand water photography for beginners ! No website .

    Reply
    • Customer Service

      Hi Mohan!

      Thanks for reaching out today! I was able to stream the Photographing Water: Ideas for Making Great Photos. You might want to try deleting your browser history, refresh your device by turning it off and then back on again, or trying a different browser.

      Have a nice day1

      Reply
  3. Darleen Stry

    What do you suggest to do to prevent lens fog when shooting coastal waters? I’ve heard hand warmers are finicky and can be ineffective?

    Reply
    • Customer Service

      Hello Darleen,

      Thank you for contacting us.

      Fog is an annoying problem. As you may know fog on lenses is formed when there is a temperature difference between your lens, camera and the ambient temperature. That said the best way to prevent fog is, if possible, keep your camera outside your jacket. I recommend giving your camera/lens combo 20-30 minutes to gradually adjust to the air temp at your location if they are either warmer or cooler then your location.
      I do not put the lens on the camera until everything is the same temp as the air. This will prevent fog from coming on the rear lens element.

      If you are concerned about rain or snow, depending on your use case getting either a waterproof, or water resistant, camera bag or dry-bag that can be worn out side your clothing and will keep everything dry and at the same air temp, is a good idea.

      https://www.bhphotovideo.com/c/buy/Waterproof-Bags/ci/9437

      In my experience I agree with you that using hand warmers is problematical.

      If you are going to be around misty conditions near moving water plan ahead and bring multiple multi fiber towels and lots of lens cloths to keep your camera as dry possible.

      On a side note, when shooting outdoors during winter getting your camera cold is great for the glass but not the batteries which loose their effectiveness as the freeze. The best solution is to get multiple sets near to your body to keep as warm as possible. You sometimes find that chilled batteries that appeared dead will sometimes regain their charge just by warming up.

      If you have any other concerns, please contact us at 1-855-231-0652, or chat with us on our site.

      We greatly appreciate your business!

      Sincerely,

      Lindsay
      Outdoor Photography Guide Video Membership

      Reply
  4. RICHARD BRANAMAN

    GREAT PICTURES. DO YOU HAVE A SEMINAR WHERE WQE CAN GET HANDS ON HELP?

    Reply
    • Customer Service

      Hello Richard,

      Thank you for contacting us.

      We are glad you appreciate Ian’s work, he is not available at this time.

      If you have any other concerns, please contact us at 1-855-231-0652, or chat with us on our site.

      We greatly appreciate your business!

      Sincerely,

      Lindsay
      Outdoor Photography Guide Video Membership

      Reply
  5. Raag

    Hello Ian, This was a very informative article. Thanks for doing this. i have a quick question. About the camera settings for any image you write the focal length a bit differently. for example:- “Canon 1DXII, Canon 11-24mm f/4 lens, ISO 100, f/11, 0.5 seconds. What do you mean by ‘f/4 lens here’ please? I get that f/11 is the aperture. So is f/4 is the widest aperture of the lens? Thanks in advance.

    Reply
    • Customer Service

      Hello Customer,

      Thank you for contacting us.
      Yes you have that correct, the f/4 does refer to the maximum aperture setting. Often times camera manufactures create lenses that are similar in terms of focal lengths and/or f-stops range. In this case the 11-24mm f/4 is an amazing optic which truly stands alone in many criteria, however as a short cut photographers often refer to it as the: the 11-24 f4

      Happy Shooting!

      If you have any other concerns, please contact us at 1-855-231-0652, or chat with us on our site.

      We greatly appreciate your business!

      Sincerely,

      Lindsay
      Outdoor Photography Guide Video Membership

      Reply
  6. Teresa Jones

    I’m a newbie. Thank you so much for the practical insight. I find myself captivated by water photography. I wouldn’t have thought of my tripod placement, in terms of leg vibration in water until you mentioned it. I may very well have attempted these shots without considering the obvious. Thank you!!

    Reply
  7. David Dahm

    Wow I have always wanted to get into watery pictures Thank you Sincerely for your great knowledge. Dave

    Reply
  8. Bobby Gentry

    I hope to have a website soon. The “water” pictures with exposure information was great. Looking forward to getting out and shooting more water with my Nikon D7200 and D850. I know a Nikon can equal the Canon. ha

    Reply