Adding Texture in Photography
David Johnston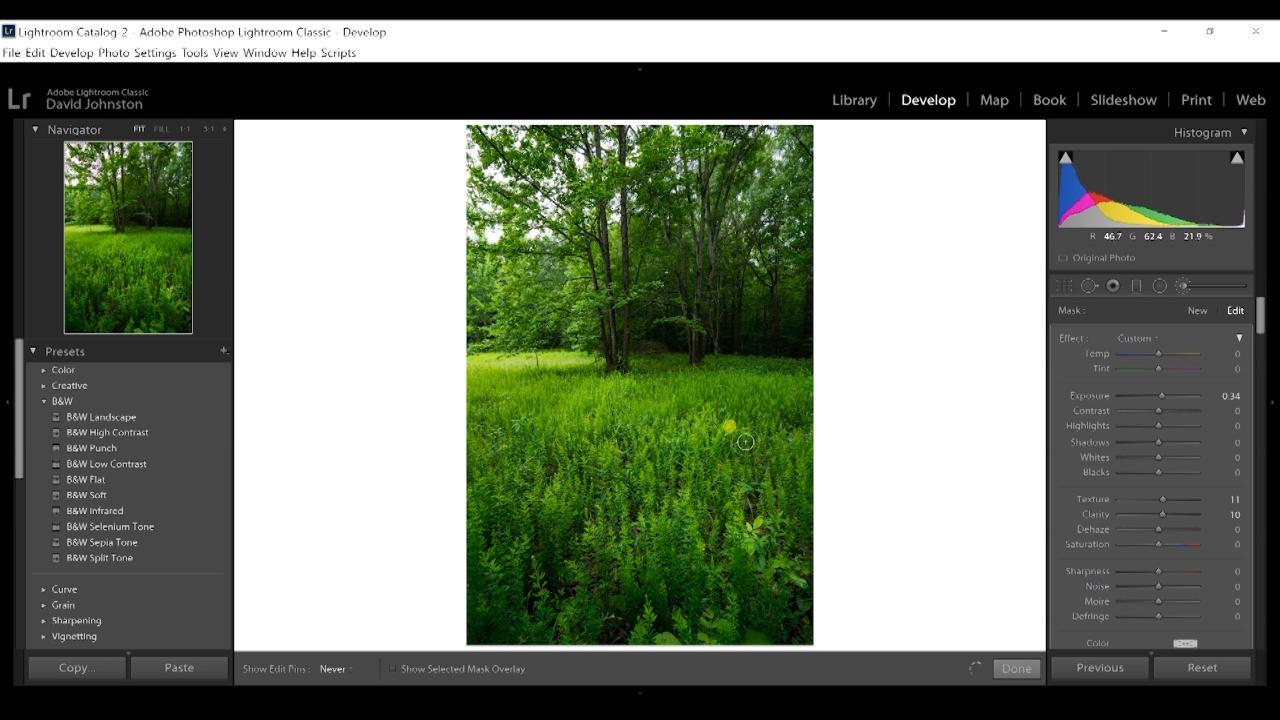
Video Player is loading.
On your outdoor field trips, you’ve been capturing some nice images of landscapes. Yet when you view the files on your computer, you notice that the overall patina is kind of flat. In this video, How to Add Texture to Your Outdoor Photography, professional nature photographer David Johnston takes you into the editing studio for tips on texture in photography.
You will learn texture in photography through the use of the Adobe Lightroom software program. To demonstrate the techniques of texture in photography, David works on his woodlands scene of wildflowers and trees. The goal is to enhance the textures of the foreground which will then lure the viewer into the frame. For this lesson on texture in photography, he first alters the exposure, tones, vibrance and saturation. Then, to add texture, he works the clarity slider back and forth until he is satisfied. Your goal is to enhance the texture but still make your image look realistic.
For the next step in texture in photography, David selects Lightroom’s presence category and finds the texture tool. He zooms into a foreground area of his image to see how much texture to add. A good technique is to increase the texture slider all the way to 100 and slowly drag it back until the selected area looks realistic. You are not making a special effects photograph. You are creating an exquisite landscape image.
For your own texture in photography, if you want to isolate part of your image, you select the adjustment brush tool, increase the texture and clarity sliders, and then paint the parts of your photograph where you want to increase texture. For fine tuning, you can again adjust the sliders and make another pass at your image.
Join Outdoor Photography Guide’s professional photographer David Johnston, for practical ideas on how to add texture in photography. You will be amazed at the results.
Hey, what's up guys, Professional Outdoor Photographer, David Johnson here for Outdoor Photography Guide. And I'm coming to you from my studio today to talk about a trick I like to use in Lightroom to really enhance the textures in my images and that's how to apply textures in Lightroom. So let's look at this photograph that I have on my screen right now. It's a really nice image. The composition has some cool features down here in the foregrounds.
All these wild flowers that are growing in this field leading up to some trees back here that are framed up near the top of the screen. So one of the things that I like to do is further enhance my foregrounds by adding more texture to them, because they're the features that pull you into the frame. First, let's just make some basic adjustments here in this photograph. I'm gonna add some more contrast. I'm gonna lift my shadows, where those foreground features are.
I'm going to decrease the whites that are in the sky that are kind of distracting there. And then I'm gonna scroll down and let's just add some vibrant. And let's also add a little bit of saturation. And then lastly, I'm gonna scroll down to my hue Saturation and Luminance sliders. And I'm just going to add a little bit more of this green luminance here that I can use further.
So what I want to do here is again add texture to my foreground, because the foreground is really what I feel like anchors the image to the bottom, but also pulls you in to explore the woodland scene. Let's see how to do that. The first way and it's probably the most popular way is this slider right here. This is the Clarity slider. So I can pull up clarity and if I go all the way, you'll see it really impacts colors as well.
So you don't wanna drag it all the way up. You wanna be really judicial with this slider and get it to that realistic point. So I can just scroll down until I see a point where it still looks realistic and it's added some texture down here into the foreground. If I zoom in, you can really see a lot of those details on the leaves pop of those wild flowers. Now there's another way you can do this and that's with the actual Texture slider.
So what I can do is come down here under the Presence section and just increase my texture. Now, I think to really get this right, you have to zoom in on your area and also a little bit of the background. So we'll just get some of these foreground elements and the trees as well. And I'll just increase my texture all the way to a hundred until it looks unrealistic. And then I'll slowly drag it down until it does look realistic, probably about a 14 or 15 in this photograph.
And there we have it. We have more texture added to this image. Now, if you don't want to add texture to the entire image like we just did here, we did and we could, because there's a lot of elements and clutter within this forest scene. But if you were photographing something like a sunrise or a sunset, you have some clear negative space in there where texture might not look great. If you want to finetune that, you can always come up here to the Adjustment Brush and click that and then increase your Texture and your Clarity sliders and just paint within your photograph where you want those to be.
And once you have that painted in, all you have to do now is slide these around and find that good finetune adjustment point of where these look realistic and can impact your photograph in a positive way. So these are just a few ways you can use the Texture and Clarity sliders. You can also just finetune these and add these to the very tips of these wild flowers and get them looking really nice. I'm going to hit Done. And there's my finished photograph of this woodland scene with a nice foreground.
And just a really simple and easy way that you can quickly add a lot more texture to your images and bring up some of that flat look that a lot of images can have in a way that you can finetune those details for better photographs.
Share tips, start a discussion or ask other students a question. If you have a question for an expert, please click here.
Already a member? Sign in
No Responses to “Adding Texture in Photography”