Do you want to capture great lightning photos like some of those "striking" images you see in magazines? It's actually not hard to do! You just need to change your approach slightly and understand the settings and capabilities of your camera.
Change Your Aperture
First of all, you need to use manual settings on your camera and turn off your auto-focus (yes, you are going to set the aperture and shutter speed and properly focus yourself). First, set your aperture to somewhere in the f8-f11 range.
Set Your Lens Focus
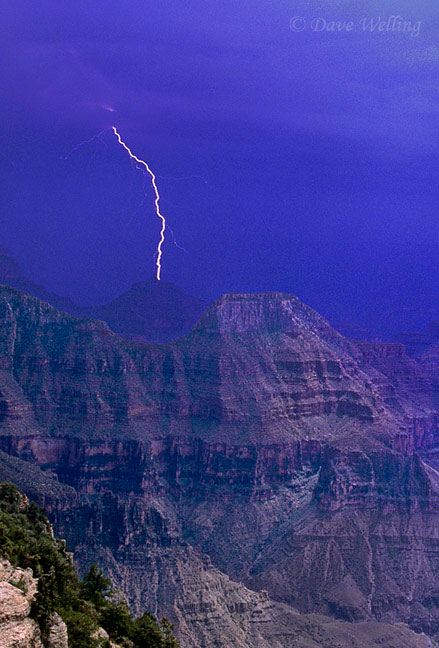
Second, your subject matter, the lightning strike, will be some distance away (if it isn't you are too close to a dangerous situation) so set your lens focus point on infinity. Mid-range zoom lenses in the 35-70mm or 70-300mm range are best for this type of photography. The shorter mid-range zoom lets you include the surrounding area to provide a sense of place. The longer zoom lets you isolate more on the lightning strike itself - but make sure your field of view will include the strike area. If the strikes are occurring over a wide area you will be better off using the wider zoom to insure you capture the strike. The image of the single strike over the Grand Canyon was taken with a shorter zoom lens and, since the strikes were concentrated in a small storm cell area, I was able to shoot vertically emphasizing the strike.
Adjust the Shutter Speed
The last setting you need to adjust is the shutter speed, where you have some options. You cannot press the shutter as you see the strike and hope to capture it. You are just not fast enough to react to a lightning strike. One way to capture the strike is to use the Bulb setting on your camera for shutter. On this setting, when you press the shutter button, the shutter will stay open as long as you press the button. This way you can capture single, or even multiple, strikes on one frame.
Dealing with Overexposure
However, there is a problem with this approach. If the surrounding light is somewhat bright and the strikes are random and far apart time-wise, you may wind up overexposing your image. This approach is best when the lightning strikes occur at a rapid rate and it is nighttime or dusk when the light is lower. Ways to get around this are:
1. Use a smaller aperture (f18-20),
2. Use a neutral density filter (at least two or three stop) over your lens to reduce the input light level, or
3. Decrease your digital ISO setting to the lowest level you can.
This is where experimenting helps – try various settings in the type of lighting you get with these situations and evaluate your results on your computer monitor after checking the histogram of the image (remember, the LCD screen on your camera shows an internally processed JPEG which may or may not give you a correctly displayed image when you check it on a monitor). When you have your baseline settings that you like, use those for your first lightning storm and make additional adjustments if necessary. A good accessory to use with a Bulb setting is a cable release with a lock button. You press the cable release button and it locks open until you release the lock position making it easy to actuate the shutter.
Using a Lightning Trigger
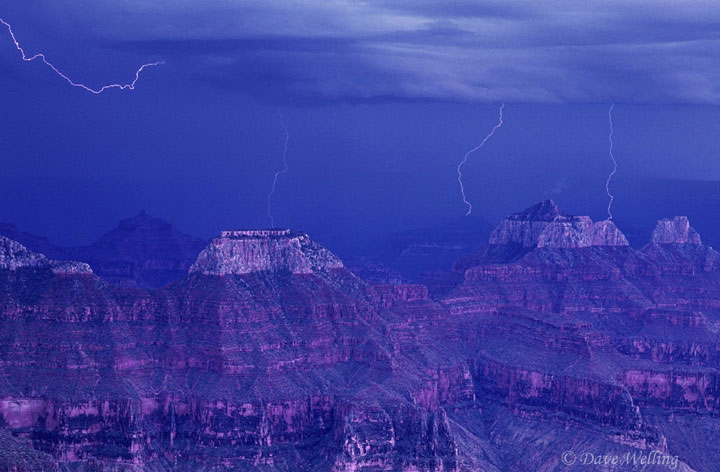
Another approach, and the one I prefer, is to use a Lightning Trigger from Stepping Stone Products. This great device is supplied with a modified cable release connection cable (you provide the cable). The unit sits on the camera hot shoe and plugs into the cable release port. You manually set your aperture and shutter speed (typically in the 1/8 to 1/30 second range - the shutter speed is the key setting so adjust your aperture accordingly), set your focus and turn off autofocus, lock up the mirror to eliminate the delay, and the Trigger fires the shutter when it senses a lightning strike. It can sense strikes many miles away and is a pretty amazing little device. All the images shown here were taken with this unit. This multiple strike photo was captured using the multi-exposure setting on my camera.
Composition
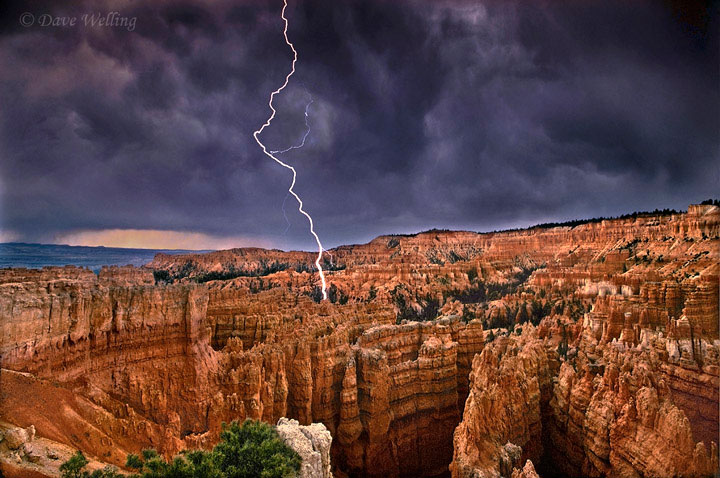
The final consideration for your lightning images is how to compose them. Many images are taken at night with only the strike featured. These images can be very impressive but I like to photograph lightning during the afternoon hours when monsoon storms build up in the Southwest and I can capture violent cloud formations as well as the surrounding landscape to provide impact, help anchor the image, and provide a sense of place like the second and third images you see in this article.
Capturing lightning isn’t nearly as difficult as it sounds. With the right equipment settings and techniques, learning to photograph lightning can be an exciting addition to any photography portfolio.
About the author: Dave Welling is a full time professional photographer specializing in wildlife, landscape and nature with over 75,000 6x7, 6x4.5, and 35mm film and digital images. He has been capturing evocative images of the natural world for over 25 years, producing the highest quality images for publication. His images often capture unique behavioral characteristics of wildlife or special lighting or weather conditions of landscapes. You can see more of his work at www.strikingnatureimagesbydavewelling.com.
Have something to add to the story? Leave a comment or email editor@outdoorphotographyguide.com.

Share tips, start a discussion or ask other students a question. If you have a question for an expert, please click here.
Already a member?
No Responses to “How to Capture “Striking” Lightning Photography”