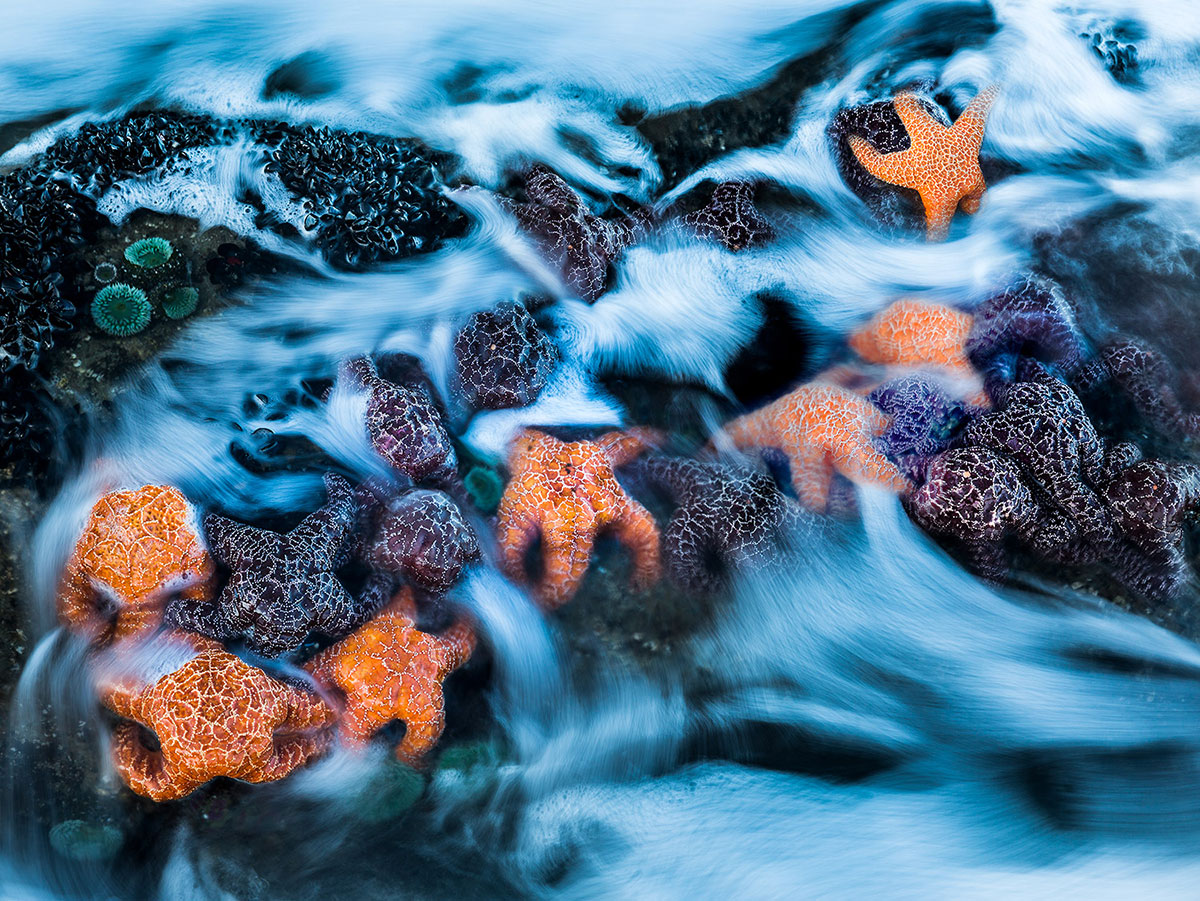
Complementary colors—that is, colors opposite one another on the color wheel—can be used very effectively in visual art, including photography. When juxtaposed, complementary colors make each seem brighter and more vivid, creating a powerful visual effect. Artists have been using complementary colors, such as the oranges of the starfish and the blues of the water found in the photo below, for centuries. Complementary colors help create multiple points of visual interest in your compositions, engaging the viewer’s eye.
What are complementary colors?
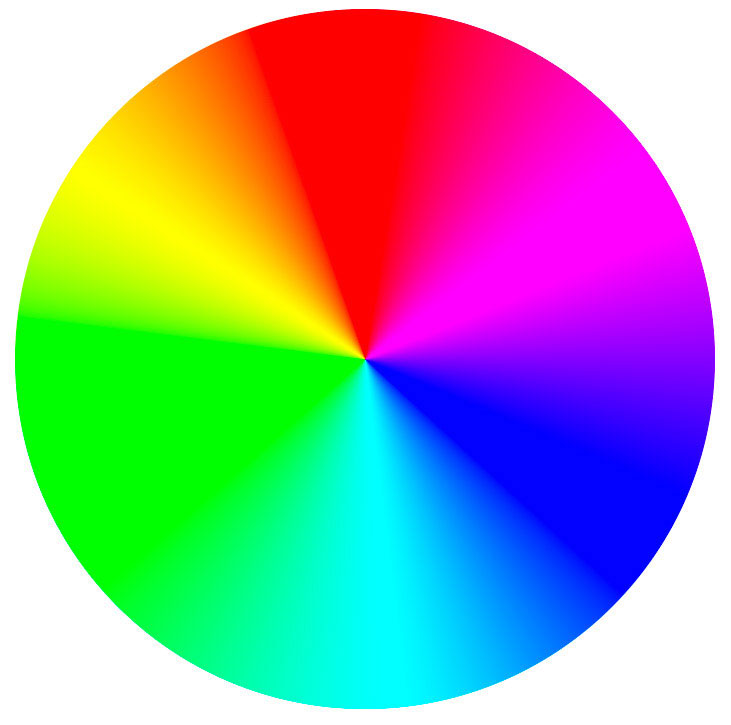
The graphic below illustrates what is typically known as a color wheel. This diagram shows where colors appear relative to each other on the color scale. Colors facing each other are known as being complementary, which essentially means that the two colors are opposites, and when mixed in the proper proportion, they produce a neutral color (grey, white, or black). For example, the following common colors are complementary pairs: red and cyan, yellow and blue, and magenta and green.
When we discuss using complementary colors for artistic purposes, however, it is not necessary that the colors be exact opposites: the complementary color effect works just fine if the two colors are generally opposed to each other on the color wheel. For example, red and blue produce a nice complementary effect, even though they are not exact color opposites.
How white balance affects color
White balance determines how your camera sees color. For many shooting situations, white balance is a subjective choice, as what you determine to be the best color balance for your photos will depend in large part on your personal tastes and artistic goals. Accordingly, if shooting auto white balance, there’s no reason to feel constrained by the settings your camera chooses, especially when shooting raw format, which allows penalty-free white balance adjustment while processing the raw file on your computer. I’ll often deviate from the choices my camera makes, sometimes to more closely match the colors of the scene as perceived by my eye, and sometimes I’ll change color balance for purely creative reasons. You should never feel constrained to present your photos with the white balance settings chosen by your camera, or to process your images to stay truly faithful to the way your eyes and brain interpreted the scene. In other words, feel free to get creative!
Related eBook: Chasing the Light
In fact, creative choice of white balance is usually important for scenes or subjects with a complementary color scheme. Mixed lighting situations will often create complementary colors: for example, at sunset, parts of the scene in the light will appear warmer than parts of the scene that are in shadow (which are illuminated primarily by light reflecting from the blue sky above, and therefore will appear relatively cool). If you “correct” the white balance to adjust for the blue light in the shadows, you will lose the cool tones in the image and therefore destroy the complementary color scheme.
In such circumstances, I will experiment with different white balance settings until I find a setting that equally preserves both warm and cool colors. Sometimes finding the correct balance is difficult, so on occasion I will take things a step further and double process a raw file at different white balance settings and blend the two photos together in Photoshop.
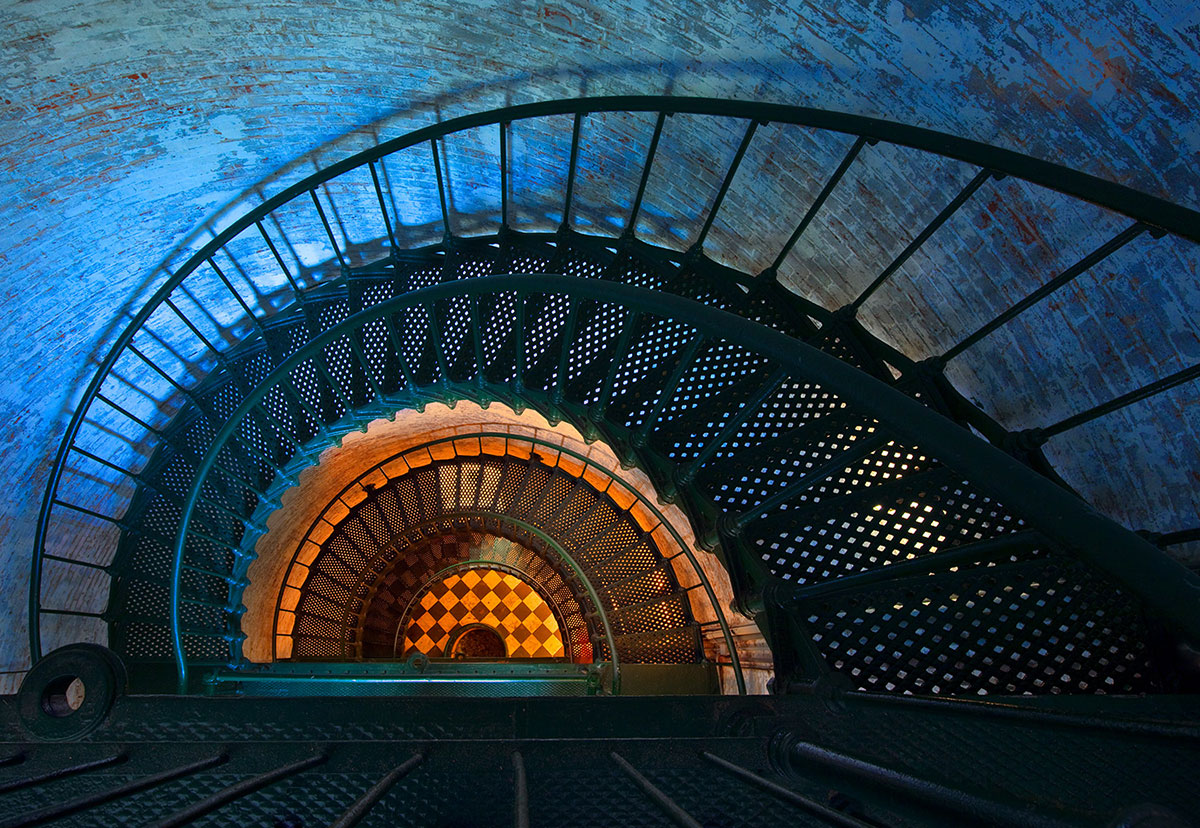
Such was the case with this photo below, where the staircase inside a lighthouse was mostly in shadow, except for the foyer at the bottom, which was lit by artificial lights. I took two exposures for blending to increase the camera’s dynamic range; when blending the two exposures, I cooled the white balance of the shadow exposure to bring out the blues, enhancing the complementary color effect.
Look for subjects or scenes with complementary color
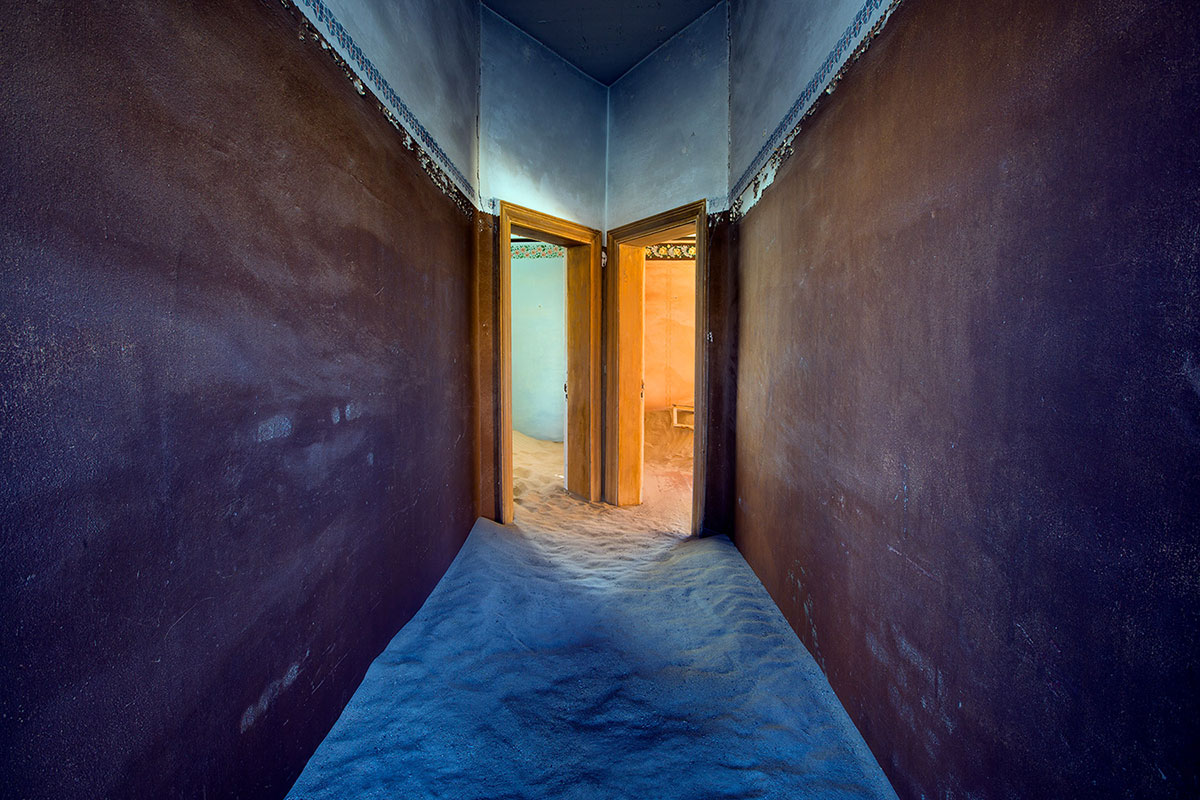
I’m always on the lookout for ways to juxtapose color complements. For example, with this scene from an abandoned ghost town in the Namibian desert, I found a hallway leading to two side-by-side rooms, one painted pastel blue and the other orange. The two colors give the photo extra visual energy. I chose a composition to direct the viewer’s eye to the color contrast, using architectural lines to lead from foreground to background.
Related article: How to Use Leading Lines to Create Compelling Landscape Photos
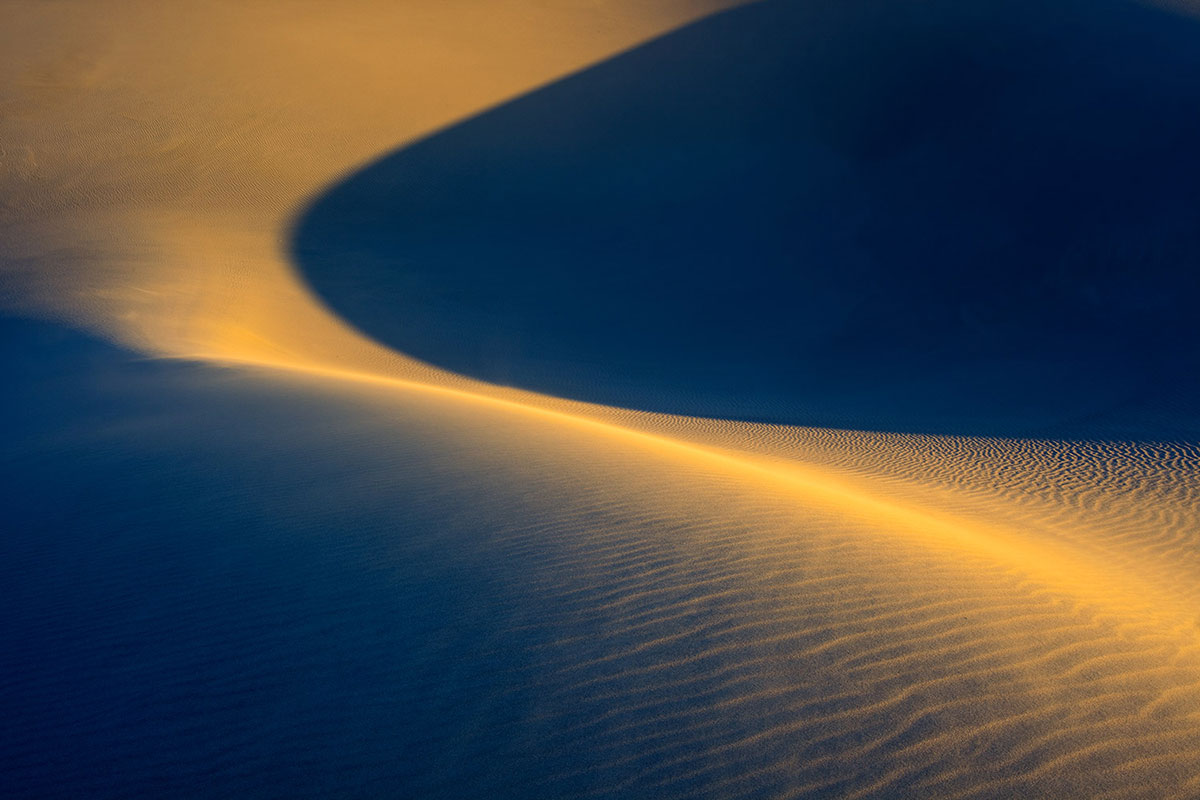
With this next photo, the complementary color scheme is the result of mixed light: the dune crest was warmly illuminated by the rising sun, while the rest of the scene was in deep shadow and rendered with a bluish tone. I choose my white balance carefully to preserve both the warmth of the sunrise light and the cool color of the shadows. The resulting light and color contrast creates the defining s-curve shape of this composition.
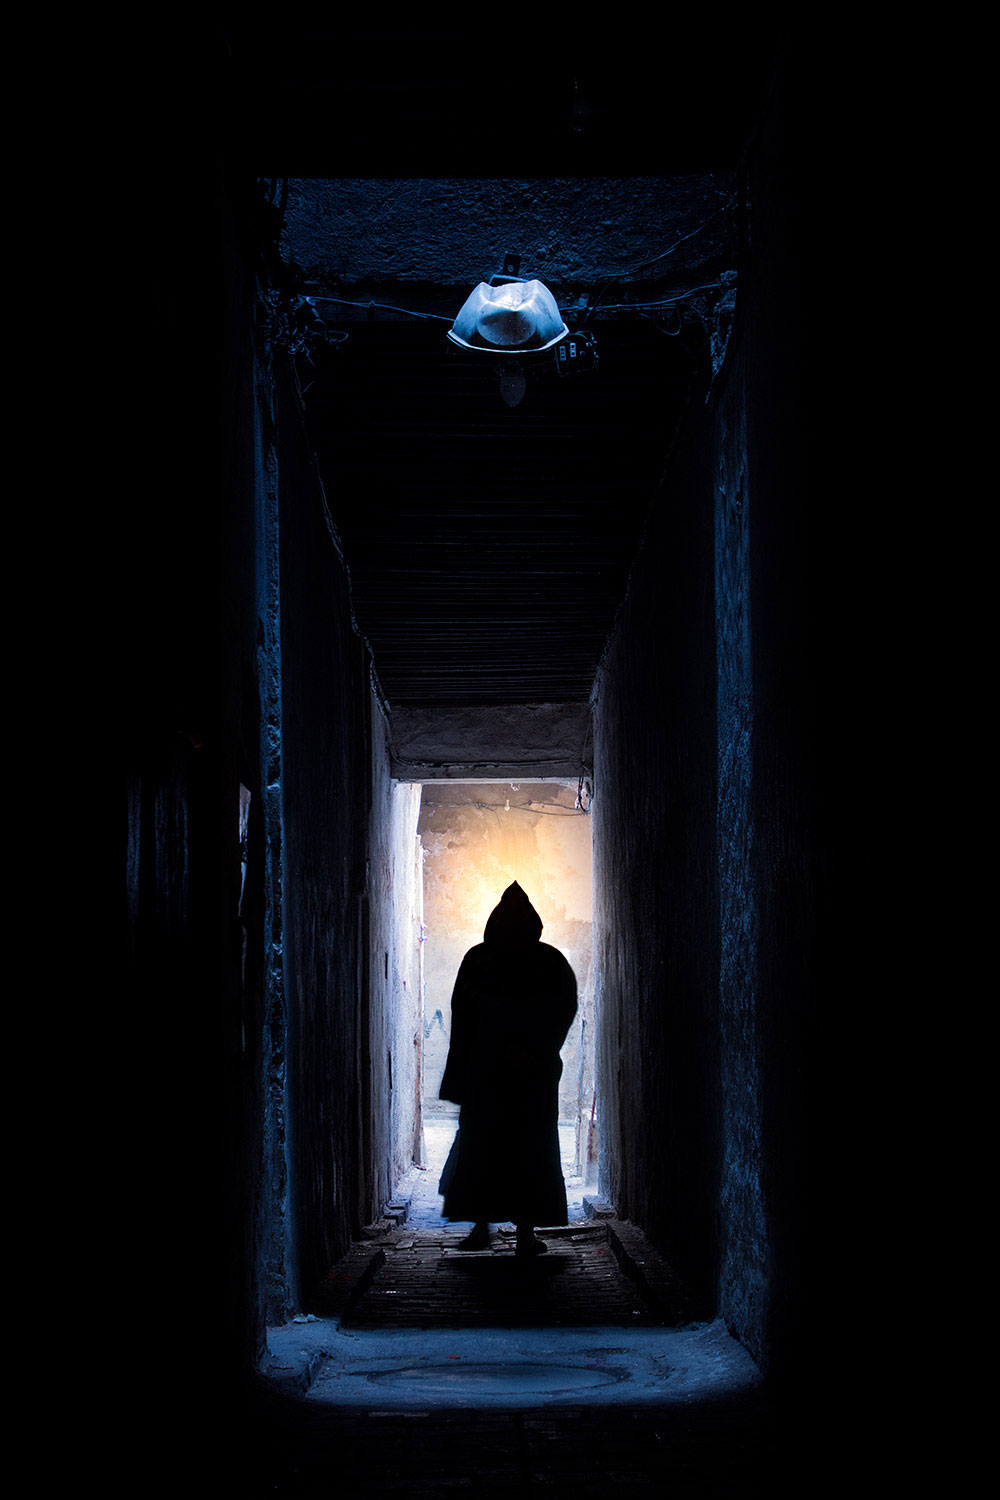
Finally, for this image of a man walking through a narrow enclosed alley, most of the scene was very dark, so I choose an exposure that let the shadows go into deep silhouette, creating a graphic look. Parts of the scene were open to the blue sky above, and are accordingly rendered blue in color. A small dash of yellow on the far wall provided the perfect color complement, enhancing visual interest. The color contrast also reinforced the composition, drawing the eye to the man in the center of the alley.
Conclusion
Always be on the lookout for complementary color schemes. The juxtaposition of color opposites can help you create exciting and colorful photographs.
If you’re interested in learning more about using color and light creatively in photography, check out Ian’s eBook, Chasing the Light, which you can find here.
About the author: World-renowned professional photographer and Tamron Image Master Ian Plant is a frequent contributor to a number of leading photo magazines (including Outdoor Photographer, Popular Photography, Landscape Photography, and others). You can see more of his work at www.ianplant.com.
Have something to add to the story? Leave a comment or email editor@outdoorphotographyguide.com.

HOW WILL YOU APPEAR ON TV? HOT NEWS Sakthivel said that:'I do not be afraid to start over. I believe that it gives me a chance to build something even better.'
beautiful photos. I need help with color combinations for my paintings
There are two types of color mixing, additive and subtractive. The wheel and complementary pairs named in this article are additive -- the mixing of light, as on a monitor or stage lighting, the colors add together. (Think how a prism separates colors from white light.) When mixing pigments, such as for painting, they cancel each other out, thus "subtractive," revealing underlying colors in common. Too many = black. An artist's complementary pairs are red-green, blue-orange and yellow-violet.
This is not really correct. You should be using an RYB color wheel, the one used by artists. Red and blue are not complementary. Complementary colors are red and green, yellow and purple, and orange and blue. You can physically see this when you stare at one of those colors for a minute and then turn to look at a white wall or white paper. You will see the complementary color. If you stare at a square red card, then look to a piece of white paper, you will see a green square. Your eye calls for the complementary color.
Not many examples of red/cyan or green/magenta shots out there!
Being a beginner is it best to set my white balance on auto? When do you know you should change it and to what?