A workflow is important because it enables the photographer to create a consistent series of photographs that quickly lead to revealing their personal style. The extra edits they choose to make to specific types of nature photographs allows the photographer to give their style an extra flair or boost that no one else has.
So, what specific situations am I talking about?
Well, the scenario that I have experienced the most is water photography editing.
Now, water photography has a lot of specifics that you need to be aware of in the field for sure, but separating your water photography skills from the rest of the pack even more depends on your knowledge of post-processing.
First up: identify your photograph’s dominant color.
Whenever you get back home and you start the post-processing process (you know the long wait while your photos import) you need to start watching for a few things. The first object to identify is the dominant color. The main color in a photograph can and should be accentuated in post-processing.For example, in this photograph, the color that I wanted to reveal was red. To me, the red is the main idea of the story of this photograph. The red is your protagonist. He’s the one you need to boost.
Now, I’m not saying you should boost colors so much that they look fake. You need to go into the post-processing experience with some restraint. I prefer to increase the specific color’s vibrance and luminance all the way, and then dial back the effects until the photograph looks realistic again. That technique allows me to maximize the edit, but also keeps the integrity of the photograph intact.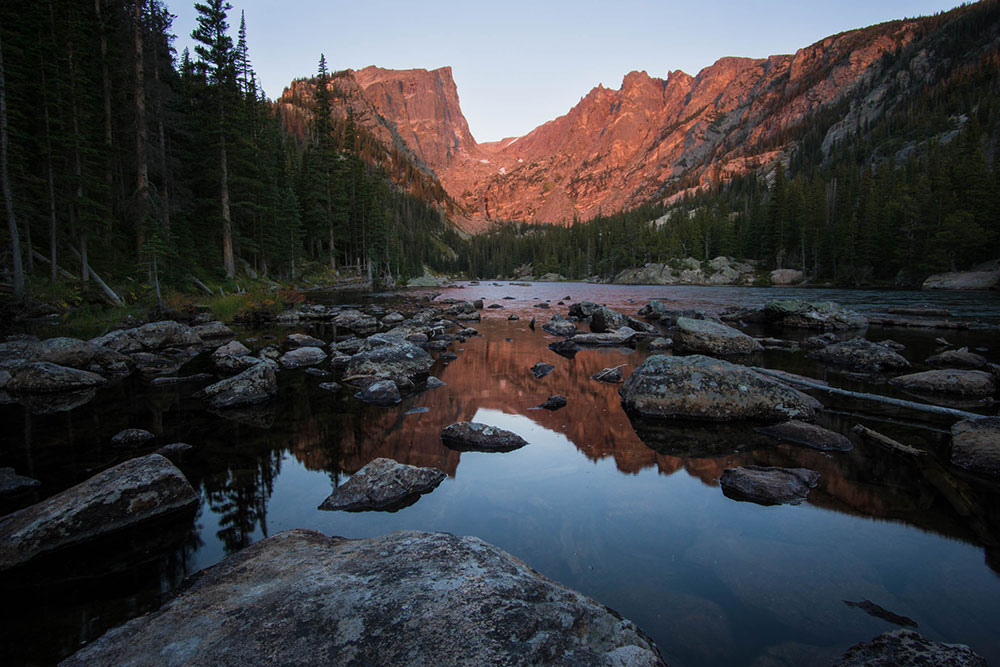
Next up: locate the detail.
The next thing to locate is your detail. Detail is a huge factor in waterfall photography specifically. Many people shoot waterfalls in exposures that are too long so the water is solid white. If you want to increase the interest level of the photograph, shoot in a way that will still reveal some lines in the rushing water.My favorite tool to accentuate this effect a little more is the adjustment brush in Lightroom. Simply paint in some clarity to the waterfall itself to bring out those lines you created in the field. Again, I increase the clarity effect all the way and then dial it back until it looks realistic.
All right, do you want to know one big secret slider you can use with water photography?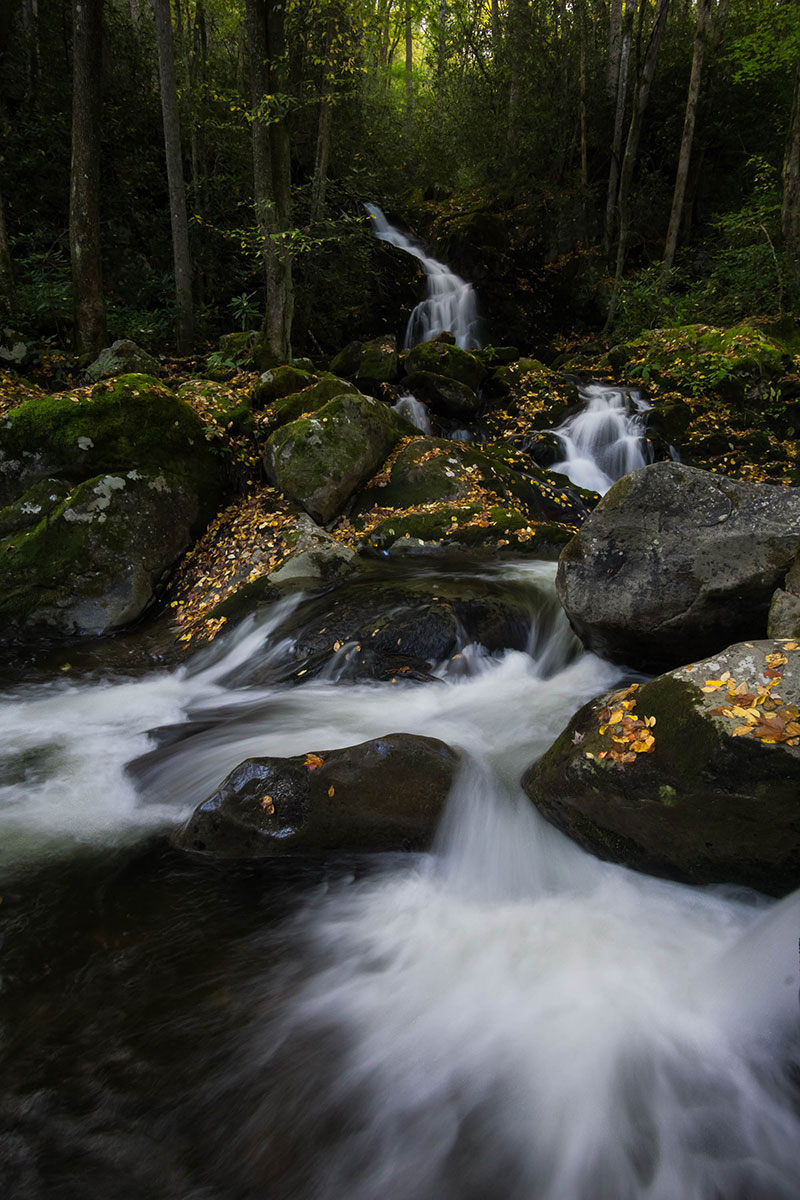
Sure you do.
Well, if you scroll down to the camera calibration section of Lightroom, there is a slider called the “Blue Primary Saturation” slider. This slider works especially well when you have some water with yellows or oranges in the shot as well. If you increase the slider, you’ll see it increases the blues and yellows along with some other tones.
The only problem with this slider is that it can increase the blues too much. Not to worry. Simply navigate back up to the blue saturation slider and lower the blue saturation effect until you get the color where you want it.
Fellow photographers, this is just scratching the surface of water post-processing that can take your water photography to a whole new level. If you want to learn more, I suggest checking out this class on post-processing your water photography where you will learn how to: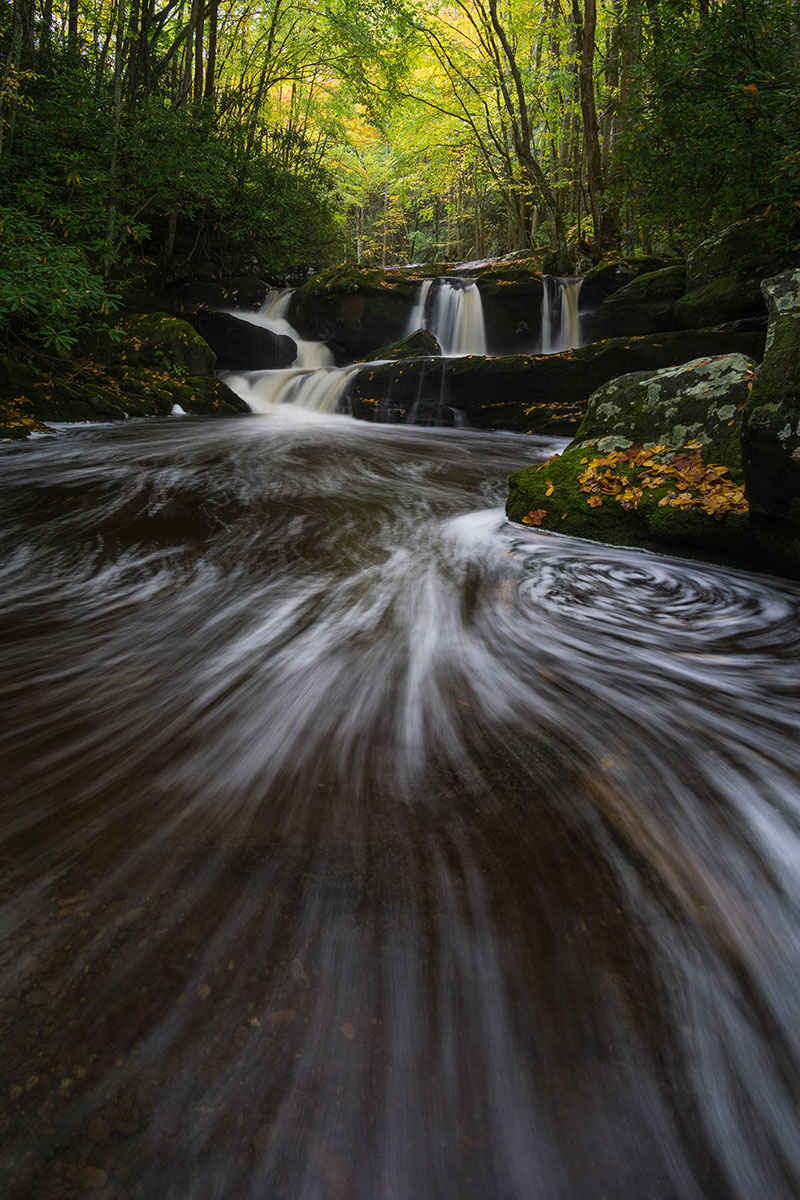
- Plan to shoot water features
- Add detail to your water features
- Merge images in Photoshop
- Create your own water photography post-processing workflow
- Manage lighting in the digital darkroom
- Use Lightroom effectively
- Use a secret pro tip to make colors pop
- Use layers and masks for water photography
This beginner- to intermediate-level class was originally recorded live and is now available for download in the Outdoor Photography Guide Shop. You can take a look and watch a preview of the class here.
 About the author: When David Johnston isn’t leading photography workshops and tutorials or hosting his popular photography podcast, Photography Roundtable, he can be found traveling the world taking photos to awe and inspire his viewers. David has a passion for sharing his knowledge of photography and has many educational offerings designed to help photographers improve their work. Visit his website at www.photographyroundtable.com.
Have something to add to the story? Leave a comment or email editor@outdoorphotographyguide.com.

Share tips, start a discussion or ask other students a question. If you have a question for an expert, please click here.
Already a member? Sign in
No Responses to “Why Post-Processing Your Water Photos is Different”