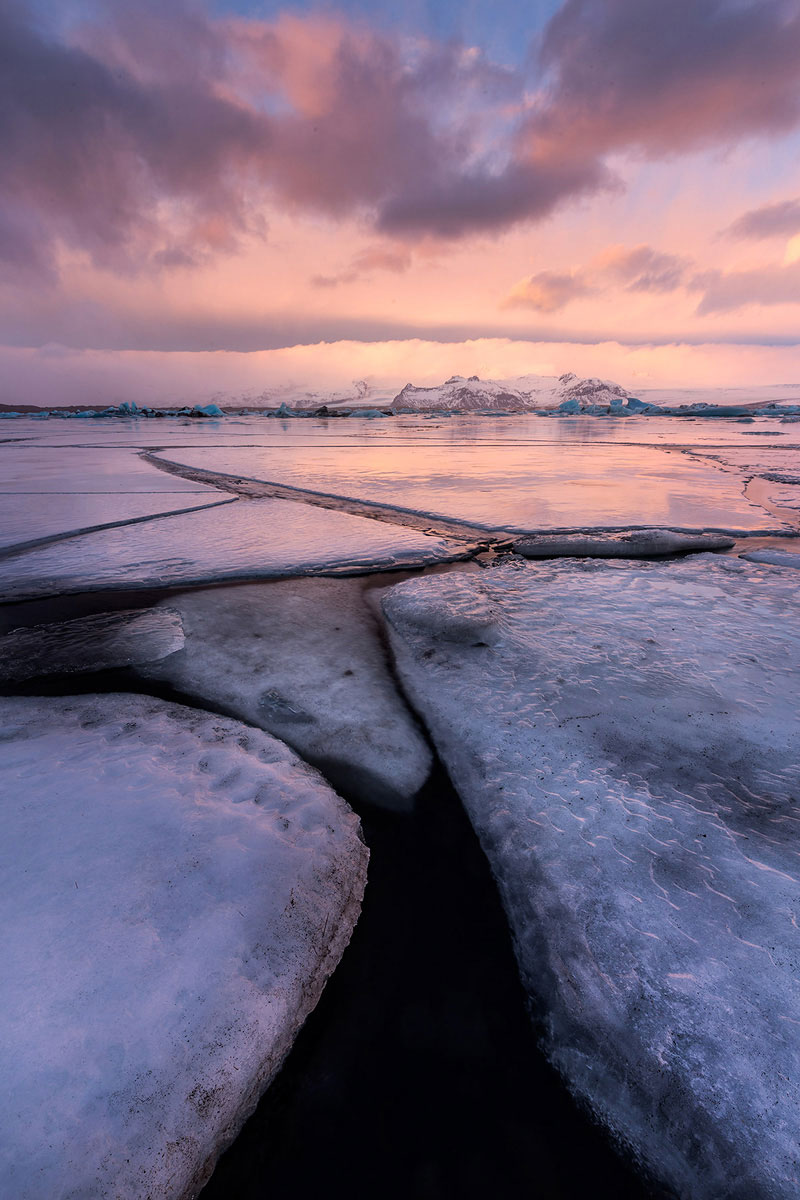
If you really want to wow viewers, get low and close to interesting foreground elements for your landscape photos. You will find that foregrounds add depth to your compositions, and help lead the viewer’s eye into the scene. For the image below, I got very close to an attractive pattern of ice with a wide-angle lens, emphasizing the foreground and making the image more visually compelling through the use of converging leading lines.
Include what’s at your feet
A foreground is the part of a scene that is nearest to and in front of the photographer. In a sense, it is the stuff that is right at your feet. Not any foreground will do! I searched around for quite some time before finding an interesting feature to include as my foreground in this image (in this case, an attractive pattern in a boulder). Look for something that relates to other elements within the scene.
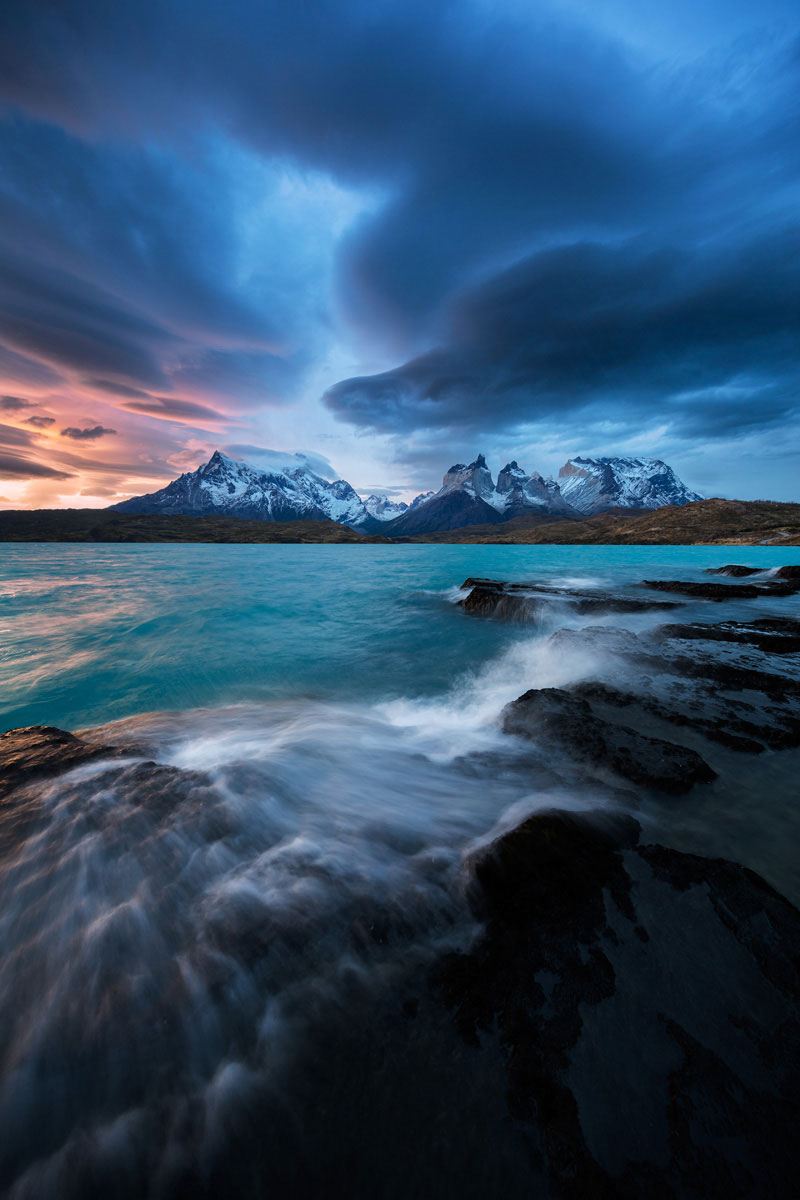
Go wide for a dramatic near-far effect
Wide-angle lenses are especially useful when shooting classic “near-far” landscape compositions, as you can get really close to a foreground element and exaggerate its importance relative to the background. I used this technique with this image of a stormy sunset in Patagonia. By getting close to the foreground wave, I was able to create a visual relationship between near and far – and I was also able to create an image that was more visually compelling than if I had just made the photo without the foreground.
Include something in between you and your subject
Your foreground doesn’t always have to be something nearby either. As long as you include something that is between you and your subject, it will achieve your goal of creating depth and a dynamic visual relationship between nearer and farther elements. Foregrounds aren’t just for wide-angle lenses either; you can use foregrounds with longer lenses too. Having something of visual interest that is closer than your main subject adds depth and compositional power, even if that something is quite far away from you. For this image, I used some shadowed rocks to add “foreground” interest, even though they were fifty feet away.
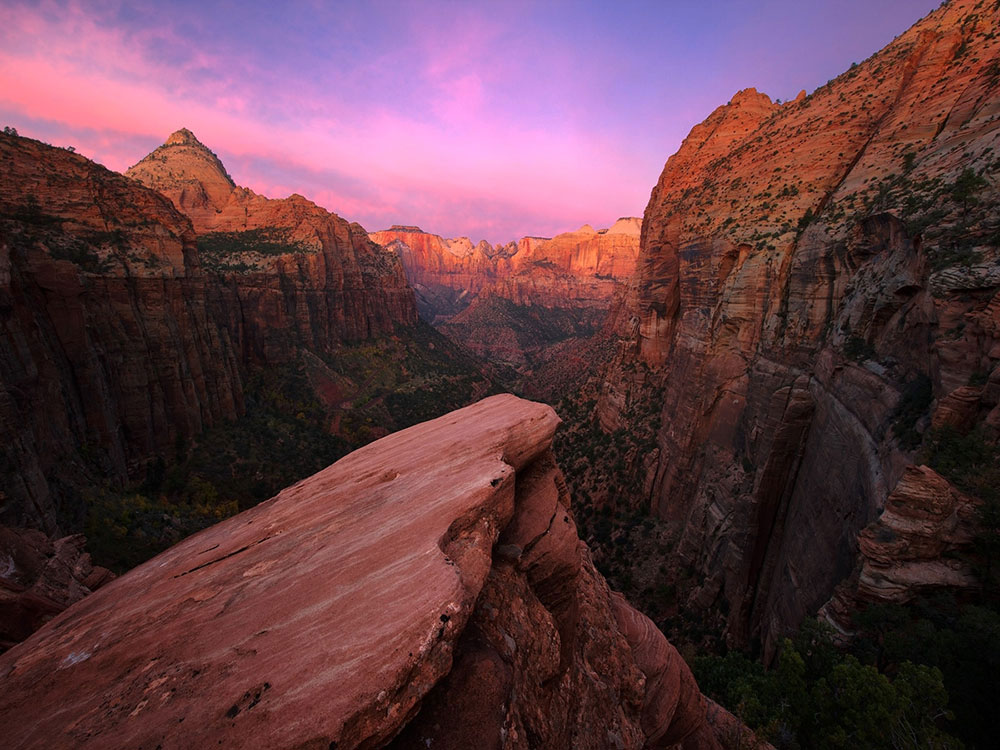
Look for bold shapes to add compositional interest to your foregrounds
Use a foreground that relates to and enhances your overall composition. For this photo, I found an interesting foreground by waiting for an incoming wave to create a swirl shape. By selecting a relatively long shutter speed, the motion of the water blurred during the exposure, creating the foreground shape where there otherwise was none.

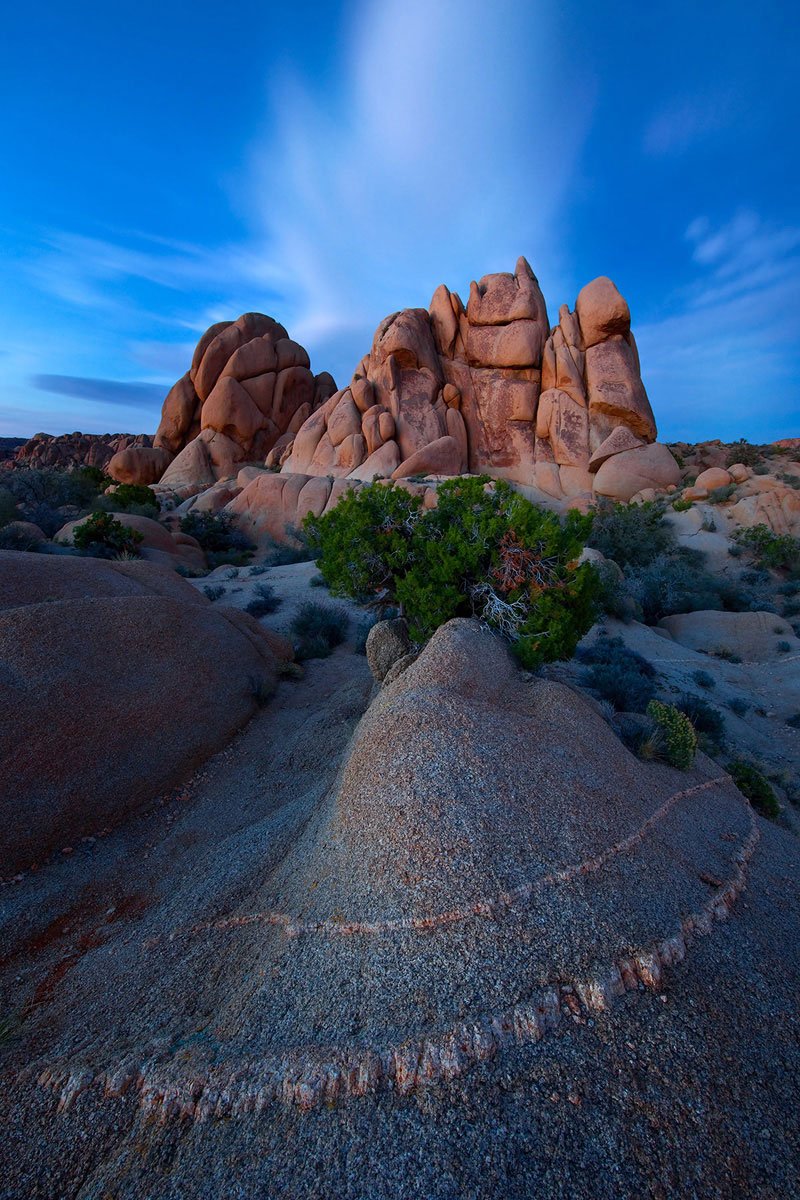
Use small apertures for depth of field
When shooting near-far landscape compositions with a close foreground, you’ll need to ensure sharpness from front to back. Careful focusing and small apertures will ensure sufficient depth of field. Try somewhere between f/11 and f/16 to make sure you have adequate sharpness. For this photo, I was only a few feet away from my foreground; a small aperture gave me the depth of field necessary to render all parts of the image sharp.
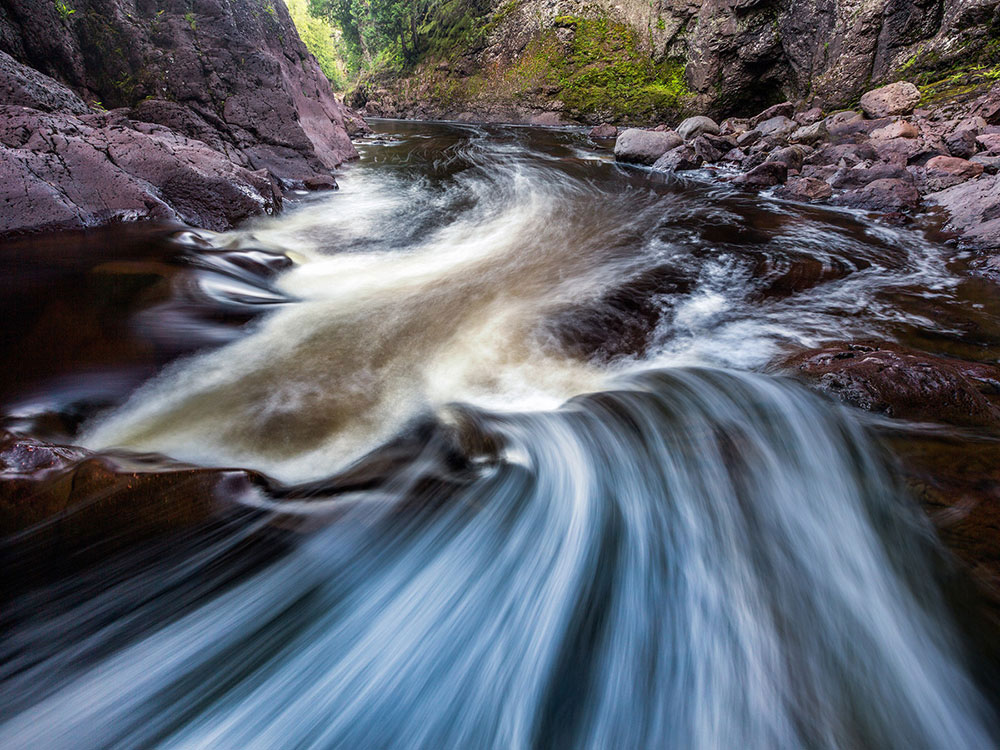
Use leading foreground elements to direct the viewer’s attention deep into the composition
Leading lines in particular can be very compelling as foregrounds, encouraging the viewer to explore the composition and creating a high level of visual engagement. For this image, I got into the stream, getting low with a wide-angle lens, in order to use the streaking water (resulting from foam in the water moving downstream during a long exposure) as leading lines.
Conclusion
Although you don’t need to include a foreground in every photograph you make, you will find that foregrounds add considerable depth to your landscape compositions. When you use a foreground, it helps establish a visual relationship between the bottom of the photograph and the top, which is important for leading the viewer’s eye into the scene.
About the author: World-renowned professional photographer and Tamron Image Master Ian Plant is a frequent contributor to several leading photo magazines (including Outdoor Photographer, Popular Photography, and others) and the author of numerous books and instructional videos. You can see more of Ian's work at www.ianplant.com.
Have something to add to the story? Leave a comment or email editor@outdoorphotographyguide.com.


Good one
Great article for a beginner like me. Thanks
Awesome tips thank you! I only have a point and shoot and yet these are applicable even with that!
I really enjoyed this article and taken some ideas on board.a huge thank you.
hello, ian, your article from last year has resurfaced and i just want to let you know how much these simple tips have improved my photography...thank you for sharing!
Fantastic images. Please teach us how to process this type of image to manage the wide angle distortion. I've tried using this technique, but my images are not nearly as powerful. That my be due to my cropped sensor 7DMII
I have watched videos & read some of your articles. Do love your inspiration on how I can improve on my nature photography. I do portrait & event photography & video work as a freelancer but nature is my true passion. Please feel free to check out my work.
I watched one of your online courses regarding the use of wide angle lens before visiting the "mighty five" national parks in southwest US this past fall. What a difference your tips made for my landscape photos. Before they were just bland "snap shots" of outdoor stuff, now I have "art". Thanks
Ian, how can I get back to the Facebook page for Community Discussion? I was on it for several months but then lost it and, for the life of me, cannot seem to retrieve it. I miss it. I have no problem getting on to the website, just the Facebook page. Any suggestions. I am on a Nikon site as well as Ditch Auto and a local, very good "Wakodahatchee and Green Cay" site, the latter being a south Florida preserve. I do get the Outdoor Facebook on my mobile phone but can't submit pics as they are on my computer. Thanks for any suggestions.
Love the steps to get sharp foreground to distance in sharp focus.