Use a small aperture to create the starburst effect
You won’t get a starburst effect if your aperture is at its widest setting, because at the widest setting the aperture diaphragm is shaped like a circle. An optical phenomenon called diffraction causes the starburst effect; as light passes through a small aperture, it is diffracted (or spread out) across the lens’ aperture blades. As you stop down your lens and select smaller aperture, the blades of the diaphragm come together to form a polygon shape, which is what creates the star-shaped streaks radiating from the light source. The smaller the aperture you use, the more pronounced the effect.Typically, a small aperture such as f/11, f/16, or f/22 is necessary to produce an attractive burst; the smaller the aperture the better the effect, although you may want to avoid extreme apertures such as f/16 or f/22 because of diffraction (this same optical effect that produces the starburst effect also reduces overall image sharpness at small apertures). So, when choosing your aperture, you are trying to find the right balance between a crisp and bold starburst effect, and minimizing the sharpness-reducing effects of diffraction.
When working with high-quality lenses, I find that f/11 usually gives me a starburst of adequate quality while at the same time maximizing overall image sharpness, although sometimes I’ll stop down a little bit more to enhance the starburst. For the image below, I was lucky enough to capture the sun rising and the crescent moon setting; an ultra-wide lens allowed me to include both within the image frame, and stopping down to f/11 created a crisp starburst.

Reduce lens flare by partially blocking the sun
Flare can be a significant challenge when the sun is included within the picture frame, as you cannot effectively shade the lens to prevent light from hitting the glass. In such circumstances, it is typically possible to partially block the sun to reduce its intensity (for example, by using a tree trunk or a passing cloud). It is important to find the right balance between blocking the sun sufficiently to reduce flare, and leaving enough of it exposed to create a strong burst. For the image below, the sun was shining through a small hole in the sandstone formation, which blocked the sun just enough to eliminate lens flare, but still allowed a strong sunburst effect.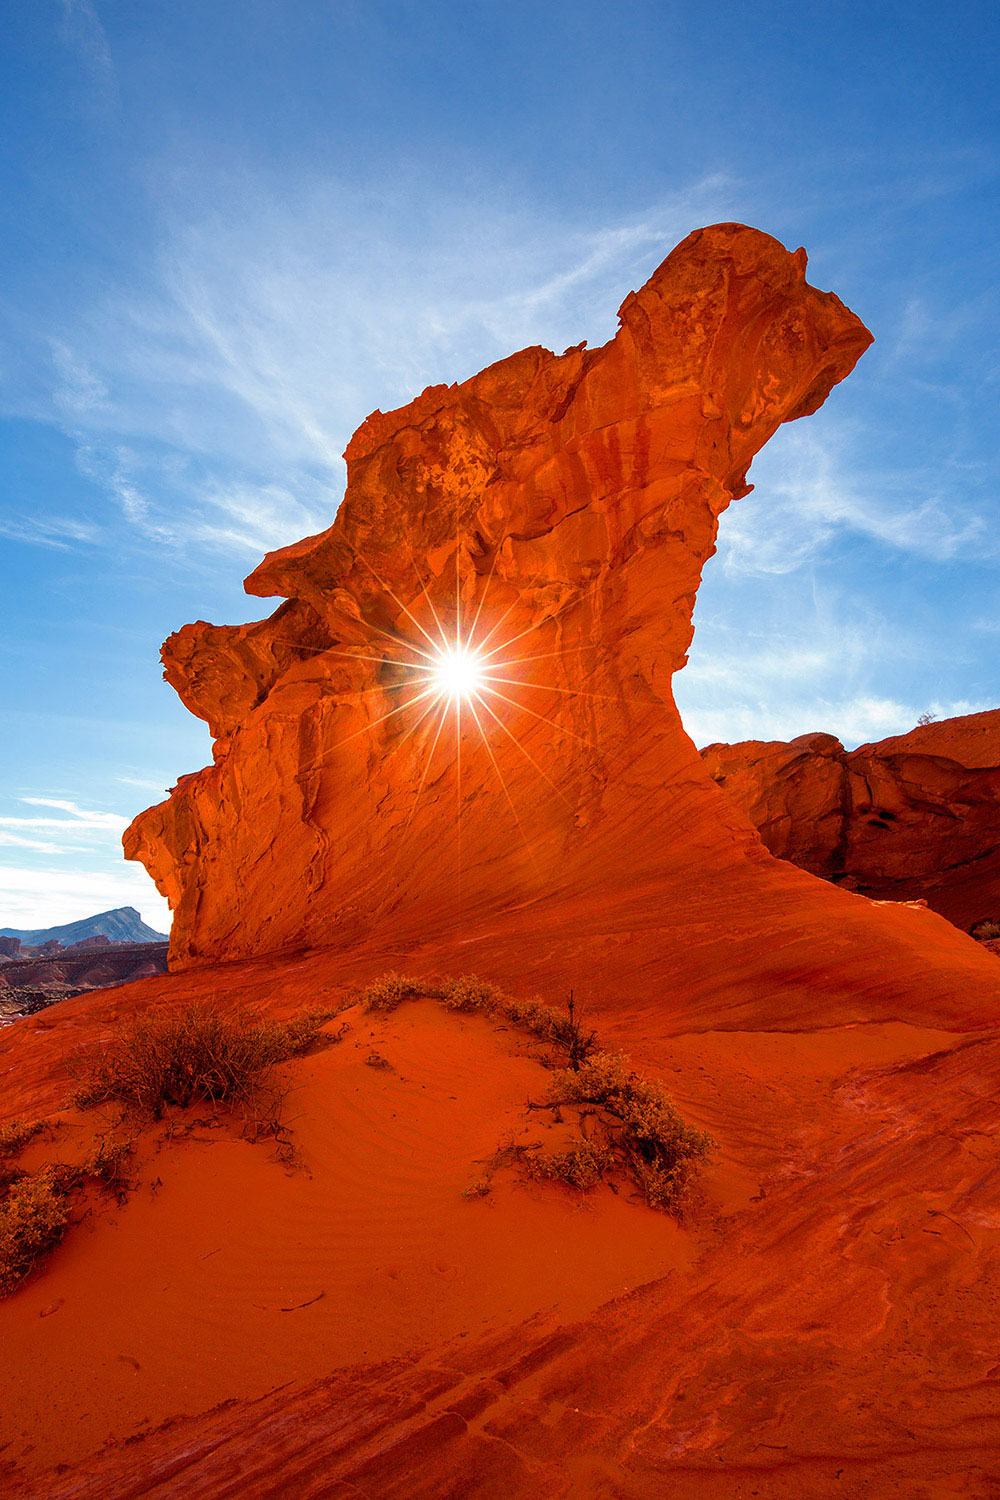
If you can’t block the sun, try shooting with the sun low on the horizon
Sometimes partially blocking the sun isn’t an option, and sometimes you might prefer to capture the sun in the sky without any obstruction. You should expect to get some lens flare in such circumstances, especially right around the sun. When the sun is low on the horizon, its intensity can be reduced by haze and atmospheric particles, which should help mitigate flare somewhat. Too much haze, however, can reduce or eliminate the starburst effect. For example, with the image below, you’ll notice some flare around the sun.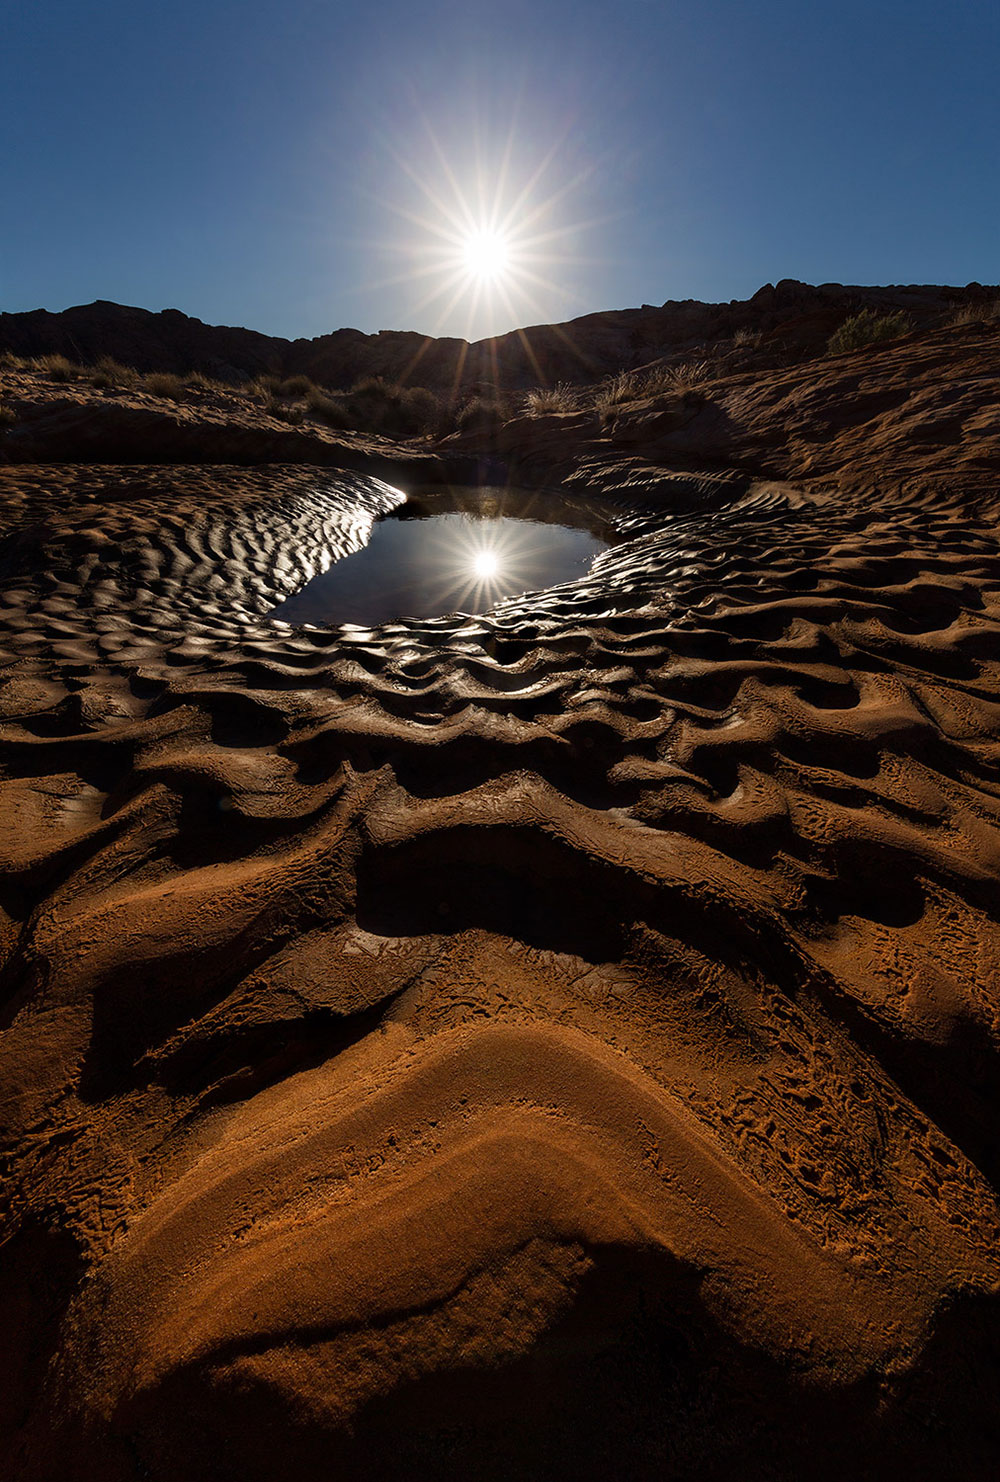
Not all lenses handle shooting into the sun equally
Some lenses handle lens flare better than others. Typically, more expensive lenses will handle lens flare better than less expensive lenses, and new lenses will be better than older models that lack the benefit of modern lens multi-coating technology. Prime lenses typically handle flare better than zooms, although many modern zooms do admirably well.Also, generally speaking, higher-quality “pro” lenses will produce more defined and higher-quality starbursts than lower-quality consumer lenses. Even among pro lenses, there is considerable variation as to the quality and character of the starburst effect created. Of course, there is a huge subjective component to how one feels about a given lens’ starburst quality, so I suggest looking at sample images when considering a lens purchase.
The quality and characteristics of the starburst produced by a lens are a result of the number and shape of aperture blades. For technical reasons too complicated to go into here, lenses with an even number of blades produce stars with spikes equal to the number of blades (for example, a lens with 8 aperture blades produces a star with 8 spikes). Lenses with an odd number of aperture blades, however, produce two spikes for each blade (for example, a lens with 7 blades produces a star with 14 spikes). Furthermore, some lenses have a tendency to produce “twinning” or “splitting” of their spikes, most noticeable at the far ends of the spike.
Which type of starburst effect you prefer is, of course, entirely subjective and completely up to you. Although many photographers prefer fewer spikes, I’m partial to the 18-spike stars produced by 9-blade lenses such as the Nikon 14-24mm, Canon 11-24mm, or Tamron 15-30mm. What can I say, I like a lot of spikes! That’s just a personal preference, of course.
Keep your lens clean and remove filters
Smudges, dirt, or oil on the front of your lens can increase lens flare. So can UV or other types of filters. If you are having problems with flare when shooting into the sun, make sure to remove any filters and check to make sure your lens is clean.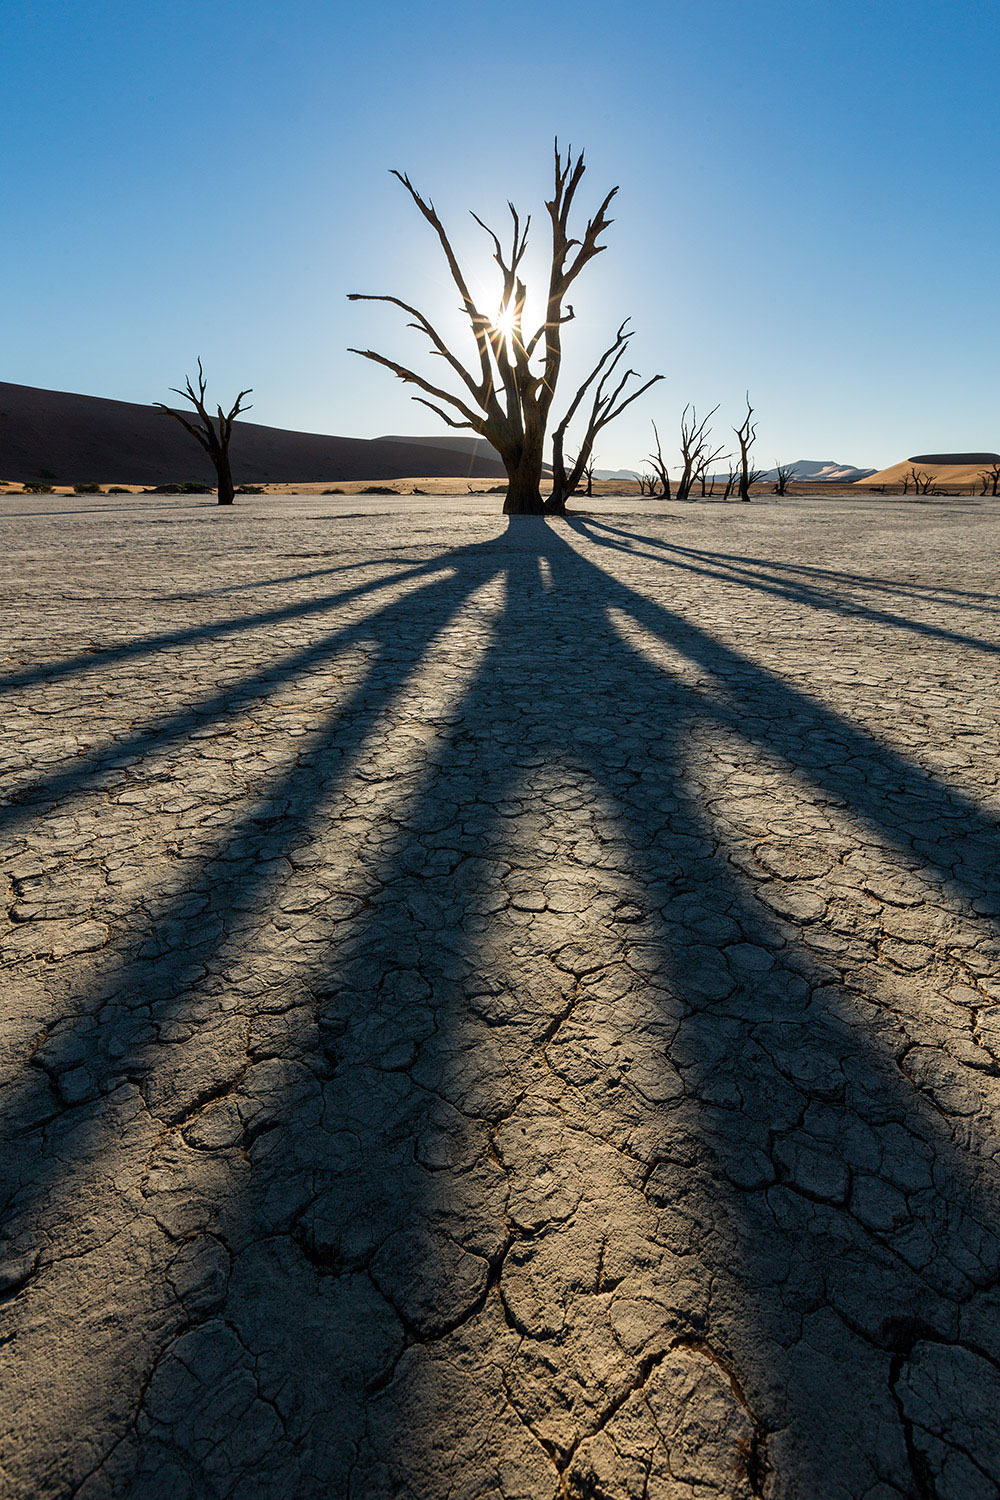
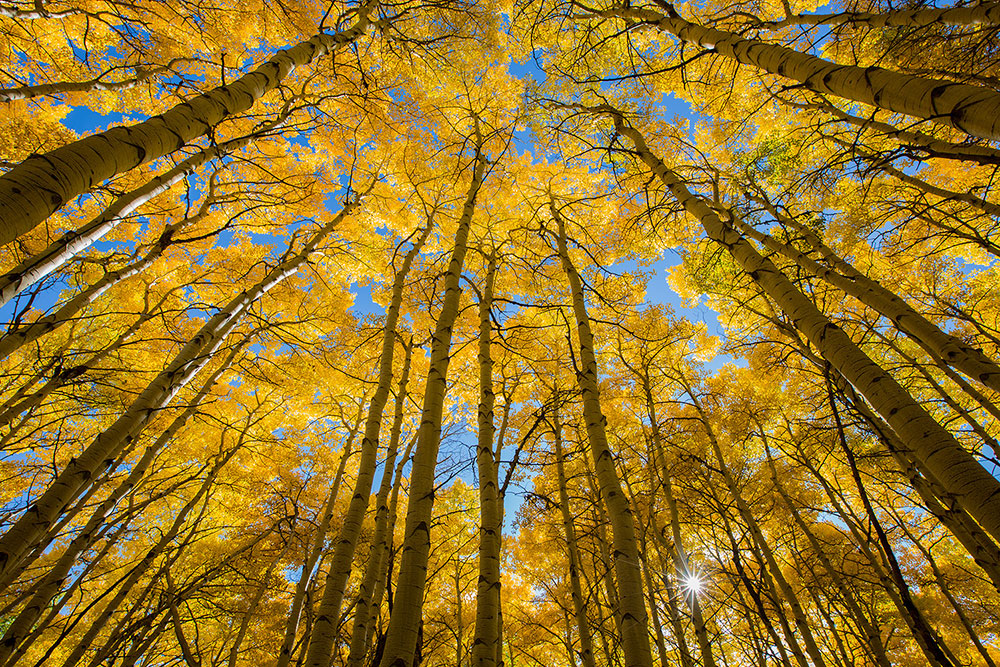
Don’t just shoot the sun
The starburst effect isn’t limited to landscape photography and shooting into the sun. Anytime you have a bright source point of light, you can create a starburst effect. The moon during a night shoot can be great for starbursts. And when shooting cityscapes at night, I’m always on the lookout for ways to include bright street lights for creative use of the starburst effect, such as with this photo of the Lowry Avenue Bridge in Minneapolis, Minnesota.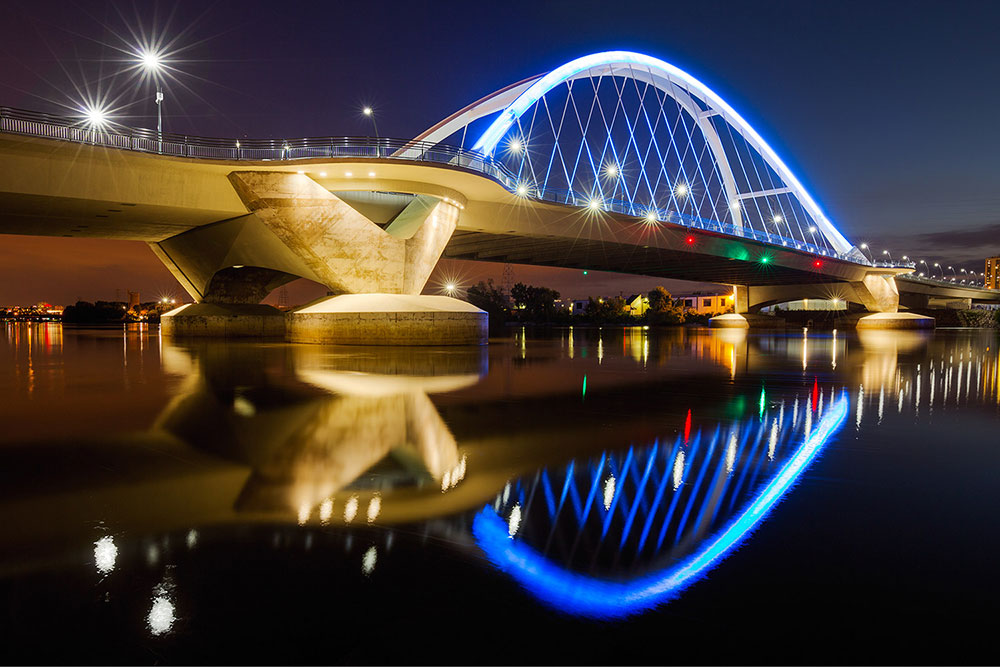
Conclusion
Including the sun as a starburst creates an eye-catching point of interest in your compositions. With a bit of creative positioning, technical considerations are easily overcome.
About the author: World-renowned professional photographer and Tamron Image Master Ian Plant is a frequent contributor to a number of leading photo magazines (including Outdoor Photographer, Popular Photography, and others). You can see more of Ian’s work at www.ianplant.com.
Have something to add to the story? Leave a comment or email editor@outdoorphotographyguide.com.


Great information so very well explained.
Great article! I love making starbursts and you provided helpful tips about reducing lens flare. Thank you!
This was really good information, thank you
Great inputs. Thanks. I shall try with my humble Nikon P910.
Good article, beautiful pictures, but in the 2nd image from top (Canyonlands National Park, USA) the two celestial bodies Sun and Moon are either rising or setting, cant be that the Sun is rising AND moon setting as mentioned. Cheers.
IIInteresting technique but what are the chances of damaging the camera sensor when photographing directly into the full sun ?
Easy for someone to talk the talk, but your stunning photos show you walking the walk.
This is the best most useful article on sunburst creation I have read. Ian simply has so much experience in shooting every situation and is happy to share his trade knowledge and secrets! I also really like the example images which are typical 'plant style' characterized by outstounding composition and technical perfection. I like Ian's bio photo which I guess was taken at the sulphuric lake Kawah Ijen in East Java!
Great Mr.Ian ..such a great landscape photos with starburst effect...U r proud of all photographers...Keep it up...thanks....
Thanks.