Tips and Techniques for Photographing the Moon
Doug GardnerDescription
Follow two experienced professional photographers in the field as they share their secrets on getting expert photos by the full moon after dark. Based on their years of experience and knowledge, Doug and Kevin give you scores of tips that will help you achieve the high quality photographs you desire.
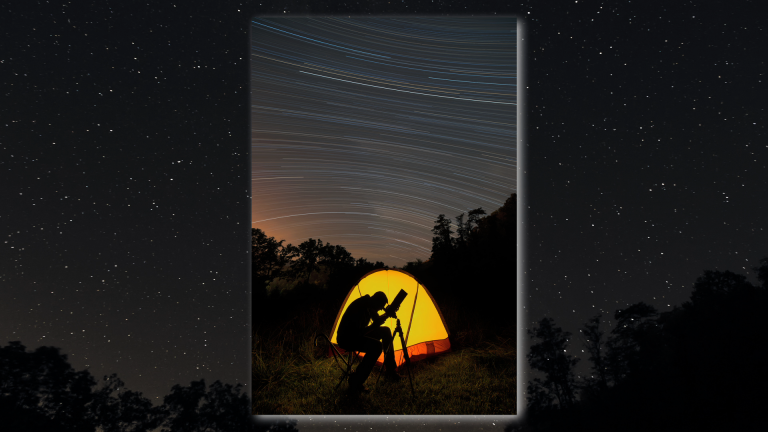
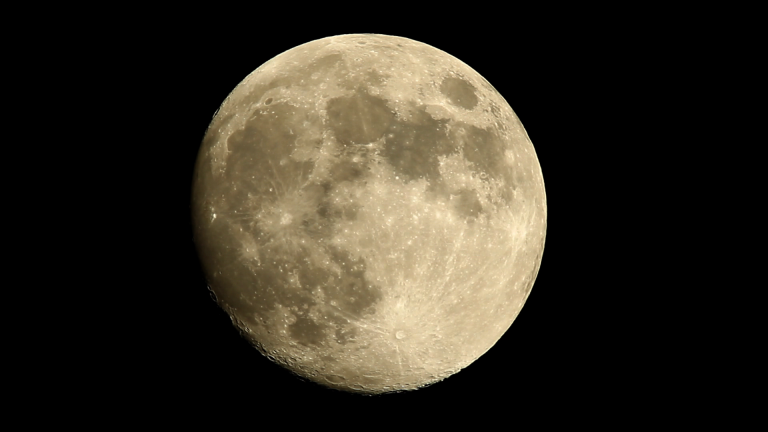
This course session follows two expert photographers – Doug Gardner and Kevin Adams – as they are out in the field photographing the moon. They demonstrate how they take professional quality photographs of the full moon at night, and give tips on determining the time of sunset and moonrise, and how long after that you should wait for the optimum time for the highest quality images. You’ll get tips on shutter speeds, aperture settings, size and types of lenses, and how to manage settings in the dark. They also demonstrate how you can combine and enhance your photos for even more dazzling imagery.
See all of the videos in our How to Photograph the Night Sky Course:
- How to Photograph the Night Sky – Course Preview
- How to Take Pictures of the Night Sky: Beginning Set-up
- Tips and Techniques for Photographing the Moon
Oh yeah, this is nice. This is really nice. This is going to be good. We take a wide angle lens, we'll get part of the rock here, we'll get the falls, this nice tree. We've got some sky up here where it's gonna show the stars in the sky.
And I think we'll be able to get a fair amount of this nice rock face over here, too. That rock face. That is really impressive. It's going to be good. Now the moon's gonna rise about 7:30.
Needs to be high enough in the sky to fully illuminate the scene. So 10:00ish? I'm thinking about, if we come back around 10:00, we'll be good. Okay. Yeah.
Now we're going to leave our tripod set up? You wanna do that now. Well, ordinarily, I'd like to do that when I can, but this is not a good place to leave your camera gear set up. Right. It's a public place.
Yeah, so, what we'll do. We got the full moon, so we've got the light and we can see to get our composition and focus and everything. And if not, I guess we could take a flashlight and hit the side of it. Yes, absolutely. I do it all the time.
Just use the flashlight to get your composition. All right. Well that's good. Let's get out of here and come back. 10:00.
All right. Oh yeah. I'm really liking what we're getting here, Doug. With the waterfall in the bottom, a little bit of rock-- Yeah. - down in the foreground and this nice cliff up here.
There's a lot going on here. Yeah and we got the full moon behind us. It's fully illuminating everything at the moment. And we've got just that little bit of sky over here and you know, what's going to happen? That sky is going to record as blue because it's illuminated by the full moon, but it's going to be a blue sky with stars in it.
With stars in it. Oh that's just the coolest thing in the world. It is cool because its going to look like a daytime shot but stars. Pretty much like a slightly underexposed daytime shot with stars in the sky. That's pretty cool.
I just think that's cool. It is cool. And you know, the really neat thing about this is that shooting a waterfall or anything at night with full moon illumination, it's a much softer light than if we shot the same scene in the daytime. Good point. Exactly.
It looks, it looks much better. And because we do have the full moon, we can see to compose, we talked about that earlier, get our focus set and everything. Now you remember the last time you were up here and we were shooting waterfalls at night we were using a flashlight. Right. We don't have to do that tonight.
You know our moon is the light painting device. And we have plenty of light to compose and focus- The whole thing. Yeah we're good to go. Now, what, where are you going to start with exposure on something like this? Typically when I'm shooting full moon landscapes I start at about ISO 800, F4, maybe F 2.8 and a shutter speed of around 20 seconds.
And it's going to vary-- Trial and error. - but we just start at that and just see what it looks like and then just make adjustments from there. So. Are you ready? I'm ready.
I'm ready to go. I'm set up and ready to go. We just need to turn these darn bright lights off that you drug out here. Well we gotta be able to see, as you know. I guess.
All right guys. Turn them off guys. That's looking really good. Really good. Yeah.
Oh man. I'm loving that. Good job. That's awesome. Good job.
Cool. You know what? We're starting to lose our moon a little bit. It's just now starting to go back behind the cliff over here. So we're getting a little bit of shadow on the fall.
As a matter of fact, well you know, I was noticing a little bit of shadow there. Why don't we go up to some of the higher elevations where we passed -- Good point. - some of those overlooks and maybe we can get kind of... Be more out in the open. And we can get a landscape shot.
Yeah. Yeah. Good idea. So we might actually pick up some fall color too. Yeah.
Yeah. Cool. All right? Let's do it. Boy Kevin, what a difference two weeks make in fall color.
Two weeks can make a lot of difference. Plus we gained several thousand feet in elevation to get up here. Well, I've noticed how cold it got. I had to put my jacket on. A little bit chillier, yeah.
Yeah. But you know what I'm hoping? Well actually I know because we've got the illumination from the full moon. So this fall color is actually going to show up much just like we were shooting during the daytime. And one thing that I'm going to recommend that we do a little bit differently too.
Ordinarily, I wouldn't shoot so much sky unless there was something interesting happening like nice clouds or something. We don't have those nice clouds tonight. But what we do have is we've got the constellation Orion. Oh yeah. High up in the sky.
So I'm going to shoot a vertical composition that has the fall color and the mountains in the foreground and then Orion, placed up high in the sky. Yeah. I think that'll look pretty good. I like the way the mountains I can see just a rim of the edge of the mountains. It's creating kind of a V-shape.
So that's, that'll be interesting anchor point at the bottom of the frame too. Yeah so all we need to do is get your guys to turn these darn lights off so we can - So we can see. So we can shoot. All right guys, kill the lights. Oh yeah.
I think that's going to look out pretty good. Yeah. I'm liking that. Yeah. I'm liking that a lot.
So what do you say we go try a few more overlooks? I'd love to do that, but before we go I want to take advantage of shooting a tight shot with my telephoto lens of the full moon. So let me get my big lens and we'll do that. Then we'll head out and down the road. All right.
Sounds good. All right. So what we got here is one of the most common questions I get is how do I get a good tight shot of the moon? You know, people send me pictures all the time and it's just this little white speck. And so we've got two things going on there, number one, they're not near close enough.
They don't have enough magnification to actually see the moon. And number two its grossly overexposed. Well, the moon is not white. The moon is gray, actually a light shade of gray almost perfectly neutral gray. And so the way I'm going to do this is first of all I need to get the magnification so I'm using a 500 millimeter lens with a 2x converter and a 1.4x converter stacked on top of that.
So that's giving me a lot of magnification and from shooting the moon in the past I know that this is almost going to be a full frame moon. So I should see a lot of detail in the moon, all the craters, all the edges, everything. This is one of the things that blows people's mind to get a exposure for the moon, the thing you need to keep in mind is the moon is not white. It's neutral gray. It's almost perfectly neutral gray, as a matter of fact.
And cameras are built to determine exposure based on a neutral tonal subject. So the moon is actually reflecting the sun's light back to us. That's the reason we can see it. So the same exposures I would use for just shooting a neutral tonal subject in the middle of the day is the same thing I'm going to use for shooting this at night. Now we've got so much magnification, with our naked eye it doesn't look like the moon's moving hardly at all.
But when I get behind this camera that moon is actually very difficult to keep the moon in the frame because it's moving very fast and it's magnified with, with all this lens here. So what I'm going to do is I'm gonna start out with a setting of 1/500 of a second at F8 and an ISO of 100. And let's see what we got here. All right, guys if you could kill that light for me, just for a second. All right.
That's looking pretty good. And one thing you have to keep in mind is because we're using the 2x converter and a 1.4x converter that's taken away some light. So I need to adjust my exposure a little bit off of that and I'll be dead on the money. So you guys kill the light one more time. Oh yeah.
That's looking really good. I hope you all found that helpful. Kevin, I'm ready to go now. Let's go check out those other overlooks. Well, it's been another great adventure with my good buddy Kevin Adams, as we photograph the night sky in the Southern Appalachian mountains.
And remember, it's not just about the photograph it's the outdoor experience, even if it is after dark. I'm your host, Doug Gardner. Thank you for joining me on another "Wild Photo Adventure".
Share tips, start a discussion or ask other students a question. If you have a question for the instructor, please click here.
Already a member? Sign in
No Responses to “Tips and Techniques for Photographing the Moon”