Our world is in perpetual motion, but a photograph freezes a moment, transforming even a dynamic subject into a completely static representation. Time-lapse photography (which involves capturing multiple photographs of a subject at a defined interval over a period of time that are then sequenced together to create a short movie) allows you to capture the energy, rhythms, and motion of our vibrant world. Although time-lapse photography might seem daunting at first, it is actually quite easy and fun!
Essential Equipment for Time-Lapse Photography
In addition to your digital camera, you will need a few items for successful time-lapse photography. First and foremost is a sturdy tripod, as it is essential that your camera is steady during a time-lapse sequence. If your lens or camera has image stabilization, make sure it is turned off when your camera is on your tripod. Another useful piece of equipment is an intervalometer, a programmable device that automatically triggers exposures at precise intervals of time. Some cameras have built-in intervalometers, others require a wired remote with an intervalometer function to be plugged in. Although you can do time-lapse photography without one, an intervalometer will make your job a lot easier.
Related video: Time Lapse Photography in the Falkland IslandsChoose Your Subject
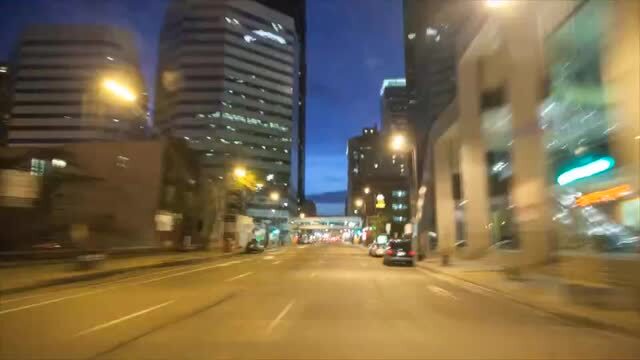
The key to a successful time-lapse is to photograph a subject that changes over time. This change can be obvious, such as traffic moving through the streets or clouds moving through the sky. Or, the change might be less perceptible, such as a flower blooming, or photographing the same scene once every day over several weeks. You are limited only by your patience and imagination!
Camera Settings
It is important to ensure that your exposure settings do not change from image to image, so that means everything – ISO, shutter speed, aperture, and white balance – needs to be set manually. I shoot in manual mode, setting my aperture for depth of field (apparent sharpness from near to far in the image frame), and then selecting ISO and shutter speed to optimize my exposure. I experiment with several different white balances, and then pick the one that looks best to me. Because I shoot raw, I can always change the white balance of the sequence during the image processing phase, but it makes things easier if every image is set to the same white balance. If you are using automatic settings, you might find considerable variation of exposure and white balance in your images, which will look awkward when the final sequence is put together (although some time-lapse editing programs allow you to easily fix these variations).
You’re not going to need your camera’s highest quality settings. I shoot my time-lapse images using my camera’s lowest resolution raw file setting. I shoot raw instead of jpeg so that I have maximum flexibility when processing my photos in Adobe Camera Raw or Lightroom, but jpeg files are fine if you don’t plan on doing much computer processing of your images. Remember, you will be taking a lot of photos for your time-lapse sequences, so smaller file sizes will make everything more manageable.
Related video: Basic Time Lapse OverviewShooting the Sequence
Once you’ve settled on a composition and decided on your camera settings, you’re ready to begin! If you are using an intervalometer, it is a simple matter of programming the interval between shots, and how many shots you want to take. You’ll probably want a lot of photos; when you assemble the photos into a time-lapse sequence, you’ll likely be using 24 to 30 frames per second, so for a 30-second video you will need almost 1000 shots!
Before I started to shoot my time-lapse sequences, I picked a music clip for my final video. I measured the overall length of the clip, and the time it took to complete each verse of the music score. That way, I knew ahead of time the number of sequences, and how many images per sequence, that I needed. I shot each sequence using 200 images, in order to give me some wiggle room while trimming and editing to ensure my sequences perfectly matched the music score.
Selecting the Best Interval
You want to avoid a jumpy or jittery movie. Faster moving objects will require shorter intervals, while longer intervals are okay for slow moving objects. A one-second interval is a good place to start with fast-moving subjects, such as people, traffic, and fast-moving clouds. Longer intervals may be necessary for capturing changes that unfold at a more leisurely pace. Experiment until you find the proper balance for your subject.
Related video: Time Lapse Photography Tips: Setup for a Perfect Time LapseEditing Your Photos
For maximum flexibility when editing image files, shot raw format instead of jpeg. I batch process my images in Adobe Camera Raw or Lightroom, ensuring that any changes to white balance, exposure, etc. are applied equally to every image in the batch. I also crop all my images to fit the HD video aspect ratio of 16×9. Then I export all images as high-resolution jpeg files.
Creating Your Time-Lapse Video
Once your images have been edited and exported, then it is time to assemble your time-lapse sequence. There are many options available for assembling time-lapse sequences – including free programs such as Time Lapse Assembler, which is very basic, or Panolapse, which offers plenty of useful tools including simulated rotational panning. Advanced programs offer features such as deflickering (which removes the occasional random exposure variations caused by shooting in aperture or shutter priority mode), panning, and auto exposure correction for when you shoot a sequence where the light rapidly changes, such as at sunrise or sunset. If you want to add titles, music, and transition effects, you will likely also need a movie editing program.
Related video: Skyline Photography Tips and Creating a Time LapseFor every sequence you assemble, you will need to select a “frame rate,” which determines the number of image frames per second. I recommend choosing a frame rate of at least 24 frames per second for a smooth viewing experience.
For my video, I assembled a series of individual time-lapse sequences using Quicktime 7 Pro, outputting each as a high quality movie file. I then imported each sequence into iMovie, which I used to assemble and edit the overall video. I purchased an inexpensive royalty-free license for the music I used in the video; there are plenty of online vendors offering a wide array of music selections at very low cost.
Conclusion
Although it may take a bit of practice and patience, time-lapse photography is easy enough that you’ll be producing great time-lapse videos – and become thoroughly addicted – in no time!
About the author: World-renowned professional photographer and Tamron Image Master Ian Plant is a frequent contributor to several leading photo magazines (including Outdoor Photographer, Popular Photography, and others) and the author of numerous books and instructional videos. You can see more of Ian’s work at www.ianplant.com.
Have something to add to the story? Leave a comment or email editor@outdoorphotographyguide.com.
I am interested in time lapse photography, but in multiple photos (5 or 6) in one frame, such as capturing an Olympic fencing duel. But, I don't know where to begin. Any suggestions?
If you already have Pictures to EXE for slideshows/AVs then use the video output in that
I like to use LRTimelapse.
I do nice ones using an app on my phone. Good fun!